
在 Apex 中使用 Connect 开发自定义体验 Salesforce的。Connect in Apex 提供对 B2B Commerce 的编程访问, CMS 托管内容、Experience Cloud 站点、主题等。创建 Apex 显示 Chatter 摘要的页面,发布带有提及和主题的摘要项目, 并更新用户和群组照片。创建更新 Chatter 的触发器 饲料。
许多 Connect REST API 资源操作都以静态方法的形式公开 命名空间中的 Apex 类。这些方法使用其他类 输入和返回信息。命名空间称为ConnectApiConnectApiConnectApi在 Apex 中连接.
在 Apex 中,您可以使用 SOQL 查询访问一些 Connect 数据,并且 对象。但是,在类和数据中公开数据更简单 已本地化和结构化以进行显示。例如,代替 进行多次调用以访问和组合源,您可以做到这一点 只需一个电话。ConnectApi
在 Apex 方法中连接在用户执行方法的上下文中执行。代码有 访问上下文用户有权访问的任何内容。它不会磨合 系统模式与其他 Apex 代码一样。
有关 Connect in Apex 参考信息,请参阅 ConnectApi 命名空间。
- Connect in Apex 示例 使用这些示例
在 Apex 中使用 Connect 执行常见任务。 - Connect in Apex 功能 本主题介绍用于处理 Apex 中的常见 Connect 功能
的类和方法。 - 使用 ConnectApi 输入和输出类 命名空间中的某些类
包含访问 Connect REST API 数据的静态方法。命名空间还包含要作为参数传递的输入类,以及调用静态方法返回的输出类。ConnectApiConnectApi - 了解 ConnectApi 类的限制 命名空间中方法的限制与其他 Apex 类
的限制不同。ConnectApi - 打包 ConnectApi 类 如果在包中包含类
,请注意 Chatter 依赖关系。ConnectApi - 序列化和反序列化 ConnectApi 对象 将输出对象
序列化为 JSON 时,其结构类似于从 Connect REST API 返回的 JSON。从 JSON 反序列化输入对象时,格式也类似于 Connect REST API。ConnectApiConnectApi - ConnectApi 版本控制和相等性检查
类中的版本控制遵循与其他 Apex 类的规则不同的特定规则。ConnectApi - 强制转换 ConnectApi 对象 将某些输出对象
下沉为更具体的类型可能很有用。ConnectApi - 通配符:
使用通配符匹配 Connect REST API 和 Connect in Apex 搜索中的文本模式。 - 测试 ConnectApi 代码 与所有 Apex 代码一样,Apex 代码
中的 Connect 需要测试覆盖率。 - ConnectApi 类与其他 Apex 类之间的差异 请注意类和其他 Apex 类
之间的这些额外差异。ConnectApi
在 Apex 中连接示例
使用这些示例在 Apex 中使用 Connect 执行常见任务。
- 从源中获取源元素 调用方法以从源中获取源
元素。 - 从其他用户的源中获取源元素 调用方法以从其他用户的源中获取源
元素。 - 从源中获取特定于站点的源元素 调用一种方法以显示用户配置文件源,该源
仅包含范围限定为特定 Experience Cloud 站点的源元素。 - 发布 Feed 元素 调用以发布 Feed 元素
。 - 发布带有提及
的源元素 调用方法或使用 ConnectApiHelper 存储库发布源。 - 使用现有文件
发布源元素 调用方法以发布包含已上传文件的源元素。 - 发布带有内联图像
的富文本源元素 调用方法或使用 ConnectApiHelper 存储库发布包含已上传的内联图像的源元素。 - 发布带有代码块
的 RTF 源元素 调用方法以发布带有代码块的源元素。 - 发布带有新文件(二进制)附件的源元素
调用方法以将源元素与新文件一起发布。 - 发布一批源元素
使用触发器调用方法以批量发布到帐户的源。 - 使用新(二进制)文件发布一批源元素 使用触发器调用方法将新文件
批量发布到帐户的源。 - 定义操作链接并使用源元素
发布 在操作链接组中创建一个操作链接,将操作链接组与源项关联,然后发布源项。 - 在模板中定义操作链接并使用源元素
发布 创建操作链接和操作链接组,并从模板实例化操作链接组。 - 编辑 Feed 元素 调用方法以编辑 Feed 元素。
- 编辑问题标题和帖子 调用用于编辑问题标题和帖子
的方法。 - Like a Feed 元素 调用一个方法来 like a feed 元素。
- 为源元素添加书签 调用方法为源元素
添加书签。 - 共享源元素(V39.0 之前的版本)
调用方法以共享源元素。 - 共享源元素(在版本 39.0 及更高版本中)
调用方法以共享源元素。 - 发送私信 调用用于发送私信
的方法。 - 发表评论
调用方法发表评论。 - 发布带有提及
的评论 拨打电话或使用 ConnectApiHelper 存储库发布带有提及的评论。 - 使用现有文件
发表评论 拨打电话以使用已上传的文件发表评论。 - 使用新文件发布注释 调用方法以使用新文件
发布注释。 - 发布带有内联图像
的富文本注释 进行调用或使用 ConnectApiHelper 存储库发布包含已上传的内联图像的评论。 - 发布带有代码块的富文本源注释 调用方法以发布带有代码块
的注释。 - 编辑注释 调用方法以编辑注释
。 - 遵循记录
调用一种方法来跟踪记录。 - 取消关注记录 调用停止关注记录
的方法。 - 获取存储库
调用方法获取存储库。 - 获取存储库
调用方法获取所有存储库。 - 获取允许的项类型 调用方法以获取允许的项类型
。 - 获取预览 调用方法以获取所有支持的预览
格式及其各自的 URL。 - 获取文件预览 调用方法以获取文件预览。
- 获取存储库文件夹项 调用方法以获取存储库文件夹项
的集合。 - 获取存储库文件夹 调用方法获取存储库文件夹。
- 获取没有权限信息
的存储库文件 调用方法以获取没有权限信息的存储库文件。 - 获取包含权限信息
的存储库文件 调用方法以获取包含权限信息的存储库文件。 - 创建不带内容的存储库文件(仅限元数据) 调用方法以在 Google Drive 存储库文件夹中创建不带二进制内容(仅元数据)
的文件。 - 创建包含内容
的存储库文件 调用方法以在 Google Drive 存储库文件夹中创建包含二进制内容的文件。 - 更新不带内容的存储库文件(仅限元数据)
调用方法更新存储库文件的元数据。 - 使用内容
更新存储库文件 调用方法以使用内容更新存储库文件。 - 获取身份验证 URL 调用方法以获取身份验证 URL。
从 Feed 中获取 Feed 元素
调用方法以从源中获取源元素。调用 getFeedElementsFromFeed(communityId, feedType, subjectId) 获取 上下文用户新闻中的源元素的第一页 饲料。
ConnectApi.FeedElementPage fep = ConnectApi.ChatterFeeds.getFeedElementsFromFeed(Network.getNetworkId(), ConnectApi.FeedType.News, 'me');该方法重载, 这意味着方法名称具有许多不同的签名。签名是 方法及其参数的顺序。getFeedElementsFromFeed
每个签名都允许您发送不同的输入。 例如,一个签名可以指定 Feed 类型和主题 ID。另一个签名 可以具有这些参数和一个附加参数来指定 要为每个 Feed 元素返回的注释。
SiW(硅瓦)
每个签名都操作于 某些 Feed 类型。使用对 操作的签名来获取组源,因为组是一条记录 类型。ConnectApi.FeedType.Record
从其他用户的 Feed 中获取 Feed 元素
调用方法以从其他用户的源中获取源元素。致电 从其他用户的 Feed 元素获取第一页 饲料。
getFeedElementsFromFeed(communityId, feedType, subjectId)
ConnectApi.FeedElementPage fep = ConnectApi.ChatterFeeds.getFeedElementsFromFeed(Network.getNetworkId(), ConnectApi.FeedType.UserProfile, '005R0000000HwMA');这 示例调用相同的方法从另一个用户的 记录 饲料。
ConnectApi.FeedElementPage fep = ConnectApi.ChatterFeeds.getFeedElementsFromFeed(Network.getNetworkId(), ConnectApi.FeedType.Record, '005R0000000HwMA');该方法重载, 这意味着方法名称具有许多不同的签名。签名是 方法及其参数的顺序。getFeedElementsFromFeed
每个签名都允许您发送不同的输入。 例如,一个签名可以指定 Feed 类型和主题 ID。另一个签名 可以有这些参数和一个额外的参数来指定最大注释数 返回每个源元素。
从 Feed 中获取特定于网站的 Feed 元素
调用方法以显示仅包含以下源元素的用户配置文件源: 范围限定为特定 Experience Cloud 站点。具有“用户”或“组”父记录的源元素的范围限定为网站。饲料 其父元素是除“用户”或“组”以外的记录类型时,始终在所有元素中可见 网站。将来,其他父记录类型的范围可以限定为网站。
此示例调用 getFeedElementsFromFeed(communityId, feedType, subjectId, recentCommentCount, density, pageParam、pageSize、sortParam、filter) 仅获取特定于网站的 Feed 元素。
ConnectApi.FeedElementPage fep = ConnectApi.ChatterFeeds.getFeedElementsFromFeed(Network.getNetworkId(), ConnectApi.FeedType.UserProfile, 'me', 3, ConnectApi.FeedDensity.FewerUpdates, null, null, ConnectApi.FeedSortOrder.LastModifiedDateDesc, ConnectApi.FeedFilter.CommunityScoped);发布源元素
进行调用以发布 Feed 元素。调用 postFeedElement(communityId, subjectId, feedElementType, text) 来发布一个字符串 发短信。
ConnectApi.FeedElement feedElement = ConnectApi.ChatterFeeds.postFeedElement(Network.getNetworkId(), '0F9d0000000TreH', ConnectApi.FeedElementType.FeedItem, 'On vacation this week.');这 第二个参数,subjectId 是此源元素的父元素的 ID 被发布到。该值可以是用户、组或记录的 ID,也可以是指示上下文用户的字符串。me
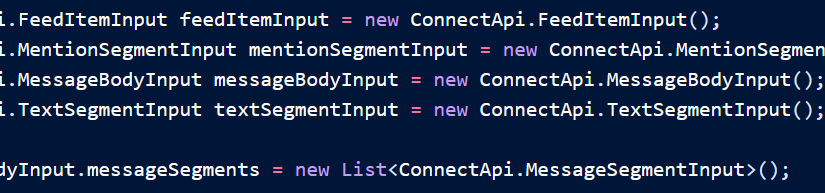
发布带有提及的提要元素
调用方法或使用 ConnectApiHelper 存储库发布源。您可以通过两种方式发布带有提及的提要元素。使用 ConnectApiHelper 存储库 在 GitHub 上编写一行代码,或者使用此 示例,调用 postFeedElement(communityId, feedElement)。
ConnectApi.FeedItemInput feedItemInput = new ConnectApi.FeedItemInput();
ConnectApi.MentionSegmentInput mentionSegmentInput = new ConnectApi.MentionSegmentInput();
ConnectApi.MessageBodyInput messageBodyInput = new ConnectApi.MessageBodyInput();
ConnectApi.TextSegmentInput textSegmentInput = new ConnectApi.TextSegmentInput();

messageBodyInput.messageSegments = new List<ConnectApi.MessageSegmentInput>();

mentionSegmentInput.id = '005RR000000Dme9';
messageBodyInput.messageSegments.add(mentionSegmentInput);

textSegmentInput.text = 'Could you take a look?';
messageBodyInput.messageSegments.add(textSegmentInput);

feedItemInput.body = messageBodyInput;
feedItemInput.feedElementType = ConnectApi.FeedElementType.FeedItem;
feedItemInput.subjectId = '0F9RR0000004CPw';

ConnectApi.FeedElement feedElement = ConnectApi.ChatterFeeds.postFeedElement(Network.getNetworkId(), feedItemInput);
使用现有文件发布源元素
调用方法以发布包含已上传文件的源元素。调用 postFeedElement(communityId, feedElement) 以发布包含已上传文件的源项。
// Define the FeedItemInput object to pass to postFeedElement
ConnectApi.FeedItemInput feedItemInput = new ConnectApi.FeedItemInput();
feedItemInput.subjectId = 'me';

ConnectApi.TextSegmentInput textSegmentInput = new ConnectApi.TextSegmentInput();
textSegmentInput.text = 'Would you please review these docs?';

// The MessageBodyInput object holds the text in the post
ConnectApi.MessageBodyInput messageBodyInput = new ConnectApi.MessageBodyInput();
messageBodyInput.messageSegments = new List<ConnectApi.MessageSegmentInput>();
messageBodyInput.messageSegments.add(textSegmentInput);
feedItemInput.body = messageBodyInput;

// The FeedElementCapabilitiesInput object holds the capabilities of the feed item.
// For this feed item, we define a files capability to hold the file(s).

List<String> fileIds = new List<String>();
fileIds.add('069xx00000000QO');
fileIds.add('069xx00000000QT');
fileIds.add('069xx00000000Qn');
fileIds.add('069xx00000000Qi');
fileIds.add('069xx00000000Qd');

ConnectApi.FilesCapabilityInput filesInput = new ConnectApi.FilesCapabilityInput();
filesInput.items = new List<ConnectApi.FileIdInput>();

for (String fileId : fileIds) {
    ConnectApi.FileIdInput idInput = new ConnectApi.FileIdInput();
    idInput.id = fileId;
    filesInput.items.add(idInput);
}

ConnectApi.FeedElementCapabilitiesInput feedElementCapabilitiesInput = new ConnectApi.FeedElementCapabilitiesInput();
feedElementCapabilitiesInput.files = filesInput;

feedItemInput.capabilities = feedElementCapabilitiesInput;

// Post the feed item.
ConnectApi.FeedElement feedElement = ConnectApi.ChatterFeeds.postFeedElement(Network.getNetworkId(), feedItemInput);
发布带有内嵌图像的富文本源元素
调用方法或使用 ConnectApiHelper 存储库发布带有 已上传的内嵌图像。您可以通过两种方式发布带有内嵌图片和提及的富文本 Feed 元素。使用 GitHub 上的 ConnectApiHelper 存储库编写单行 代码,或者使用此示例,该示例调用 postFeedElement(communityId, feedElement)。在此示例中,图像文件是具有 已上传到 Salesforce。该帖子还包括文本和 提到。
String communityId = null;
String imageId = '069D00000001INA';
String mentionedUserId = '005D0000001QNpr';
String targetUserOrGroupOrRecordId  = '005D0000001Gif0';
ConnectApi.FeedItemInput input = new ConnectApi.FeedItemInput();
input.subjectId = targetUserOrGroupOrRecordId;
input.feedElementType = ConnectApi.FeedElementType.FeedItem;

ConnectApi.MessageBodyInput messageInput = new ConnectApi.MessageBodyInput();
ConnectApi.TextSegmentInput textSegment;
ConnectApi.MentionSegmentInput mentionSegment;
ConnectApi.MarkupBeginSegmentInput markupBeginSegment;
ConnectApi.MarkupEndSegmentInput markupEndSegment;
ConnectApi.InlineImageSegmentInput inlineImageSegment;

messageInput.messageSegments = new List<ConnectApi.MessageSegmentInput>();

markupBeginSegment = new ConnectApi.MarkupBeginSegmentInput();
markupBeginSegment.markupType = ConnectApi.MarkupType.Bold;
messageInput.messageSegments.add(markupBeginSegment);

textSegment = new ConnectApi.TextSegmentInput();
textSegment.text = 'Hello ';
messageInput.messageSegments.add(textSegment);

mentionSegment = new ConnectApi.MentionSegmentInput();
mentionSegment.id = mentionedUserId;
messageInput.messageSegments.add(mentionSegment);

textSegment = new ConnectApi.TextSegmentInput();
textSegment.text = '!';
messageInput.messageSegments.add(textSegment);

markupEndSegment = new ConnectApi.MarkupEndSegmentInput();
markupEndSegment.markupType = ConnectApi.MarkupType.Bold;
messageInput.messageSegments.add(markupEndSegment);

inlineImageSegment = new ConnectApi.InlineImageSegmentInput();
inlineImageSegment.altText = 'image one';
inlineImageSegment.fileId = imageId;
messageInput.messageSegments.add(inlineImageSegment);

input.body = messageInput;

ConnectApi.ChatterFeeds.postFeedElement(communityId, input);
发布带有代码块的富文本源元素
调用方法以发布带有代码块的源元素。调用 postFeedElement(communityId, feedElement) 发布带有代码块的源项。
String communityId = null;
String targetUserOrGroupOrRecordId  = 'me';
String codeSnippet = '<html>\n\t<body>\n\t\tHello, world!\n\t</body>\n</html>';
ConnectApi.FeedItemInput input = new ConnectApi.FeedItemInput();
input.subjectId = targetUserOrGroupOrRecordId;
input.feedElementType = ConnectApi.FeedElementType.FeedItem;

ConnectApi.MessageBodyInput messageInput = new ConnectApi.MessageBodyInput();
ConnectApi.TextSegmentInput textSegment;
ConnectApi.MarkupBeginSegmentInput markupBeginSegment;
ConnectApi.MarkupEndSegmentInput markupEndSegment;

messageInput.messageSegments = new List<ConnectApi.MessageSegmentInput>();

markupBeginSegment = new ConnectApi.MarkupBeginSegmentInput();
markupBeginSegment.markupType = ConnectApi.MarkupType.Code;
messageInput.messageSegments.add(markupBeginSegment);

textSegment = new ConnectApi.TextSegmentInput();
textSegment.text = codeSnippet;
messageInput.messageSegments.add(textSegment);

markupEndSegment = new ConnectApi.MarkupEndSegmentInput();
markupEndSegment.markupType = ConnectApi.MarkupType.Code;
messageInput.messageSegments.add(markupEndSegment);

input.body = messageInput;

ConnectApi.ChatterFeeds.postFeedElement(communityId, input);
发布带有新文件(二进制)附件的源元素
调用方法以使用新文件发布源元素。
重要
在版本 36.0 及更高版本中,无法发布源 元素替换为同一调用中的新文件。将文件上传到 Salesforce 首先,然后在发布源时指定现有文件 元素。此示例调用 postFeedElement(communityId, feedElement, feedElementFileUpload) 发布 Feed 项 使用新文件(二进制) 附件。
ConnectApi.FeedItemInput input = new ConnectApi.FeedItemInput();
input.subjectId = 'me';

ConnectApi.ContentCapabilityInput contentInput = new ConnectApi.ContentCapabilityInput();
contentInput.title = 'Title';

ConnectApi.FeedElementCapabilitiesInput capabilities = new ConnectApi.FeedElementCapabilitiesInput();
capabilities.content = contentInput;

input.capabilities = capabilities;

String text = 'These are the contents of the new file.';
Blob myBlob = Blob.valueOf(text);
ConnectApi.BinaryInput binInput = new ConnectApi.BinaryInput(myBlob, 'text/plain', 'fileName');

ConnectApi.ChatterFeeds.postFeedElement(Network.getNetworkId(), input, binInput);
发布一批 Feed 元素
使用触发器调用方法以批量发布到帐户的源。此触发器调用 postFeedElementBatch(communityId, feedElements) 到 批量发布到新插入的源 帐户。
trigger postFeedItemToAccount on Account (after insert) {
    Account[] accounts = Trigger.new;

    // Bulk post to the account feeds.

    List<ConnectApi.BatchInput> batchInputs = new List<ConnectApi.BatchInput>();

    for (Account a : accounts) {
        ConnectApi.FeedItemInput input = new ConnectApi.FeedItemInput();

        input.subjectId = a.id;

        ConnectApi.MessageBodyInput body = new ConnectApi.MessageBodyInput();
        body.messageSegments = new List<ConnectApi.MessageSegmentInput>();

        ConnectApi.TextSegmentInput textSegment = new ConnectApi.TextSegmentInput();
        textSegment.text = 'Let\'s win the ' + a.name + ' account.';

        body.messageSegments.add(textSegment);
        input.body = body;

        ConnectApi.BatchInput batchInput = new ConnectApi.BatchInput(input);
        batchInputs.add(batchInput);
    }

    ConnectApi.ChatterFeeds.postFeedElementBatch(Network.getNetworkId(), batchInputs);
}
使用新的(二进制)文件发布一批源元素
使用触发器调用方法将新文件批量发布到 帐户。
重要
此示例在版本 32.0–35.0 中有效。在 版本 36.0 及更高版本中,您无法在 同样的电话。首先将文件上传到 Salesforce,然后指定上传的 文件。此触发器调用 postFeedElementBatch(communityId, feedElements) 以批量发布到 新插入的帐户的 Feed。每个帖子都有一个新文件(二进制) 附件。
trigger postFeedItemToAccountWithBinary on Account (after insert) {
    Account[] accounts = Trigger.new;

    // Bulk post to the account feeds.

    List<ConnectApi.BatchInput> batchInputs = new List<ConnectApi.BatchInput>();

    for (Account a : accounts) {
        ConnectApi.FeedItemInput input = new ConnectApi.FeedItemInput();

        input.subjectId = a.id;

        ConnectApi.MessageBodyInput body = new ConnectApi.MessageBodyInput();
        body.messageSegments = new List<ConnectApi.MessageSegmentInput>();

        ConnectApi.TextSegmentInput textSegment = new ConnectApi.TextSegmentInput();
        textSegment.text = 'Let\'s win the ' + a.name + ' account.';

        body.messageSegments.add(textSegment);
        input.body = body;

        ConnectApi.ContentCapabilityInput contentInput = new ConnectApi.ContentCapabilityInput();
        contentInput.title = 'Title';

        ConnectApi.FeedElementCapabilitiesInput capabilities = new ConnectApi.FeedElementCapabilitiesInput();
        capabilities.content = contentInput;

        input.capabilities = capabilities;

        String text = 'We are words in a file.';
        Blob myBlob = Blob.valueOf(text);
        ConnectApi.BinaryInput binInput = new ConnectApi.BinaryInput(myBlob, 'text/plain', 'fileName');

        ConnectApi.BatchInput batchInput = new ConnectApi.BatchInput(input, binInput);

        batchInputs.add(batchInput);
    }

    ConnectApi.ChatterFeeds.postFeedElementBatch(Network.getNetworkId(), batchInputs);
定义操作链接并使用源元素发布
在操作链接组中创建一个操作链接,将该操作链接组与 Feed 项目,然后发布 Feed 项目。

当用户单击操作链接时,操作链接将请求连接 REST API resource ,用于发布源 项目添加到用户的 Feed。用户单击操作链接并成功执行后, 其状态更改为“成功”,并且源项 UI 已更新。/chatter/feed-elements

刷新用户的 Feed 以查看新帖子。

这个简单示例向您展示了如何使用操作链接来调用 Salesforce 资源。
将操作链接视为 Feed 项上的按钮。就像一个按钮,一个动作 链接定义包括标签 ()。一个动作 链接组定义还包括其他属性,如 URL ()、HTTP 方法 () 和 可选请求正文 () 和 HTTP 标头 ().labelKeyactionUrlmethodrequestBodyheaders
当用户单击此操作链接时, 向 Connect REST API 资源发出 HTTP POST 请求,该资源将源项发布到 喋喋不休。该属性保留请求 资源的正文,包括 新的源项。在此示例中,新的源项仅包含文本,但可以 包括其他功能,例如文件附件、轮询甚至操作 链接。requestBodyactionUrl
就像单选按钮一样,操作链接必须嵌套在一个组中。操作链接 在组内共享组的属性,并且是互斥的(可以单击 一个组中只有一个操作链接)。即使只定义一个操作链接,它也必须 操作链接组的一部分。
此示例调用 ConnectApi.ActionLinks.createActionLinkGroupDefinition(communityId, actionLinkGroup) 创建操作链接组定义。
它 保存该调用中的操作链接组 ID,并将其与 调用 ConnectApi.ChatterFeeds.postFeedElement(communityId, feedElement)。
若要使用此代码,请将 OAuth 值替换为你自己的值 Salesforce组织。此外,请验证是否在将来。在 法典。expirationDate
ConnectApi.ActionLinkGroupDefinitionInput actionLinkGroupDefinitionInput = new ConnectApi.ActionLinkGroupDefinitionInput();
ConnectApi.ActionLinkDefinitionInput actionLinkDefinitionInput = new ConnectApi.ActionLinkDefinitionInput();
ConnectApi.RequestHeaderInput requestHeaderInput1 = new ConnectApi.RequestHeaderInput();
ConnectApi.RequestHeaderInput requestHeaderInput2 = new ConnectApi.RequestHeaderInput();

// Create the action link group definition.
actionLinkGroupDefinitionInput.actionLinks = New List<ConnectApi.ActionLinkDefinitionInput>();
actionLinkGroupDefinitionInput.executionsAllowed = ConnectApi.ActionLinkExecutionsAllowed.OncePerUser;
actionLinkGroupDefinitionInput.category = ConnectApi.PlatformActionGroupCategory.Primary;
// To Do: Verify that the date is in the future.
// Action link groups are removed from feed elements on the expiration date.
datetime myDate = datetime.newInstance(2016, 3, 1);
actionLinkGroupDefinitionInput.expirationDate = myDate;

// Create the action link definition.
actionLinkDefinitionInput.actionType = ConnectApi.ActionLinkType.Api;
actionLinkDefinitionInput.actionUrl = '/services/data/v33.0/chatter/feed-elements';
actionLinkDefinitionInput.headers = new List<ConnectApi.RequestHeaderInput>();
actionLinkDefinitionInput.labelKey = 'Post';
actionLinkDefinitionInput.method = ConnectApi.HttpRequestMethod.HttpPost;
actionLinkDefinitionInput.requestBody = '{\"subjectId\": \"me\",\"feedElementType\": \"FeedItem\",\"body\": {\"messageSegments\": [{\"type\": \"Text\",\"text\": \"This is a test post created via an API action link.\"}]}}';
actionLinkDefinitionInput.requiresConfirmation = true;

// To Do: Substitute an OAuth value for your Salesforce org.
requestHeaderInput1.name = 'Authorization';
requestHeaderInput1.value = 'OAuth 00DD00000007WNP!ARsAQCwoeV0zzAV847FTl4zF.85w.EwsPbUgXR4SAjsp';
actionLinkDefinitionInput.headers.add(requestHeaderInput1);

requestHeaderInput2.name = 'Content-Type';
requestHeaderInput2.value = 'application/json';
actionLinkDefinitionInput.headers.add(requestHeaderInput2);

// Add the action link definition to the action link group definition.
actionLinkGroupDefinitionInput.actionLinks.add(actionLinkDefinitionInput);

// Instantiate the action link group definition.
ConnectApi.ActionLinkGroupDefinition actionLinkGroupDefinition = ConnectApi.ActionLinks.createActionLinkGroupDefinition(Network.getNetworkId(), actionLinkGroupDefinitionInput);

ConnectApi.FeedItemInput feedItemInput = new ConnectApi.FeedItemInput();
ConnectApi.FeedElementCapabilitiesInput feedElementCapabilitiesInput = new ConnectApi.FeedElementCapabilitiesInput();
ConnectApi.AssociatedActionsCapabilityInput associatedActionsCapabilityInput = new ConnectApi.AssociatedActionsCapabilityInput();
ConnectApi.MessageBodyInput messageBodyInput = new ConnectApi.MessageBodyInput();
ConnectApi.TextSegmentInput textSegmentInput = new ConnectApi.TextSegmentInput();

// Set the properties of the feedItemInput object.
feedItemInput.body = messageBodyInput;
feedItemInput.capabilities = feedElementCapabilitiesInput;
feedItemInput.subjectId = 'me';

// Create the text for the post.
messageBodyInput.messageSegments = new List<ConnectApi.MessageSegmentInput>();
textSegmentInput.text = 'Click to post a feed item.';
messageBodyInput.messageSegments.add(textSegmentInput);


// The feedElementCapabilitiesInput object holds the capabilities of the feed item.
// Define an associated actions capability to hold the action link group.
// The action link group ID is returned from the call to create the action link group definition.
feedElementCapabilitiesInput.associatedActions = associatedActionsCapabilityInput;
associatedActionsCapabilityInput.actionLinkGroupIds = new List<String>();
associatedActionsCapabilityInput.actionLinkGroupIds.add(actionLinkGroupDefinition.id);

// Post the feed item.
ConnectApi.FeedElement feedElement = ConnectApi.ChatterFeeds.postFeedElement(Network.getNetworkId(), feedItemInput);
注意
如果 开机自检失败,请检查 OAuth ID。
在模板中定义操作链接并使用 Feed 元素发布
创建操作链接和操作链接组,并从 一个模板。
此示例创建与示例 Define an Action Link and Post with a Feed Element 相同的操作链接和操作链接组,但此示例 从模板实例化操作链接组。
步骤 1:创建操作链接模板
- 在“设置”中,输入“快速” “查找”框,然后选择“操作链接模板”。Action Link Templates
- 在新的操作链接组模板中使用以下值:田价值名字文档示例开发商名称Doc_Example类别主要操作允许执行每个用户一次
- 在新的操作链接模板中使用以下值:田价值操作链接组模板文档示例操作类型应用程序接口操作 URL/services/data/{!Bindings.ApiVersion}/聊天/馈送元素用户可视性每个人都可以看到HTTP 请求正文{ “subjectId”:“{!Bindings.SubjectId}“, ”feedElementType“:”FeedItem“, “body”:{ “messageSegments”:[ { “type”:“Text”, “text”:“{!Bindings.Text}“ } ] } }HTTP 标头内容类型:application/json位置0标签键发布HTTP 方法发布
- 返回到“操作链接组模板”,然后选择“已发布”。 点击保存。
步骤 2:实例化操作链接组,将其与源项关联,然后发布 它
此示例调用 ConnectApi.ActionLinks.createActionLinkGroupDefinition(communityId, actionLinkGroup) 创建操作链接组定义。
它调用 ConnectApi.ChatterFeeds.postFeedElement(communityId, feedElement) 将操作链接组与源项关联并发布。
// Get the action link group template Id.
ActionLinkGroupTemplate template = [SELECT Id FROM ActionLinkGroupTemplate WHERE DeveloperName='Doc_Example'];

// Add binding name-value pairs to a map.
// The names are defined in the action link template(s) associated with the action link group template.
// Get them from Setup UI or SOQL.
Map<String, String> bindingMap = new Map<String, String>();
bindingMap.put('ApiVersion', 'v33.0');
bindingMap.put('Text', 'This post was created by an API action link.');
bindingMap.put('SubjectId', 'me');

// Create ActionLinkTemplateBindingInput objects from the map elements.
List<ConnectApi.ActionLinkTemplateBindingInput> bindingInputs = new List<ConnectApi.ActionLinkTemplateBindingInput>();

for (String key : bindingMap.keySet()) {
    ConnectApi.ActionLinkTemplateBindingInput bindingInput = new ConnectApi.ActionLinkTemplateBindingInput();
    bindingInput.key = key;
    bindingInput.value = bindingMap.get(key);
    bindingInputs.add(bindingInput);
}

// Set the template Id and template binding values in the action link group definition.
ConnectApi.ActionLinkGroupDefinitionInput actionLinkGroupDefinitionInput = new ConnectApi.ActionLinkGroupDefinitionInput();
actionLinkGroupDefinitionInput.templateId = template.id;
actionLinkGroupDefinitionInput.templateBindings = bindingInputs;

// Instantiate the action link group definition.
ConnectApi.ActionLinkGroupDefinition actionLinkGroupDefinition =
 ConnectApi.ActionLinks.createActionLinkGroupDefinition(Network.getNetworkId(), actionLinkGroupDefinitionInput);

ConnectApi.FeedItemInput feedItemInput = new ConnectApi.FeedItemInput();
ConnectApi.FeedElementCapabilitiesInput feedElementCapabilitiesInput = new ConnectApi.FeedElementCapabilitiesInput();
ConnectApi.AssociatedActionsCapabilityInput associatedActionsCapabilityInput = new ConnectApi.AssociatedActionsCapabilityInput();
ConnectApi.MessageBodyInput messageBodyInput = new ConnectApi.MessageBodyInput();
ConnectApi.TextSegmentInput textSegmentInput = new ConnectApi.TextSegmentInput();

// Define the FeedItemInput object to pass to postFeedElement
feedItemInput.body = messageBodyInput;
feedItemInput.capabilities = feedElementCapabilitiesInput;
feedItemInput.subjectId = 'me';

// The MessageBodyInput object holds the text in the post
messageBodyInput.messageSegments = new List<ConnectApi.MessageSegmentInput>();

textSegmentInput.text = 'Click to post a feed item.';
messageBodyInput.messageSegments.add(textSegmentInput);


// The FeedElementCapabilitiesInput object holds the capabilities of the feed item.
// For this feed item, we define an associated actions capability to hold the action link group.
// The action link group ID is returned from the call to create the action link group definition.
feedElementCapabilitiesInput.associatedActions = associatedActionsCapabilityInput;
associatedActionsCapabilityInput.actionLinkGroupIds = new List<String>();
associatedActionsCapabilityInput.actionLinkGroupIds.add(actionLinkGroupDefinition.id);

// Post the feed item.
ConnectApi.FeedElement feedElement = ConnectApi.ChatterFeeds.postFeedElement(Network.getNetworkId(), feedItemInput);
编辑 Feed 元素
调用方法以编辑 Feed 元素。调用 updateFeedElement(communityId, feedElementId、feedElement) 来编辑 Feed 元素。Feed 项是 唯一可以 编辑。
String communityId = Network.getNetworkId();

// Get the last feed item created by the context user.
List<FeedItem> feedItems = [SELECT Id FROM FeedItem WHERE CreatedById = :UserInfo.getUserId() ORDER BY CreatedDate DESC];
if (feedItems.isEmpty()) {
    // Return null within anonymous apex.
    return null;
}
String feedElementId = feedItems[0].id;

ConnectApi.FeedEntityIsEditable isEditable = ConnectApi.ChatterFeeds.isFeedElementEditableByMe(communityId, feedElementId);

if (isEditable.isEditableByMe == true){
    ConnectApi.FeedItemInput feedItemInput = new ConnectApi.FeedItemInput();
    ConnectApi.MessageBodyInput messageBodyInput = new ConnectApi.MessageBodyInput();
    ConnectApi.TextSegmentInput textSegmentInput = new ConnectApi.TextSegmentInput();

    messageBodyInput.messageSegments = new List<ConnectApi.MessageSegmentInput>();

    textSegmentInput.text = 'This is my edited post.';
    messageBodyInput.messageSegments.add(textSegmentInput);

    feedItemInput.body = messageBodyInput;

    ConnectApi.FeedElement editedFeedElement = ConnectApi.ChatterFeeds.updateFeedElement(communityId, feedElementId, feedItemInput);
}
编辑问题标题和帖子
调用方法以编辑问题标题和帖子。调用 updateFeedElement(communityId, feedElementId、feedElement) 编辑问题标题和帖子。
String communityId = Network.getNetworkId();

// Get the last feed item created by the context user.
List<FeedItem> feedItems = [SELECT Id FROM FeedItem WHERE CreatedById = :UserInfo.getUserId() ORDER BY CreatedDate DESC];
if (feedItems.isEmpty()) {
    // Return null within anonymous apex.
    return null;
}
String feedElementId = feedItems[0].id;

ConnectApi.FeedEntityIsEditable isEditable = ConnectApi.ChatterFeeds.isFeedElementEditableByMe(communityId, feedElementId);

if (isEditable.isEditableByMe == true){

    ConnectApi.FeedItemInput feedItemInput = new ConnectApi.FeedItemInput();
    ConnectApi.FeedElementCapabilitiesInput feedElementCapabilitiesInput = new ConnectApi.FeedElementCapabilitiesInput();
    ConnectApi.QuestionAndAnswersCapabilityInput questionAndAnswersCapabilityInput = new ConnectApi.QuestionAndAnswersCapabilityInput();
    ConnectApi.MessageBodyInput messageBodyInput = new ConnectApi.MessageBodyInput();
    ConnectApi.TextSegmentInput textSegmentInput = new ConnectApi.TextSegmentInput();

    messageBodyInput.messageSegments = new List<ConnectApi.MessageSegmentInput>();

    textSegmentInput.text = 'This is my edited question.';
    messageBodyInput.messageSegments.add(textSegmentInput);

    feedItemInput.body = messageBodyInput;
    feedItemInput.capabilities = feedElementCapabilitiesInput;

    feedElementCapabilitiesInput.questionAndAnswers = questionAndAnswersCapabilityInput;
    questionAndAnswersCapabilityInput.questionTitle = 'Where is my edited question?';

    ConnectApi.FeedElement editedFeedElement = ConnectApi.ChatterFeeds.updateFeedElement(communityId, feedElementId, feedItemInput);
}
像饲料元素一样
调用一个方法来喜欢一个源元素。调用 likeFeedElement(communityId, feedElementId) 来点赞 Feed 元素。
ConnectApi.ChatterLike chatterLike = ConnectApi.ChatterFeeds.likeFeedElement(null, '0D5D0000000KuGh');为 Feed 元素添加书签
调用方法为源元素添加书签。调用 updateFeedElementBookmarks(communityId, feedElementId, isBookmarkedByCurrentUser) 为提要添加书签 元素。
ConnectApi.BookmarksCapability bookmark = ConnectApi.ChatterFeeds.updateFeedElementBookmarks(null, '0D5D0000000KuGh', true);共享源元素(版本 39.0 之前)
调用方法以共享源元素。
重要
在 API 版本 39.0 及更高版本中,不受支持。请参阅共享 Feed 元素(在版本 39.0 及更高版本中)。shareFeedElement(communityId, subjectId, feedElementType, originalFeedElementId)调用 shareFeedElement(communityId, subjectId, feedElementType, originalFeedElementId)来共享源项(这是一种 进料元件)与 群。
ConnectApi.ChatterLike chatterLike = ConnectApi.ChatterFeeds.likeFeedElement(null, '0D5D0000000KuGh');共享源元素(在版本 39.0 及更高版本中)
调用方法以共享源元素。调用 postFeedElement(communityId, feedElement) 共享源 元素。
// Define the FeedItemInput object to pass to postFeedElement
ConnectApi.FeedItemInput feedItemInput = new ConnectApi.FeedItemInput();
feedItemInput.subjectId = 'me';
ConnectApi.TextSegmentInput textSegmentInput = new ConnectApi.TextSegmentInput();
textSegmentInput.text = 'Look at this post I'm sharing.';
// The MessageBodyInput object holds the text in the post
ConnectApi.MessageBodyInput messageBodyInput = new ConnectApi.MessageBodyInput();
messageBodyInput.messageSegments = new List<ConnectApi.MessageSegmentInput>();
messageBodyInput.messageSegments.add(textSegmentInput);
feedItemInput.body = messageBodyInput;

ConnectApi.FeedEntityShareCapabilityInput shareInput = new ConnectApi.FeedEntityShareCapabilityInput();
shareInput.feedEntityId = '0D5R0000000SEbc';
ConnectApi.FeedElementCapabilitiesInput feedElementCapabilitiesInput = new
ConnectApi.FeedElementCapabilitiesInput();
feedElementCapabilitiesInput.feedEntityShare = shareInput;
feedItemInput.capabilities = feedElementCapabilitiesInput;
// Post the feed item.
ConnectApi.FeedElement feedElement =
ConnectApi.ChatterFeeds.postFeedElement(Network.getNetworkId(), feedItemInput);
发送私信
调用方法以发送直接消息。调用 postFeedElement(communityId, feedElement) 向两个人发送直接消息。
// Define the FeedItemInput object to pass to postFeedElement
ConnectApi.FeedItemInput feedItemInput = new ConnectApi.FeedItemInput();

ConnectApi.TextSegmentInput textSegmentInput = new ConnectApi.TextSegmentInput();
textSegmentInput.text = 'Thanks for attending my presentation test run this morning. Send me any feedback.';

// The MessageBodyInput object holds the text in the post
ConnectApi.MessageBodyInput messageBodyInput = new ConnectApi.MessageBodyInput();
messageBodyInput.messageSegments = new List<ConnectApi.MessageSegmentInput>();
messageBodyInput.messageSegments.add(textSegmentInput);
feedItemInput.body = messageBodyInput;

// The FeedElementCapabilitiesInput object holds the capabilities of the feed item.
// For this feed item, we define a direct message capability to hold the member(s) and the subject.

List<String> memberIds = new List<String>();
memberIds.add('005B00000016OUQ');
memberIds.add('005B0000001rIN6');

ConnectApi.DirectMessageCapabilityInput dmInput = new ConnectApi.DirectMessageCapabilityInput();
dmInput.subject = 'Thank you!';
dmInput.membersToAdd = memberIds;

ConnectApi.FeedElementCapabilitiesInput feedElementCapabilitiesInput = new ConnectApi.FeedElementCapabilitiesInput();
feedElementCapabilitiesInput.directMessage = dmInput;

feedItemInput.capabilities = feedElementCapabilitiesInput;

// Post the feed item.
ConnectApi.FeedElement feedElement = ConnectApi.ChatterFeeds.postFeedElement(Network.getNetworkId(), feedItemInput);
发表评论
调用方法以发表评论。调用 postCommentToFeedElement(communityId, feedElementId, text) 以发布 对 Feed 的纯文本注释 元素。
ConnectApi.Comment comment = ConnectApi.ChatterFeeds.postCommentToFeedElement(null, '0D5D0000000KuGh', 'I agree with the proposal.' );发表评论并提及
调用或使用 ConnectApiHelper 存储库发布带有 提到。您可以通过两种方式发布带有提及的评论。使用 GitHub 上的 ConnectApiHelper 存储库编写单行 的代码,或者使用此示例,该示例调用 postCommentToFeedElement(communityId, feedElementId, comment, feedElementFileUpload)。
String communityId = null;
String feedElementId = '0D5D0000000KtW3';

ConnectApi.CommentInput commentInput = new ConnectApi.CommentInput();
ConnectApi.MentionSegmentInput mentionSegmentInput = new ConnectApi.MentionSegmentInput();
ConnectApi.MessageBodyInput messageBodyInput = new ConnectApi.MessageBodyInput();
ConnectApi.TextSegmentInput textSegmentInput = new ConnectApi.TextSegmentInput();

messageBodyInput.messageSegments = new List<ConnectApi.MessageSegmentInput>();

textSegmentInput.text = 'Does anyone in this group have an idea? ';
messageBodyInput.messageSegments.add(textSegmentInput);

mentionSegmentInput.id = '005D00000000oOT';
messageBodyInput.messageSegments.add(mentionSegmentInput);

commentInput.body = messageBodyInput;

ConnectApi.Comment commentRep = ConnectApi.ChatterFeeds.postCommentToFeedElement(communityId, feedElementId, commentInput, null);
使用现有文件发表评论
拨打电话以使用已上传的文件发表评论。要发表评论并附加现有文件(已上传到 Salesforce) 添加到评论中,创建一个对象以传递给 postCommentToFeedElement(communityId, feedElementId, 评论 feedElementFileUpload)。
ConnectApi.CommentInput
String feedElementId = '0D5D0000000KtW3';

ConnectApi.CommentInput commentInput = new ConnectApi.CommentInput();

ConnectApi.MessageBodyInput messageBodyInput = new ConnectApi.MessageBodyInput();
ConnectApi.TextSegmentInput textSegmentInput = new ConnectApi.TextSegmentInput();

textSegmentInput.text = 'I attached this file from Salesforce Files.';

messageBodyInput.messageSegments = new List<ConnectApi.MessageSegmentInput>();
messageBodyInput.messageSegments.add(textSegmentInput);
commentInput.body = messageBodyInput;

ConnectApi.CommentCapabilitiesInput commentCapabilitiesInput = new ConnectApi.CommentCapabilitiesInput();
ConnectApi.ContentCapabilityInput contentCapabilityInput = new ConnectApi.ContentCapabilityInput();

commentCapabilitiesInput.content = contentCapabilityInput;
contentCapabilityInput.contentDocumentId = '069D00000001rNJ';

commentInput.capabilities = commentCapabilitiesInput;

ConnectApi.Comment commentRep = ConnectApi.ChatterFeeds.postCommentToFeedElement(Network.getNetworkId(), feedElementId, commentInput, null);
使用新文件发表评论
调用方法以使用新文件发布注释。要发布评论并上传新文件并将其附加到评论中,请创建一个对象和一个要传递给 postCommentToFeedElement(communityId, feedElementId, comment, feedElementFileUpload) 方法。
ConnectApi.CommentInputConnectApi.BinaryInput
String feedElementId = '0D5D0000000KtW3';

ConnectApi.CommentInput commentInput = new ConnectApi.CommentInput();

ConnectApi.MessageBodyInput messageBodyInput = new ConnectApi.MessageBodyInput();
ConnectApi.TextSegmentInput textSegmentInput = new ConnectApi.TextSegmentInput();

textSegmentInput.text = 'Enjoy this new file.';

messageBodyInput.messageSegments = new List<ConnectApi.MessageSegmentInput>();
messageBodyInput.messageSegments.add(textSegmentInput);
commentInput.body = messageBodyInput;

ConnectApi.CommentCapabilitiesInput commentCapabilitiesInput = new ConnectApi.CommentCapabilitiesInput();
ConnectApi.ContentCapabilityInput contentCapabilityInput = new ConnectApi.ContentCapabilityInput();

commentCapabilitiesInput.content = contentCapabilityInput;
contentCapabilityInput.title = 'Title';

commentInput.capabilities = commentCapabilitiesInput;

String text = 'These are the contents of the new file.';
Blob myBlob = Blob.valueOf(text);
ConnectApi.BinaryInput binInput = new ConnectApi.BinaryInput(myBlob, 'text/plain', 'fileName');

ConnectApi.Comment commentRep = ConnectApi.ChatterFeeds.postCommentToFeedElement(Network.getNetworkId(), feedElementId, commentInput, binInput);
发布带有内嵌图像的富文本评论
进行调用或使用 ConnectApiHelper 存储库发布评论,其中包含 上传的内嵌图像。您可以通过两种方式发布带有内嵌图像和提及的富文本评论。使用 GitHub 上的 ConnectApiHelper 存储库编写单行 的代码,或者使用此示例,该示例调用 postCommentToFeedElement(communityId, feedElementId, comment, feedElementFileUpload)。在此示例中,图像文件已存在 已上传到的内容 Salesforce的。
String communityId = null;
String feedElementId = '0D5R0000000SBEr';
String imageId = '069R00000000IgQ';
String mentionedUserId = '005R0000000DiMz';

ConnectApi.CommentInput input = new ConnectApi.CommentInput();
ConnectApi.MessageBodyInput messageInput = new ConnectApi.MessageBodyInput();
ConnectApi.TextSegmentInput textSegment;
ConnectApi.MentionSegmentInput mentionSegment;
ConnectApi.MarkupBeginSegmentInput markupBeginSegment;
ConnectApi.MarkupEndSegmentInput markupEndSegment;
ConnectApi.InlineImageSegmentInput inlineImageSegment;

messageInput.messageSegments = new List<ConnectApi.MessageSegmentInput>();


markupBeginSegment = new ConnectApi.MarkupBeginSegmentInput();
markupBeginSegment.markupType = ConnectApi.MarkupType.Bold;
messageInput.messageSegments.add(markupBeginSegment);

textSegment = new ConnectApi.TextSegmentInput();
textSegment.text = 'Hello ';
messageInput.messageSegments.add(textSegment);

mentionSegment = new ConnectApi.MentionSegmentInput();
mentionSegment.id = mentionedUserId;
messageInput.messageSegments.add(mentionSegment);

textSegment = new ConnectApi.TextSegmentInput();
textSegment.text = '!';
messageInput.messageSegments.add(textSegment);

markupEndSegment = new ConnectApi.MarkupEndSegmentInput();
markupEndSegment.markupType = ConnectApi.MarkupType.Bold;
messageInput.messageSegments.add(markupEndSegment);

inlineImageSegment = new ConnectApi.InlineImageSegmentInput();
inlineImageSegment.altText = 'image one';
inlineImageSegment.fileId = imageId;
messageInput.messageSegments.add(inlineImageSegment);

input.body = messageInput;

ConnectApi.ChatterFeeds.postCommentToFeedElement(communityId, feedElementId, input, null);
发布带有代码块的富文本源注释
调用方法以使用代码块发布注释。此示例调用 postCommentToFeedElement(communityId, feedElementId, comment, feedElementFileUpload) 发布带有代码的评论 块。
String communityId = null;
String feedElementId = '0D5R0000000SBEr';
String codeSnippet = '<html>\n\t<body>\n\t\tHello, world!\n\t</body>\n</html>';

ConnectApi.CommentInput input = new ConnectApi.CommentInput();
ConnectApi.MessageBodyInput messageInput = new ConnectApi.MessageBodyInput();
ConnectApi.TextSegmentInput textSegment;
ConnectApi.MarkupBeginSegmentInput markupBeginSegment;
ConnectApi.MarkupEndSegmentInput markupEndSegment;

messageInput.messageSegments = new List<ConnectApi.MessageSegmentInput>();

markupBeginSegment = new ConnectApi.MarkupBeginSegmentInput();
markupBeginSegment.markupType = ConnectApi.MarkupType.Code;
messageInput.messageSegments.add(markupBeginSegment);

textSegment = new ConnectApi.TextSegmentInput();
textSegment.text = codeSnippet;
messageInput.messageSegments.add(textSegment);

markupEndSegment = new ConnectApi.MarkupEndSegmentInput();
markupEndSegment.markupType = ConnectApi.MarkupType.Code;
messageInput.messageSegments.add(markupEndSegment);

input.body = messageInput;

ConnectApi.ChatterFeeds.postCommentToFeedElement(communityId, feedElementId, input, null);
编辑批注
调用方法以编辑注释。调用 updateComment(communityId, commentId, comment) 来编辑 评论。
String commentId;
String communityId = Network.getNetworkId();

// Get the last feed item created by the context user.
List<FeedItem> feedItems = [SELECT Id FROM FeedItem WHERE CreatedById = :UserInfo.getUserId() ORDER BY CreatedDate DESC];
if (feedItems.isEmpty()) {
    // Return null within anonymous apex.
    return null;
}
String feedElementId = feedItems[0].id;

ConnectApi.CommentPage commentPage = ConnectApi.ChatterFeeds.getCommentsForFeedElement(communityId, feedElementId);
if (commentPage.items.isEmpty()) {
    // Return null within anonymous apex.
    return null;
}
commentId = commentPage.items[0].id;

ConnectApi.FeedEntityIsEditable isEditable = ConnectApi.ChatterFeeds.isCommentEditableByMe(communityId, commentId);

if (isEditable.isEditableByMe == true){
    ConnectApi.CommentInput commentInput = new ConnectApi.CommentInput();
    ConnectApi.MessageBodyInput messageBodyInput = new ConnectApi.MessageBodyInput();
    ConnectApi.TextSegmentInput textSegmentInput = new ConnectApi.TextSegmentInput();

    messageBodyInput.messageSegments = new List<ConnectApi.MessageSegmentInput>();

    textSegmentInput.text = 'This is my edited comment.';
    messageBodyInput.messageSegments.add(textSegmentInput);

    commentInput.body = messageBodyInput;

    ConnectApi.Comment editedComment = ConnectApi.ChatterFeeds.updateComment(communityId, commentId, commentInput);
}
关注记录
调用方法以跟踪记录。调用 follow(communityId, userId, subjectId) 来跟随 记录。
ChatterUsers.ConnectApi.Subscription subscriptionToRecord = ConnectApi.ChatterUsers.follow(null, 'me', '001RR000002G4Y0');取消关注记录
调用方法以停止关注记录。当您关注记录(如用户)时,对 的调用将返回一个对象。若要取消关注记录,请将该对象的属性传递给 deleteSubscription(communityId, subscriptionId)。
ConnectApi.ChatterUsers.followConnectApi.Subscriptionid
ConnectApi.Chatter.deleteSubscription(null, '0E8RR0000004CnK0AU');获取存储库
调用方法以获取存储库。调用 getRepository(repositoryId) 获取 存储 库。
final string repositoryId = '0XCxx0000000123GAA';
final ConnectApi.ContentHubRepository repository = ConnectApi.ContentHub.getRepository(repositoryId);
获取存储库
调用方法以获取所有存储库。调用 getRepositories() 以获取所有存储库并获取第一个 SharePoint 在线存储库 发现。
final string sharePointOnlineProviderType ='ContentHubSharepointOffice365';
final ConnectApi.ContentHubRepositoryCollection repositoryCollection = ConnectApi.ContentHub.getRepositories();
ConnectApi.ContentHubRepository sharePointOnlineRepository = null;
for(ConnectApi.ContentHubRepository repository : repositoryCollection.repositories){
   if(sharePointOnlineProviderType.equalsIgnoreCase(repository.providerType.type)){
      sharePointOnlineRepository = repository;
      break;
   }
}
获取允许的项目类型
调用方法以获取允许的项类型。使用 of 调用 getAllowedItemTypes(repositoryId, repositoryFolderId, filter) 以获取文件的第一个。用户可以创建的上下文 外部存储库文件夹中允许的文件 系统。
filterFilesOnlyConnectApi.ContentHubItemTypeSummary.id
final ConnectApi.ContentHubAllowedItemTypeCollection allowedItemTypesColl = ConnectApi.ContentHub.getAllowedItemTypes(repositoryId, repositoryFolderId, ConnectApi.ContentHubItemType.FilesOnly);
final List<ConnectApi.ContentHubItemTypeSummary> allowedItemTypes = allowedItemTypesColl.allowedItemTypes;
string allowedFileItemTypeId = null;
if(allowedItemTypes.size() > 0){
   ConnectApi.ContentHubItemTypeSummary allowedItemTypeSummary = allowedItemTypes.get(0);
   allowedFileItemTypeId = allowedItemTypeSummary.id;
}
获取预览
调用方法以获取所有支持的预览格式及其各自的预览格式 URL。调用 getPreviews(repositoryId, repositoryFileId) 获取所有支持的预览格式及其 各自的 URL 和演绎版数量。对于每种受支持的预览格式,我们都会显示 演绎版 URL 可用。
final String gDriveRepositoryId = '0XCxx00000000ODGAY', gDriveFileId = 'document:1-zcA1BaeoQbo2_yNFiHCcK6QJTPmOke-kHFC4TYg3rk';
final ConnectApi.FilePreviewCollection previewsCollection = ConnectApi.ContentHub.getPreviews(gDriveRepositoryId, gDriveFileId);
for(ConnectApi.FilePreview filePreview : previewsCollection.previews){
   System.debug(String.format('Preview - URL: \'\'{0}\'\', format: \'\'{1}\'\', nbr of renditions for this format: {2}', new String[]{ filePreview.url, filePreview.format.name(),String.valueOf(filePreview.previewUrls.size())}));
   for(ConnectApi.FilePreviewUrl filePreviewUrl : filePreview.previewUrls){
      System.debug('-----> Rendition URL: ' + filePreviewUrl.previewUrl);
      }
}
获取文件预览
调用方法以获取文件预览。调用 getFilePreview(repositoryId, repositoryFileId, formatType) 替换为 of 来获取 缩略图格式预览及其各自的 URL 和缩略图演绎版的数量。为 每种缩略图格式,我们都会显示每个演绎版 URL 可用。
formatTypeThumbnail
final String gDriveRepositoryId = '0XCxx00000000ODGAY', gDriveFileId = 'document:1-zcA1BaeoQbo2_yNFiHCcK6QJTPmOke-kHFC4TYg3rk';
final ConnectApi.FilePreviewCollection previewsCollection = ConnectApi.ContentHub.getPreviews(gDriveRepositoryId, gDriveFileId);
for(ConnectApi.FilePreview filePreview : previewsCollection.previews){
   System.debug(String.format('Preview - URL: \'\'{0}\'\', format: \'\'{1}\'\', nbr of renditions for this format: {2}', new String[]{ filePreview.url, filePreview.format.name(),String.valueOf(filePreview.previewUrls.size())}));
   for(ConnectApi.FilePreviewUrl filePreviewUrl : filePreview.previewUrls){
      System.debug('-----> Rendition URL: ' + filePreviewUrl.previewUrl);
      }
}
获取存储库文件夹项
调用方法以获取存储库文件夹项的集合。调用 getRepositoryFolderItems(repositoryId, repositoryFolderId) 获取 存储库文件夹中的项目集合。对于文件,我们显示文件的名称、大小、外部 URL 和下载 URL。对于文件夹,我们显示文件夹的名称、描述和外部 网址。
final String gDriveRepositoryId = '0XCxx00000000ODGAY', gDriveFolderId = 'folder:0B0lTys1KmM3sSVJ2bjIzTGFqSWs';
final ConnectApi.RepositoryFolderItemsCollection folderItemsColl = ConnectApi.ContentHub.getRepositoryFolderItems(gDriveRepositoryId,gDriveFolderId);
final List<ConnectApi.RepositoryFolderItem> folderItems = folderItemsColl.items;
System.debug('Number of items in repository folder: ' + folderItems.size());
for(ConnectApi.RepositoryFolderItem item : folderItems){
   ConnectApi.RepositoryFileSummary fileSummary = item.file;
   if(fileSummary != null){
      System.debug(String.format('File item - name: \'\'{0}\'\', size: {1}, external URL: \'\'{2}\'\', download URL: \'\'{3}\'\'', new String[]{ fileSummary.name, String.valueOf(fileSummary.contentSize), fileSummary.externalDocumentUrl, fileSummary.downloadUrl}));
      }else{
         ConnectApi.RepositoryFolderSummary folderSummary = item.folder;
         System.debug(String.format('Folder item - name: \'\'{0}\'\', description: \'\'{1}\'\'',  new String[]{ folderSummary.name, folderSummary.description}));
      }
}
获取存储库文件夹
调用方法以获取存储库文件夹。调用 getRepositoryFolder(repositoryId, repositoryFolderId) 获取仓库 文件夹。
final String gDriveRepositoryId = '0XCxx00000000ODGAY', gDriveFolderId = 'folder:0B0lTys1KmM3sSVJ2bjIzTGFqSWs';
final ConnectApi.RepositoryFolderDetail folder = ConnectApi.ContentHub.getRepositoryFolder(gDriveRepositoryId, gDriveFolderId);
System.debug(String.format('Folder - name: \'\'{0}\'\', description: \'\'{1}\'\', external URL: \'\'{2}\'\', folder items URL: \'\'{3}\'\'',
   new String[]{ folder.name, folder.description, folder.externalFolderUrl, folder.folderItemsUrl}));
获取没有权限信息的存储库文件
调用方法获取没有权限信息的存储库文件。调用 getRepositoryFile(repositoryId, repositoryFileId) 获取仓库 没有权限的文件 信息。
final String gDriveRepositoryId = '0XCxx00000000ODGAY', gDriveFileId = 'file:0B0lTys1KmM3sTmxKNjVJbWZja00';
final ConnectApi.RepositoryFileDetail file = ConnectApi.ContentHub.getRepositoryFile(gDriveRepositoryId, gDriveFileId);
System.debug(String.format('File - name: \'\'{0}\'\', size: {1}, external URL: \'\'{2}\'\', download URL: \'\'{3}\'\'',
   new String[]{ file.name, String.valueOf(file.contentSize), file.externalDocumentUrl, file.downloadUrl}));
获取包含权限信息的存储库文件
调用方法以获取包含权限信息的存储库文件。调用 getRepositoryFile(repositoryId, repositoryFileId, includeExternalFilePermissionsInfo) 获取存储库文件 权限 信息。
final String gDriveRepositoryId = '0XCxx00000000ODGAY', gDriveFileId = 'file:0B0lTys1KmM3sTmxKNjVJbWZja00';

final ConnectApi.RepositoryFileDetail file = ConnectApi.ContentHub.getRepositoryFile(gDriveRepositoryId, gDriveFileId, true);
System.debug(String.format('File - name: \'\'{0}\'\', size: {1}, external URL: \'\'{2}\'\', download URL: \'\'{3}\'\'', new String[]{ file.name, String.valueOf(file.contentSize), file.externalDocumentUrl, file.downloadUrl}));
final ConnectApi.ExternalFilePermissionInformation externalFilePermInfo = file.externalFilePermissionInformation;

//permission types
final List<ConnectApi.ContentHubPermissionType> permissionTypes = externalFilePermInfo.externalFilePermissionTypes;
for(ConnectApi.ContentHubPermissionType permissionType : permissionTypes){
   System.debug(String.format('Permission type - id: \'\'{0}\'\', label: \'\'{1}\'\'', new String[]{ permissionType.id, permissionType.label}));
}

//permission groups
final List<ConnectApi.RepositoryGroupSummary> groups = externalFilePermInfo.repositoryPublicGroups;
for(ConnectApi.RepositoryGroupSummary ggroup : groups){
   System.debug(String.format('Group - id: \'\'{0}\'\', name: \'\'{1}\'\', type: \'\'{2}\'\'', new String[]{ ggroup.id, ggroup.name, ggroup.type.name()}));
}
创建不带内容的存储库文件(仅限元数据)
调用方法以在 Google Drive 中创建没有二进制内容(仅限元数据)的文件 存储库文件夹。调用 addRepositoryItem(repositoryId, repositoryFolderId, file) 创建一个 Google 云端硬盘存储库文件夹中没有二进制内容(仅限元数据)的文件。之后 文件,我们显示文件的 ID、名称、描述、外部 URL 和下载 网址。
final String gDriveRepositoryId = '0XCxx00000000ODGAY', gDriveFolderId = 'folder:0B0lTys1KmM3sSVJ2bjIzTGFqSWs';

final ConnectApi.ContentHubItemInput newItem = new ConnectApi.ContentHubItemInput();
newItem.itemTypeId = 'document'; //see getAllowedTypes for any file item types available for creation/update
newItem.fields = new List<ConnectApi.ContentHubFieldValueInput>();

//Metadata: name field
final ConnectApi.ContentHubFieldValueInput fieldValueInput = new ConnectApi.ContentHubFieldValueInput();
fieldValueInput.name = 'name';
fieldValueInput.value = 'new folder item name.txt';
newItem.fields.add(fieldValueInput);

//Metadata: description field
final ConnectApi.ContentHubFieldValueInput fieldValueInputDesc = new ConnectApi.ContentHubFieldValueInput();
fieldValueInputDesc.name = 'description';
fieldValueInputDesc.value = 'It does describe it';
newItem.fields.add(fieldValueInputDesc);

final ConnectApi.RepositoryFolderItem newFolderItem = ConnectApi.ContentHub.addRepositoryItem(gDriveRepositoryId, gDriveFolderId, newItem);
final ConnectApi.RepositoryFileSummary newFile = newFolderItem.file;
System.debug(String.format('New file - id: \'\'{0}\'\', name: \'\'{1}\'\', description: \'\'{2}\'\' \n external URL: \'\'{3}\'\', download URL: \'\'{4}\'\'', new String[]{ newFile.id, newFile.name, newFile.description, newFile.externalDocumentUrl, newFile.downloadUrl}));
创建包含内容的存储库文件
调用方法以在 Google Drive 存储库中创建包含二进制内容的文件 文件夹。调用 addRepositoryItem(repositoryId, repositoryFolderId, file, filedata) 来 在 Google Drive 存储库文件夹中创建包含二进制内容的文件。文件被 created,我们显示文件的 ID、名称、描述、外部 URL 和下载 网址。
final String gDriveRepositoryId = '0XCxx00000000ODGAY', gDriveFolderId = 'folder:0B0lTys1KmM3sSVJ2bjIzTGFqSWs';

final ConnectApi.ContentHubItemInput newItem = new ConnectApi.ContentHubItemInput();
newItem.itemTypeId = 'document'; //see getAllowedTypes for any file item types available for creation/update
newItem.fields = new List<ConnectApi.ContentHubFieldValueInput>();

//Metadata: name field
Final String newFileName = 'new folder item name.txt';
final ConnectApi.ContentHubFieldValueInput fieldValueInput = new ConnectApi.ContentHubFieldValueInput();
fieldValueInput.name = 'name';
fieldValueInput.value = newFileName;
newItem.fields.add(fieldValueInput);

//Metadata: description field
final ConnectApi.ContentHubFieldValueInput fieldValueInputDesc = new ConnectApi.ContentHubFieldValueInput();
fieldValueInputDesc.name = 'description';
fieldValueInputDesc.value = 'It does describe it';
newItem.fields.add(fieldValueInputDesc);

//Binary content
final Blob newFileBlob = Blob.valueOf('awesome content for brand new file');
final String newFileMimeType = 'text/plain';
final ConnectApi.BinaryInput fileBinaryInput = new ConnectApi.BinaryInput(newFileBlob, newFileMimeType, newFileName);

final ConnectApi.RepositoryFolderItem newFolderItem = ConnectApi.ContentHub.addRepositoryItem(gDriveRepositoryId, gDriveFolderId, newItem, fileBinaryInput);
final ConnectApi.RepositoryFileSummary newFile = newFolderItem.file;
System.debug(String.format('New file - id: \'\'{0}\'\', name: \'\'{1}\'\', description: \'\'{2}\'\' \n external URL: \'\'{3}\'\', download URL: \'\'{4}\'\'', new String[]{ newFile.id, newFile.name, newFile.description, newFile.externalDocumentUrl, newFile.downloadUrl}));
更新不带内容的存储库文件(仅限元数据)
调用方法更新存储库文件的元数据。调用 updateRepositoryFile(repositoryId, repositoryFileId, file) 以更新 存储库文件夹中文件的元数据。文件更新后,我们显示文件的 ID, 名称、描述、外部 URL、下载 网址。
final String gDriveRepositoryId = '0XCxx00000000ODGAY', gDriveFolderId = 'folder:0B0lTys1KmM3sSVJ2bjIzTGFqSWs', gDriveFileId = 'document:1q9OatVpcyYBK-JWzp_PhR75ulQghwFP15zhkamKrRcQ';

final ConnectApi.ContentHubItemInput updatedItem = new ConnectApi.ContentHubItemInput();
updatedItem.itemTypeId = 'document'; //see getAllowedTypes for any file item types available for creation/update
updatedItem.fields = new List<ConnectApi.ContentHubFieldValueInput>();

//Metadata: name field
final ConnectApi.ContentHubFieldValueInput fieldValueInputName = new ConnectApi.ContentHubFieldValueInput();
fieldValueInputName.name = 'name';
fieldValueInputName.value =  'updated file name.txt';
updatedItem.fields.add(fieldValueInputName);

final ConnectApi.RepositoryFileDetail updatedFile = ConnectApi.ContentHub.updateRepositoryFile(gDriveRepositoryId, gDriveFileId, updatedItem);
System.debug(String.format('Updated file - id: \'\'{0}\'\', name: \'\'{1}\'\', description: \'\'{2}\'\',\n external URL: \'\'{3}\'\', download URL: \'\'{4}\'\'',  new String[]{ updatedFile.id, updatedFile.name, updatedFile.description, updatedFile.externalDocumentUrl, updatedFile.downloadUrl}));
使用内容更新存储库文件
调用方法以使用内容更新存储库文件。调用 updateRepositoryFile(repositoryId, repositoryFileId, file, fileData) 来 更新存储库中文件的内容和元数据。文件更新后,我们显示 文件的 ID、名称、描述、外部 URL 和下载 网址。
final String gDriveRepositoryId = '0XCxx00000000ODGAY', gDriveFolderId = 'folder:0B0lTys1KmM3sSVJ2bjIzTGFqSWs', gDriveFileId = 'document:1q9OatVpcyYBK-JWzp_PhR75ulQghwFP15zhkamKrRcQ';

final ConnectApi.ContentHubItemInput updatedItem = new ConnectApi.ContentHubItemInput();
updatedItem.itemTypeId = 'document'; //see getAllowedTypes for any file item types available for creation/update
updatedItem.fields = new List<ConnectApi.ContentHubFieldValueInput>();

//Metadata: name field
final ConnectApi.ContentHubFieldValueInput fieldValueInputName = new ConnectApi.ContentHubFieldValueInput();
fieldValueInputName.name = 'name';
fieldValueInputName.value =  'updated file name.txt';
updatedItem.fields.add(fieldValueInputName);

//Binary content
final Blob updatedFileBlob = Blob.valueOf('even more awesome content for updated file');
final String updatedFileMimeType = 'text/plain';
final ConnectApi.BinaryInput fileBinaryInput = new ConnectApi.BinaryInput(updatedFileBlob, updatedFileMimeType, updatedFileName);

final ConnectApi.RepositoryFileDetail updatedFile = ConnectApi.ContentHub.updateRepositoryFile(gDriveRepositoryId, gDriveFileId, updatedItem);
System.debug(String.format('Updated file - id: \'\'{0}\'\', name: \'\'{1}\'\', description: \'\'{2}\'\',\n external URL: \'\'{3}\'\', download URL: \'\'{4}\'\'',  new String[]{ updatedFile.id, updatedFile.name, updatedFile.description, updatedFile.externalDocumentUrl, updatedFile.downloadUrl}));
获取身份验证 URL
调用方法以获取身份验证 URL。调用 getOAuthCredentialAuthUrl(requestBody) 以检索用户 必须访问才能开始身份验证流程,最终将身份验证令牌返回到 Salesforce的。接受表示特定外部凭据的输入参数,并且 (可选)命名主体。使用此方法作为构建自定义或品牌的一部分 用户界面,帮助用户启动身份验证。
ConnectApi.OAuthCredentialAuthUrlInput input = new ConnectApi.OAuthCredentialAuthUrlInput();

input.externalCredential = 'MyExternalCredentialDeveloperName';
input.principalType = ConnectApi.CredentialPrincipalType.PerUserPrincipal;
input.principalName = 'MyPrincipal'; // Only required when principalType = NamedPrincipal

ConnectApi.OAuthCredentialAuthUrl output = ConnectApi.NamedCredentials.getOAuthCredentialAuthUrl(input);

String authenticationUrl = output.authenticationUrl; // Redirect users to this URL to authenticate in the browser