要在 JavaScript 或其他支持 Web 的语言中引用 Visualforce 组件,您必须 为该组件的属性指定一个值。DOM ID 由组合构成 的属性 组件和属性 包含该元素的所有组件。ididid
使用全局变量简化 引用为 Visualforce 组件生成的 DOM ID,并减少对整个页面的一些依赖 结构。$Component要引用特定 Visualforce 组件的 DOM ID,请使用点表示法将组件路径说明符添加到 在页面的组件层次结构中分隔每个级别。例如 用。以引用 Visualforce 组件层次结构中同一级别的组件,或使用 …以指定更完整的组件路径。$Component$ComponentitemId$ComponentgrandparentIdparentIditemId路径说明符 与组件层次结构匹配:
$Component
在组件层次结构的当前级别,其中使用;然后$Component
在组件层次结构中每个连续的更高级别,直到 找到匹配项,或达到组件层次结构的顶层。
没有回溯,所以如果你尝试的 ID 匹配需要向上遍历然后向下遍历,它不会 火柴。以下示例说明了 的几种用法:
$Component
<apex:page >

    <style>
    .clicker { border: 1px solid #999; cursor: pointer;
        margin: .5em; padding: 1em; width: 10em; text-align: center; }
    </style>

    <apex:form id="theForm">
        <apex:pageBlock id="thePageBlock" title="Targeting IDs with $Component">
            <apex:pageBlockSection id="theSection">
                <apex:pageBlockSectionItem id="theSectionItem">
                    All the alerts refer to this component.

                    <p>The full DOM ID resembles something like this:<br/>
                    j_id0:theForm:thePageBlock:theSection:theSectionItem</p>
                </apex:pageBlockSectionItem>

                <!-- Works because this outputPanel has a parent in common
                     with "theSectionItem" component -->
                <apex:outputPanel layout="block" styleClass="clicker"
                    onclick="alert('{!$Component.theSectionItem}');">
                    First click here
                </apex:outputPanel>
            </apex:pageBlockSection>

            <apex:pageBlockButtons id="theButtons" location="bottom">
                <!-- Works because this outputPanel has a grandparent ("theSection")
                     in common with "theSectionItem" -->
                <apex:outputPanel layout="block" styleClass="clicker"
                    onclick="alert('{!$Component.theSection.theSectionItem}');">
                    Second click here
                </apex:outputPanel>

                <!-- Works because this outputPanel has a distant ancestor ("theForm")
                     in common with "theSectionItem" -->
                <apex:outputPanel layout="block" styleClass="clicker"
                    onclick="alert('
                    {!$Component.theForm.thePageBlock.theSection.theSectionItem}');">
                    Third click here
                </apex:outputPanel>
            </apex:pageBlockButtons>

        </apex:pageBlock>

        <!-- Works because this outputPanel is a sibling to "thePageBlock",
             and specifies the complete ID path from that sibling -->
        <apex:outputPanel layout="block" styleClass="clicker"
            onclick="alert('{!$Component.thePageBlock.theSection.theSectionItem}');">
            Fourth click here
        </apex:outputPanel>

        <hr/>

        <!-- Won't work because this outputPanel doesn't provide a path
             that includes a sibling or common ancestor -->
        <apex:outputPanel layout="block" styleClass="clicker"
            onclick="alert('{!$Component.theSection.theSectionItem}');">
            This won't work
        </apex:outputPanel>

        <!-- Won't work because this outputPanel doesn't provide a path
             that includes a sibling or common ancestor -->
        <apex:outputPanel layout="block" styleClass="clicker"
            onclick="alert('{!$Component.theSectionItem}');">
            Won't work either
        </apex:outputPanel>

    </apex:form>
</apex:page>
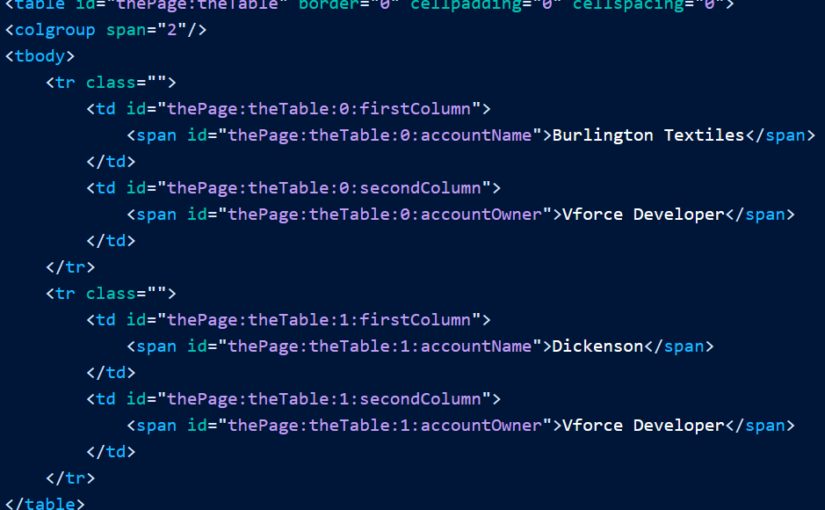
如果您的 Visualforce 页面包含大型表格,我们建议您实现分页。 或者,您可以使用静态 HTML 表而不是组件。在 HTML 表中,使用组件循环访问 HTML 行 元素。有关使用 的示例 HTML 表,请参阅 apex:repeat 组件 参考页面。<apex:pageBlockTable><apex:repeat><apex:repeat>
注意
与表格不同,静态 HTML 表没有标准的 Salesforce 样式。<apex:pageBlockTable>
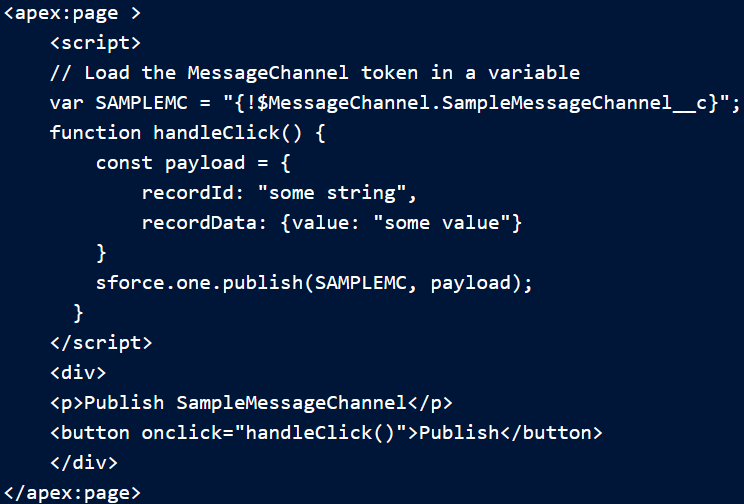
<apex:page>
    <script>
        // Load the MessageChannel token in a variable
        var SAMPLEMC = "{!$MessageChannel.SampleMessageChannel__c}";
    </script>
</apex:page>
在这里,我们引用一个带有公式表达式的自定义消息通道。此表达式 创建一个我们分配给变量的令牌。 此令牌对于您的自定义消息通道是唯一的,可以在 Lightning 消息中使用 服务 API 方法。语法引用元数据类型的自定义实例。后缀表示它是自定义的, 但请注意,它不是自定义对象。有关详细信息,请参阅创建消息通道。{!$MessageChannel.SampleMessageChannel__c}SAMPLEMCSampleMessageChannel__cLightningMessageChannel__c
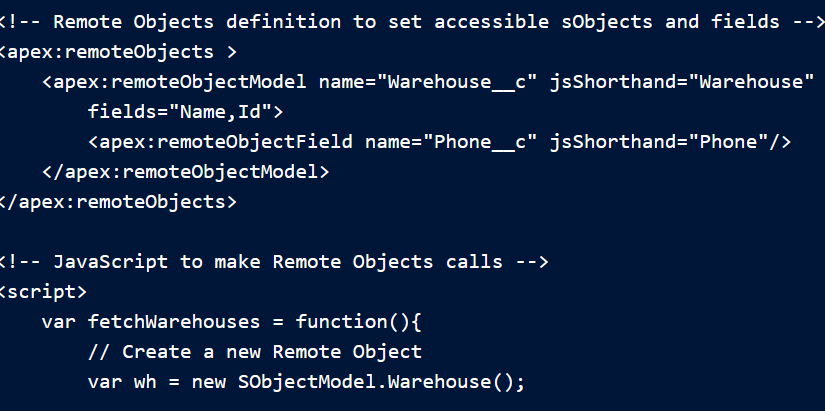
<apex:page>

    <!-- Remote Objects definition to set accessible sObjects and fields -->
    <apex:remoteObjects >
        <apex:remoteObjectModel name="Warehouse__c" jsShorthand="Warehouse"
            fields="Name,Id">
            <apex:remoteObjectField name="Phone__c" jsShorthand="Phone"/>
        </apex:remoteObjectModel>
    </apex:remoteObjects>

    <!-- JavaScript to make Remote Objects calls -->
    <script>
        var fetchWarehouses = function(){
            // Create a new Remote Object
            var wh = new SObjectModel.Warehouse();

            // Use the Remote Object to query for 10 warehouse records
            wh.retrieve({ limit: 10 }, function(err, records, event){
                if(err) {
                    alert(err.message);
                }
                else {
                    var ul = document.getElementById("warehousesList");
                    records.forEach(function(record) {
                        // Build the text for a warehouse line item
                        var whText = record.get("Name");
                        whText += " -- ";
                        whText += record.get("Phone");

                        // Add the line item to the warehouses list
                        var li = document.createElement("li");
                        li.appendChild(document.createTextNode(whText));
                        ul.appendChild(li);
                    });
                }
            });
        };
    </script>

    <h1>Retrieve Warehouses via Remote Objects</h1>

    <p>Warehouses:</p>

    <ul id="warehousesList">
    </ul>
    <button onclick="fetchWarehouses()">Retrieve Warehouses</button>

</apex:page>
<!-- JavaScript to make Remote Objects calls -->
<script>
    var fetchWarehouses = function(){
        // Create a new Remote Object
        var wh = new SObjectModel.Warehouse();

        // Use the Remote Object to query for 10 warehouse records
        wh.retrieve({ limit: 10 }, function(err, records, event){
            if(err) {
                alert(err.message);
            }
            else {
                var ul = document.getElementById("warehousesList");
                records.forEach(function(record) {
                    // Build the text for a warehouse line item
                    var whText = record.get("Name");
                    whText += " -- ";
                    whText += record.get("Phone");

                    // Add the line item to the warehouses list
                    var li = document.createElement("li");
                    li.appendChild(document.createTextNode(whText));
                    ul.appendChild(li);
                });
            }
        });
    };
</script>
这 函数的第一行从模型创建一个 Warehouse 对象。请注意, 创建它的调用使用 for sObject 而不是对象的完整 API 名称。遵循此最佳实践 将 JavaScript 代码与组织命名空间的细节分离, sObject 和字段名称等,并使代码更加简洁明了。
var ctDetails = { FirstName: 'Marc', LastName: 'Benioff' };

// Call create() on an existing Contact model, with no arguments
var ct = new RemoteObjectModel.Contact(ctDetails);
ct.create();

// Call create() on an empty Contact model, passing in field values
var ct = new RemoteObjectModel.Contact();
ct.create(ctDetails);
var ctDetails = { FirstName: 'Marc', LastName: 'Benioff' };
var ct = new RemoteObjectModel.Contact();
ct.create(ctDetails, function(err) {
    if(err) {
        console.log(err);
        alert(err.message);
    }
    else {
        // this is the contact
        console.log(ct.log());     // Dump contact to log
        console.log(ct.get('Id')); // Id is set when create completes
    }
});
// Handle the Save button
function updateContact(e){
    e.preventDefault();

    var record = new RemoteObjectModel.Contact({
        Id: $jQuery('#contactId').val(),
        FirstName: $jQuery('#fName').val(),
        LastName: $jQuery('#lName').val(),
        Phone: $jQuery('#phone').val(),
        Notes: $jQuery('#notes').val()
    });
    record.update(updateCallback);
}

// Callback to handle DML Remote Objects calls
function updateCallback(err, ids){
    if (err) {
        displayError(err);
    } else {
        // Reload the contacts with current list
        getAllContacts();
        $jQuery.mobile.changePage('#listpage', {changeHash: true});
    }
}
// Call upsert() on a Contact model, with no arguments
// ct is a RemoteObjectModel.Contact that already has data
ct.set('Phone', '(415) 777-1212');
ct.upsert();

// Call upsert() on a Contact model, passing in field values
// ct is a RemoteObjectModel.Contact that already has data
ct.upsert({Phone: '(415) 777-1212'});
ctDetails = {FirstName: "Tobe", LastName: "Ornottobe"};
ct = new RemoteObjectModel.Contact(ctDetails);
ct.create();

// After some thought, and the async operation completes...
// It's not to be; delete the contact
ct.del();
// Handle the delete button click
function deleteContact(e){
    e.preventDefault();
    var ct = new RemoteObjectModel.Contact();
    ct.del($jQuery('#contactId').val(), updateCallback);
}

// Callback to handle DML Remote Objects calls
function updateCallback(err, ids){
    if (err) {
        displayError(err);
    } else {
        // Reload the contacts with current list
        getAllContacts();
        $jQuery.mobile.changePage('#listpage', {changeHash: true});
    }
}
要删除一个请求中的多条记录,例如,选中 列表中的项目 – 将 s 数组传递给 。
Iddel()
var ct = new RemoteObjectModel.Contact();
ct.del(['003xxxxxxxxxxxxxxx', '003xxxxxxxxxxxxxxx'], function(err, ids) {
    if (err) {
        displayError(err);
    } else {
        // Reload the contacts with current list
        getAllContacts();
        $jQuery('#status').html(ids.length + ' record(s) deleted.');
        $jQuery.mobile.changePage('#listpage', {changeHash: true});
    }
});
function getAllContacts() {
    $j.mobile.showPageLoadingMsg();

    var c = new RemoteObjectModel.Contact();
    c.retrieve({ limit: 100 }, function (err, records) {
        // Handle errors
        if (err) {
            displayError(err);
        } else {
            // Add the results to the page
            var list = $j(Config.Selectors.list).empty();
            $j.each(records, function() {
                var newLink = $j('<a>'+this.get('FirstName')+' '+this.get('LastName')+'</a>');
                newLink.appendTo(list).wrap('<li></li>');
            });

            $j.mobile.hidePageLoadingMsg();
            list.listview('refresh');
        }
    });
}
在 此示例调用匿名函数并将其传递为 回调。回调函数检查错误,然后使用 jQuery 循环访问结果记录数组,并将它们添加到页面中。一些细节 省略以专注于回调结构。请参阅使用远程的示例 带有 jQuery Mobile 的对象,用于获取完整的页面源代码。
public with sharing class RemoteObjectContactOverride {

    @RemoteAction
    public static Map<String, Object> create(String type, Map<String, Object> fields) {
        System.debug(LoggingLevel.INFO, 'Before calling create on: ' + type);

        // Invoke the standard create action
        // For when you want mostly-normal behavior, with a little something different
        Map<String, Object> result = RemoteObjectController.create(type, fields);

        System.debug(LoggingLevel.INFO, 'After calling create on: ' + type);
        System.debug(LoggingLevel.INFO, 'Result: ' + result);

        // Here's the little something different, adding extra data to the result
        Map<String, Object> customResult =
            new Map<String, Object> {'custom' => 'my custom data' };
        customResult.putAll(result);

        return customResult;
    }
}
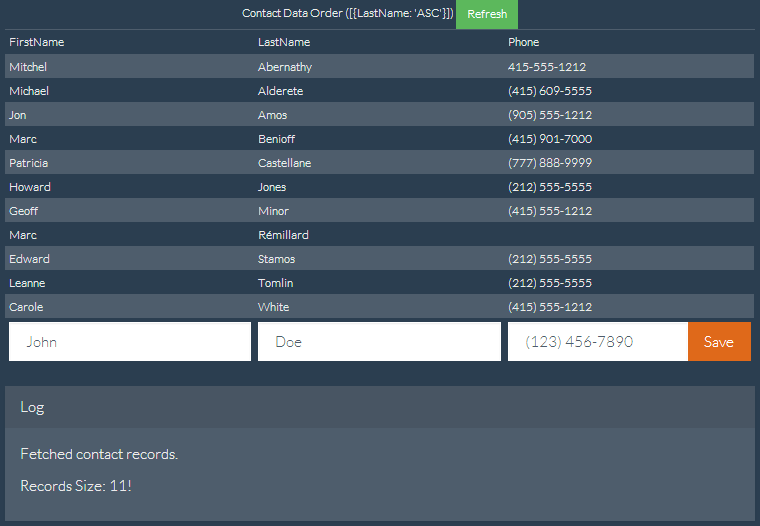
此示例使用 Salesforce Mobile Pack 中的 jQuery Mobile,并且基于 在移动随附的示例代码上 打包用于 jQuery。远程 对象和 jQuery Mobile 可以很容易地为 电话。
具有远程对象和 jQuery Mobile 的简单联系人编辑器
<apex:page docType="html-5.0" showHeader="false" sidebar="false">
<!-- Include jQuery and jQuery Mobile from the Mobile Pack -->
<apex:stylesheet value="{!URLFOR($Resource.MobilePack_jQuery,
'jquery.mobile-1.3.0.min.css')}"/>
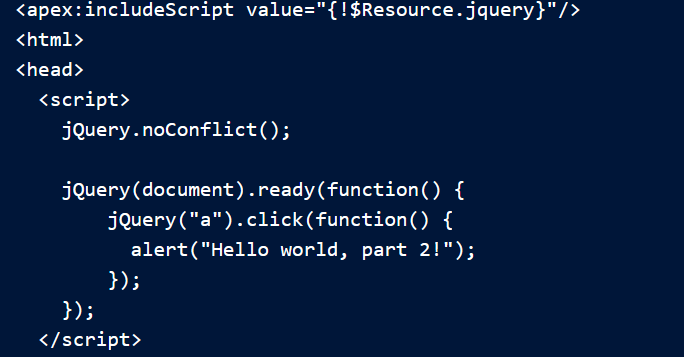
<apex:includeScript value="{!URLFOR($Resource.MobilePack_jQuery,
'jquery-1.9.1.min.js')}"/>
<apex:includeScript value="{!URLFOR($Resource.MobilePack_jQuery,
'jquery.mobile-1.3.0.min.js')}"/>
<!-- Remote Objects declaration -->
<apex:remoteObjects jsNamespace="RemoteObjectModel">
<apex:remoteObjectModel name="Contact" fields="Id,FirstName,LastName,Phone">
<!-- Notes is a custom field added to the Contact object -->
<apex:remoteObjectField name="Notes__c" jsShorthand="Notes"/>
</apex:remoteObjectModel>
</apex:remoteObjects>
<head>
<title>Contacts</title>
<meta name="viewport"
content="width=device-width, initial-scale=1.0, maximum-scale=1.0, user-scalable=no" />
<script type="text/javascript">
var $j = jQuery.noConflict();
// Config object with commonly used data
// This keeps some hard-coded HTML IDs out of the code
var Config = {
Selectors: {
list: '#cList',
detailFields: "#fName #lName #phone #notes #error #contactId".split(" ")
},
Data: {
contact: 'contact'
}
};
// Get all contacts, and display them in a list
function getAllContacts() {
$j.mobile.showPageLoadingMsg();
var c = new RemoteObjectModel.Contact();
// Use the 'limit' operator to increase the default limit of 20
c.retrieve({ limit: 100 }, function (err, records) {
// Handle any errors
if (err) {
displayError(err);
} else {
// Empty the current list
var list = $j(Config.Selectors.list).empty();
// Now add results records to list
$j.each(records, function() {
var newLink = $j('<a></a>', {
text: this.get('FirstName') + ' ' + this.get('LastName')
});
newLink.data(Config.Data.contact, this.get('Id'));
newLink.appendTo(list).wrap('<li></li>');
});
$j.mobile.hidePageLoadingMsg();
list.listview('refresh');
}
});
}
// Handle the Save button that appears on both
// the Edit Contact and New Contact pages
function addUpdateContact(e){
e.preventDefault();
var record = new RemoteObjectModel.Contact({
FirstName: $j('#fName').val(),
LastName: $j('#lName').val(),
Phone: $j('#phone').val(),
Notes: $j('#notes').val()
// Note use of shortcut 'Notes' in place of Notes__c
});
var cId = $j('#contactId').val();
if( !cId ) { // new record
record.create(updateCallback);
} else { // update existing
record.set('Id', cId);
record.update(updateCallback);
}
}
// Handle the delete button
function deleteContact(e){
e.preventDefault();
var ct = new RemoteObjectModel.Contact();
ct.del($j('#contactId').val(), updateCallback);
}
// Callback to handle DML Remote Objects calls
function updateCallback(err, ids){
if (err) {
displayError(err);
} else {
// Reload the contacts with current list
getAllContacts();
$j.mobile.changePage('#listpage', {changeHash: true});
}
}
// Utility function to log and display any errors
function displayError(e){
console && console.log(e);
$j('#error').html(e.message);
}
// Attach functions to the buttons that trigger them
function regBtnClickHandlers() {
$j('#add').click(function(e) {
e.preventDefault();
$j.mobile.showPageLoadingMsg();
// empty all the clic handlers
$j.each(Config.Selectors.detailFields, function(i, field) {
$j(field).val('');
});
$j.mobile.changePage('#detailpage', {changeHash: true});
$j.mobile.hidePageLoadingMsg();
});
$j('#save').click(function(e) {
addUpdateContact(e);
});
$j('#delete').click(function(e) {
deleteContact(e);
});
}
// Shows the contact detail view,
// including filling in form fields with current data
function showDetailView(contact) {
$j('#contactId').val(contact.get('Id'));
$j('#fName').val(contact.get('FirstName'));
$j('#lName').val(contact.get('LastName'));
$j('#phone').val(contact.get('Phone'));
$j('#notes').val(contact.get('Notes'));
$j('#error').html('');
$j.mobile.changePage('#detailpage', {changeHash: true});
}
// Register click handler for list view clicks
// Note: One click handler handles the whole list
function regListViewClickHandler() {
$j(Config.Selectors.list).on('click', 'li', function(e) {
// show loading message
$j.mobile.showPageLoadingMsg();
// get the contact data for item clicked
var id = $j(e.target).data(Config.Data.contact);
// retrieve latest details for this contact
var c = new RemoteObjectModel.Contact();
c.retrieve({
where: { Id: { eq: id } }
}, function(err, records) {
if(err) {
displayError(err);
} else {
showDetailView(records[0]);
}
// hide the loading message in either case
$j.mobile.hidePageLoadingMsg();
});
});
}
// And, finally, run the page
$j(document).ready(function() {
regBtnClickHandlers();
regListViewClickHandler();
getAllContacts();
});
</script>
</head>
<!-- HTML and jQuery Mobile markup for the list and detail screens -->
<body>
<!-- This div is the list "page" -->
<div data-role="page" data-theme="b" id="listpage">
<div data-role="header" data-position="fixed">
<h2>Contacts</h2>
<a href='#' id="add" class='ui-btn-right' data-icon='add'
data-theme="b">Add</a>
</div>
<div data-role="content" id="contactList">
<ul id="cList" data-filter="true" data-inset="true"
data-role="listview" data-theme="c" data-dividertheme="b">
</ul>
</div>
</div>
<!-- This div is the detail "page" -->
<div data-role="page" data-theme="b" id="detailpage">
<div data-role="header" data-position="fixed">
<a href='#listpage' id="back2ContactList" class='ui-btn-left'
data-icon='arrow-l' data-direction="reverse"
data-transition="flip">Back</a>
<h1>Contact Details</h1>
</div>
<div data-role="content">
<div data-role="fieldcontain">
<label for="fName">First Name:</label>
<input name="fName" id="fName" />
</div>
<div data-role="fieldcontain">
<label for="lName">Last Name:</label>
<input name="lName" id="lName" />
</div>
<div data-role="fieldcontain">
<label for="phone">Phone:</label>
<input name="phone" id="phone"/>
</div>
<div data-role="fieldcontain">
<label for="notes">Notes:</label>
<textarea name="notes" id="notes"/>
</div>
<h2 style="color:red" id="error"></h2>
<input type="hidden" id="contactId" />
<button id="save" data-role="button" data-icon="check"
data-inline="true" data-theme="b" class="save">Save</button>
<button id="delete" data-role="button" data-icon="delete"
data-inline="true" class="destroy">Delete</button>
</div>
</div>
</body>
</apex:page>
除了用于将 Visualforce 组件绑定在一起外,此 ID 还用于构成文档的一部分 呈现页面时组件的对象模型 (DOM) ID。
要在 JavaScript 或其他支持 Web 的语言中引用 Visualforce 组件,您必须 为该组件的属性指定一个值。DOM ID 由组合构成 的属性 组件和属性 包含该元素的所有组件。ididid
组件访问示例
以下示例将 DOM ID 用于标记。该页面包含两个面板:第一个面板 持有一个触发 DOM 事件的复选框,第二个复选框包含一些文本 为响应事件而更改。<apex:outputPanel>
页面顶部包括 JavaScript 包含在 HTML 标记中。它将触发事件的元素作为参数 () 和包含要影响文本的目标面板的 DOM ID()。<script>inputtextid
<apex:page id="thePage">
    <!-- A simple function for changing the font. -->
    <script>
        function changeFont(input, textid) {
            if(input.checked) {
                document.getElementById(textid).style.fontWeight = "bold";
            }
            else {
                document.getElementById(textid).style.fontWeight = "normal";
            }
        }
    </script>

    <!-- This outputPanel calls the function, passing in the
         checkbox itself, and the DOM ID of the target component. -->
    <apex:outputPanel layout="block">
        <label for="checkbox">Click this box to change text font:</label>
        <input id="checkbox" type="checkbox"
            onclick="changeFont(this,'{!$Component.thePanel}');"/>
    </apex:outputPanel>

    <!-- This outputPanel is the target, and contains
         text that will be changed. -->
    <apex:outputPanel id="thePanel" layout="block">
        Change my font weight!
    </apex:outputPanel>
</apex:page>
该表达式用于获取 组件生成的 HTML 元素的 DOM ID。{!$Component.thePanel}<apex:outputPanel id=”thePanel”>
<script type="text/javascript">

    Visualforce.remoting.timeout = 120000; // Set timeout at page level

    function getRemoteAccount() {
        var accountName = document.getElementById('acctSearch').value;

        // This remoting call will use the page's timeout value
        Visualforce.remoting.Manager.invokeAction(
            '{!$RemoteAction.AccountRemoter.getAccount}',
            accountName,
            handleResult
        );
    }

    function handleResult(result, event) { ... }
</script>
global with sharing class ChildRemoteController
    extends ParentRemoteController { }
global virtual with sharing class ParentRemoteController
    extends GrandparentRemoteController { }

global virtual with sharing class GrandparentRemoteController {
    @RemoteAction
    global static String sayHello(String helloTo) {
        return 'Hello ' + helloTo + ' from the Grandparent.';
    }
}
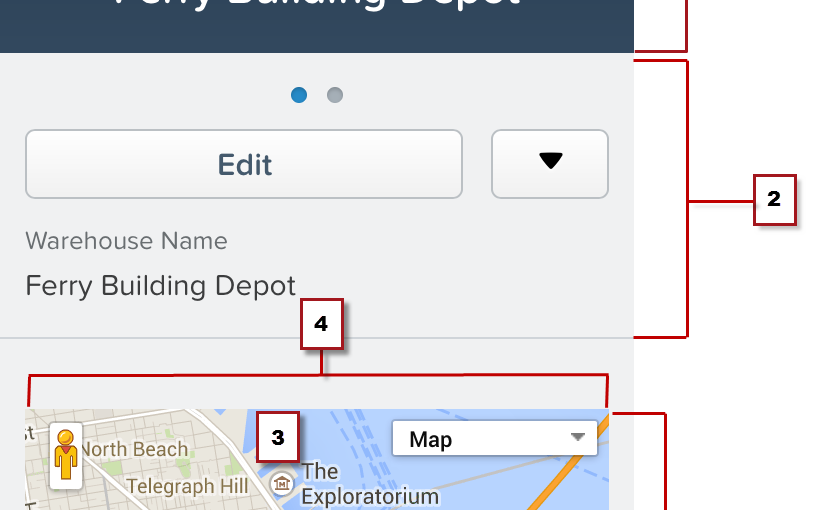
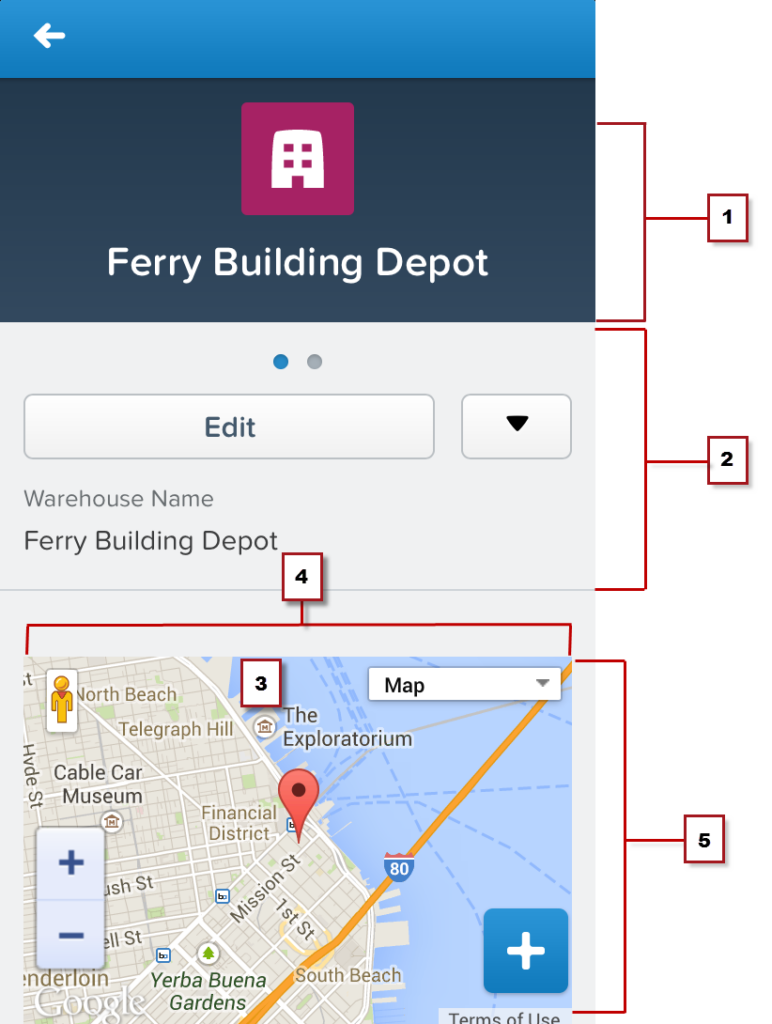
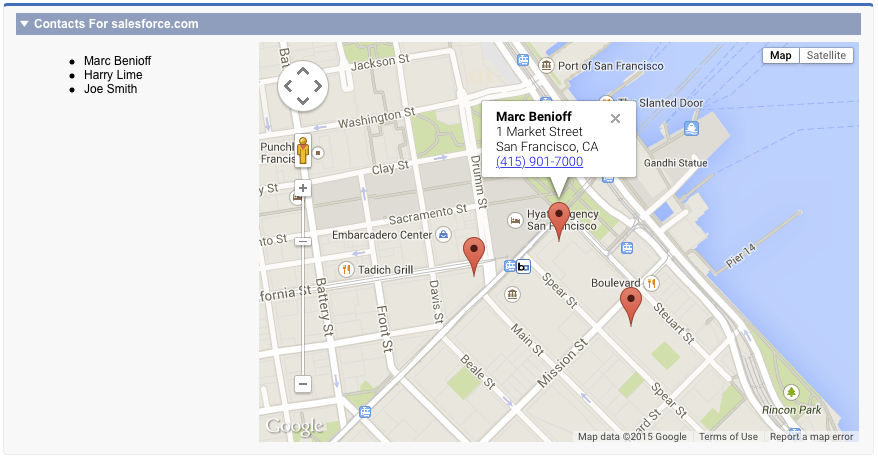
function setupMarker(){

    // Use JavaScript nav function to determine if we are
    // in the Salesforce mobile app and set navigation link appropriately
    var warehouseNavUrl =
        'sforce.one.navigateToSObject(\'' + warehouse.Id + '\')';

    // Wrap the warehouse details with the link to
    // navigate to the warehouse details
    var warehouseDetails =
        '<a href="javascript:' + warehouseNavUrl + '">' +
        warehouse.Name + '</a><br/>' +
        warehouse.Street_Address__c + '<br/>' +
        warehouse.City__c + '<br/>' +
        warehouse.Phone__c;

    // Create a panel that will appear when a marker is clicked
    var infowindow = new google.maps.InfoWindow({
        content: warehouseDetails
    });

    // ...
}
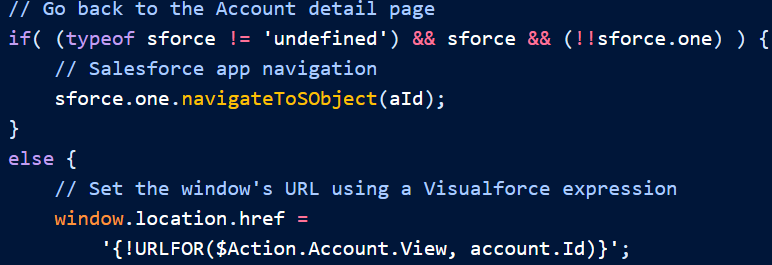
这 第一行构建一个字符串 ,当用作 JavaScript URL,导航到仓库的详细信息页面。链接已创建 ,并显示在单击标记时显示的信息面板(放在字符串中)。 单击仓库名称将带您进入该仓库的详细信息页面(省略 函数代码的一部分涉及 Google Maps API 调用以创建标记和 将其添加到地图中)。
warehouseNavUrlwarehouseDetails如果您有在 Salesforce 移动应用程序中运行的 JavaScript 代码或 HTML 标记, 请记住以下注意事项:
默认情况下,使用与 请求的 Visualforce 页面的 API 版本。例如,如果 Visualforce 页面 API 版本为 30.0,该页面上默认使用的 JavaScript 使用 API 版本 30.0 的 。sforce.onesforce.onesforce.one
这意味着,当 Visualforce 页面更新到新的 API 版本时,该页面 自动使用 的更新版本。在前面的示例中,如果该 Visualforce 页面已更新 到 API 版本 31.0,则使用 API 版本 31.0 的应用功能。sforce.onesforce.onesforce.one如果新 API 版本中的更新行为导致页面功能出现兼容性问题,则 有三个选项来纠正问题。
<script src="/sforce/one/30.0/api.js"></script>
<script>
    function MyApp(sfone) {
        this.createAccount = function() {
            sfone.navigateToURL("/001/e");
        };
    }

    var app = null;

    sforce.one.getVersion("30.0", function(sfoneV30) {
        app = new MyApp(sfoneV30);
    });

    // Events handling function
    // Can't be fired until app is defined
    function btnCreateAccount() {
        app.createAccount();
    }
</script>
与创建移动页面的其他两种方法不同,远程处理 + HTML 方法不使用标准控制器功能从中检索数据 并将数据保存到 Salesforce。相反,您可以创建控制器扩展或自定义 控制器,用于添加任何方法 您的页面需要。下面是一个简化的控制器扩展,支持 以上 页。
@RemoteAction
global with sharing class WarehouseEditor {

    // Stub controller
    // We're only using RemoteActions, so this never runs
    public WarehouseEditor(ApexPages.StandardController ctl){ }

    @RemoteAction
    global static Warehouse__c getWarehouse(String warehouseId) {

        // Clean up the Id parameter, in case there are spaces
        warehouseId = warehouseId.trim();

        // Simple SOQL query to get the warehouse data we need
        Warehouse__c wh = [
            SELECT Id, Name, Street_Address__c, City__c, Phone__c
            FROM Warehouse__c
            WHERE Id = :warehouseId];

        return(wh);
    }

    @RemoteAction
    global static Boolean setWarehouse(
        String whId, String street, String city, String phone) {

        // Get the warehouse record for the Id
        Warehouse__c wh = WarehouseEditor.getWarehouse(whId);

        // Update fields
        // Note that we're not validating / sanitizing, for simplicity
        wh.Street_Address__c = street.trim();
        wh.City__c = city.trim();
        wh.Phone__c = phone.trim();

        // Save the updated record
        // This should be wrapped in an exception handler
        update wh;

        return true;
    }
}
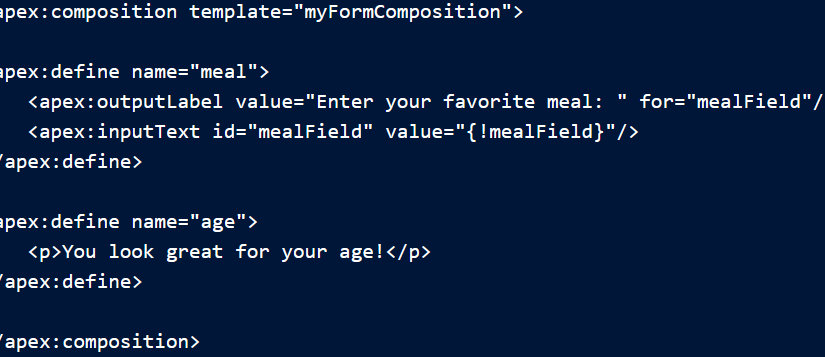
<apex:page controller="compositionExample">
    <apex:messages/>
    <apex:composition template="myFormComposition">

    <apex:define name="meal">
        <apex:outputLabel value="Enter your favorite meal: " for="mealField"/>
        <apex:inputText id="mealField" value="{!mealField}"/>
    </apex:define>

    <apex:define name="age">
        <p>You look great for your age!</p>
    </apex:define>

    </apex:composition>

    <apex:outputText id="greeting" rendered="{!showGreeting}" value="Hello {!nameField}.
    Would you like some delicious {!mealField}?"/>
</apex:page>
public class ModemTroubleShootingCustomSimple {

    // You don't need to explicitly instantiate the Flow object;
    // the class constructor is invoked automatically

    public Flow.Interview.ModemTroubleShooting myflow { get; set; }
    public String casePriority;
    public String getCasePriority() {
        // Access flow variables as simple member variables with get/set methods
        if(myflow == null) return 'High';
        else return myflow.vaCasePriority;
    }
}
public class SampleController {

   //Instance of the flow
   public Flow.Interview.Flow_Template_Gallery myFlow {get; set;}

   public String getBreadCrumb() {
      String aBreadCrumb;
      if (myFlow==null) { return 'Home';}
      else aBreadCrumb = (String) myFlow.getVariableValue('vaBreadCrumb');

      return(aBreadCrumb==null ? 'Home': aBreadCrumb);

   }
}
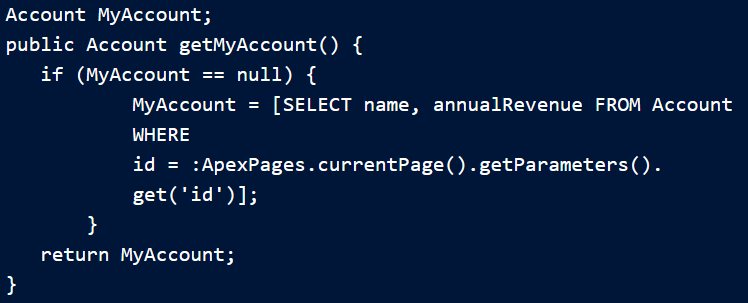
public class MyCustomController {
    public Account apexVar {get; set;}

    public MyCustomController() {
        apexVar = [
            SELECT Id, Name FROM Account
            WHERE Name = 'Acme' LIMIT 1];
    }
}
此示例使用 Apex 将记录集合变量 myAccount 设置为 Name 为 的每条记录的 Id 和 Name 字段值。Acme
public class MyCustomController {
    public Account[] myAccount {
        get {
            return [
                SELECT Id, Name FROM account
                WHERE Name = 'Acme'
                ORDER BY Id
            ] ;
        }
        set {
            myAccount = value;
        }
    }
    public MyCustomController () {
    }
}
public class MyCustomController {
    public Flow.Interview.TestFlow myflow { get; set; }

     public MyCustomController() {
        Map<String, Object> myMap = new Map<String, Object>();
        myMap.put('accVar', [SELECT Id FROM Account
                             WHERE Name = 'Acme' LIMIT 1]);
        myflow = new Flow.Interview.ModemTroubleShooting(myMap);
    }
}
public class MyCustomController {
    public Flow.Interview.TestFlow myflow { get; set; }

     public MyCustomController() {
        Map<String, List<Object>> myMap = new Map<String, List<Object>>();
        myMap.put('accVar', new Account(name = 'Acme'));
        myflow = new Flow.Interview.ModemTroubleShooting(myMap);
    }
}
public class FlowController {
    public Flow.Interview.flowname myflow { get; set; }
    public Case apexCaseVar;
    public Case getApexCaseVar() {
        return myflow.caseVar;
    }
}
public class MyCustomController {
   public Flow.Interview.flowname myflow { get; set; }
}
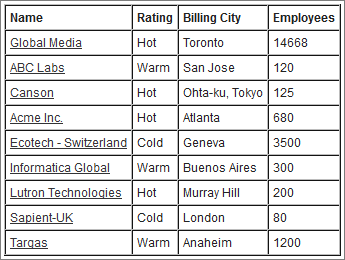
<apex:page controller="MyCustomController" tabStyle="Account">
   <flow:interview name="flowname" interview="{!myflow}" reRender="nameSection" />
    <!-- The data table iterates over the variable set in the "value" attribute and
         sets that variable to the value for the "var" attribute, so that instead of
         referencing {!myflow.collectionVariable} in each column, you can simply refer
         to "account".-->
    <apex:dataTable value="{!myflow.collectionVariable}" var="account"
        rowClasses="odd,even" border="1" cellpadding="4" id="nameSection">
        <!-- Add a column for each value that you want to display.-->
        <apex:column >
            <apex:facet name="header">Name</apex:facet>
            <apex:outputlink value="/{!account['Id']}">
                {!account['Name']}
            </apex:outputlink>
        </apex:column>
        <apex:column >
            <apex:facet name="header">Rating</apex:facet>
            <apex:outputText value="{!account['Rating']}"/>
        </apex:column>
        <apex:column >
            <apex:facet name="header">Billing City</apex:facet>
            <apex:outputText value="{!account['BillingCity']}"/>
        </apex:column>
        <apex:column >
            <apex:facet name="header">Employees</apex:facet>
            <apex:outputText value="{!account['NumberOfEmployees']}"/>
        </apex:column>
    </apex:dataTable>
</apex:page>
public class MyControllerExtension_SurveyCustomers {

    // Empty constructor, to allow use as a controller extension
    public MyControllerExtension_SurveyCustomers(
        ApexPages.StandardController stdController) { }

    // Flow support methods
    public String getInterviews() { return null; }

    public String showList { get; set; }

    public String getPausedId() {
        String currentUser = UserInfo.getUserId();
        List<FlowInterview> interviews =
            [SELECT Id FROM FlowInterview WHERE CreatedById = :currentUser AND InterviewLabel LIKE '%Survey Customers%'];

        if (interviews == null || interviews.isEmpty()) {
            return null; // early out
        }

        // Return the ID for the first interview in the list
        return interviews.get(0).Id;
    }
}
public class myFlowController {

    public PageReference getPageA() {
        return new PageReference('/300');
    }

    public String getPageB() {
        return '/300';
    }

    public String getPageC() {
        return '/apex/my_finish_page';
    }
}
下面是一个 Visualforce 示例 引用控制器并将流完成行为设置为第一个的页面 选择。
<apex:page controller="myFlowController">
    <h1>Congratulations!</h1> This is your new page.
    <flow:interview name="flowname" finishLocation="{!pageA}"/>
</apex:page>
<apex:page >
   <html>
      <head>
         <apex:includeLightning />
      </head>
      <body class="slds-scope">
         <div id="flowContainer" />
         <script>
            var statusChange = function (event) {
               if(event.getParam("status") === "FINISHED") {
                  // Control what happens when the interview finishes

                  var outputVariables = event.getParam("outputVariables");
                  var key;
                  for(key in outputVariables) {
                     if(outputVariables[key].name === "myOutput") {
                        // Do something with an output variable
                     }
                  }
               }
            };
            $Lightning.use("c:lightningOutApp", function() {
               // Create the flow component and set the onstatuschange attribute
               $Lightning.createComponent("lightning:flow", {"onstatuschange":statusChange},
                  "flowContainer",
                  function (component) {
                     // Set the input variables
                     var inputVariables = [
                        {
                           name : 'myInput',
                           type : 'String',
                           value : "Hello, world"
                        }
                     ];

                     // Start an interview in the flowContainer div, and
                     // initializes the input variables.
                     component.startFlow("myFlowName", inputVariables);
                  }
               );
            });
         </script>
      </body>
   </html>
</apex:page>
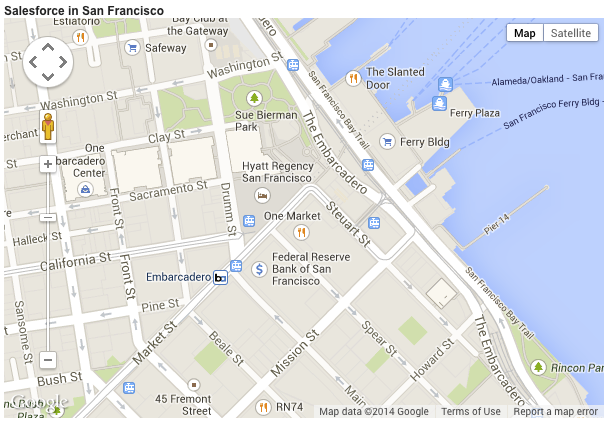
<apex:page >

    <h1>Salesforce in San Francisco</h1>

    <!-- Display the address on a map -->
    <apex:map width="600px" height="400px" mapType="roadmap" zoomLevel="16"
        center="One Market Street, San Francisco, CA">
    </apex:map>

</apex:page>
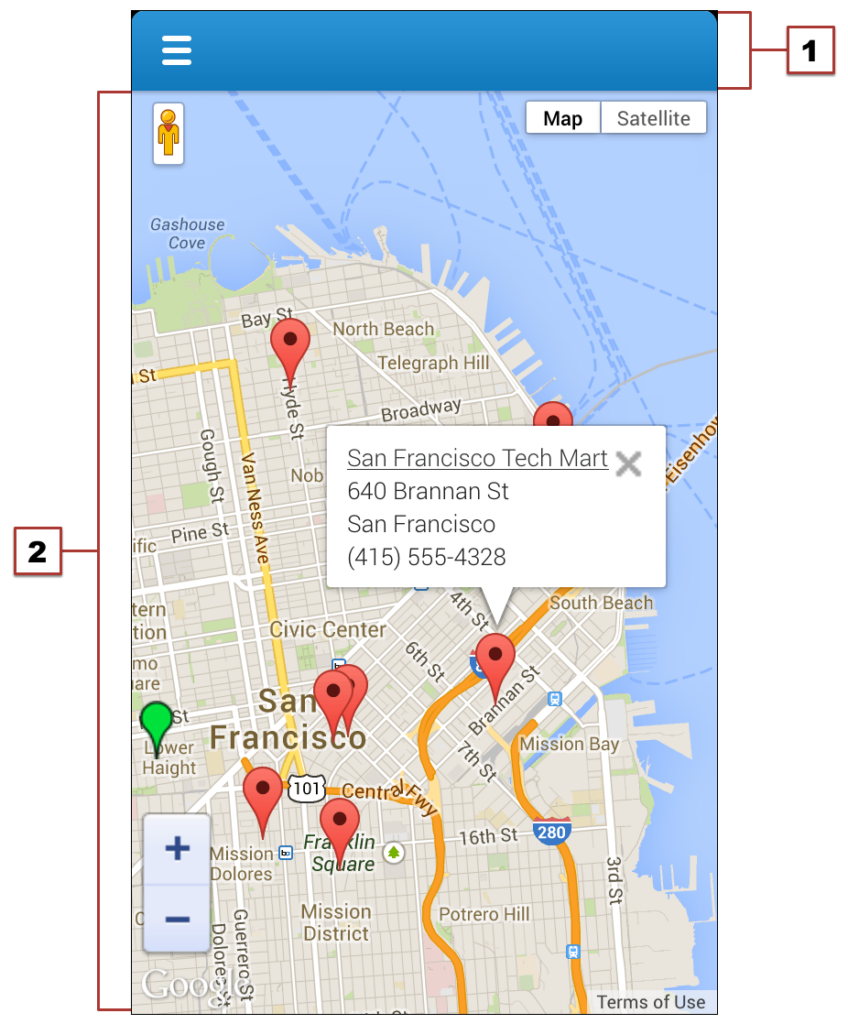
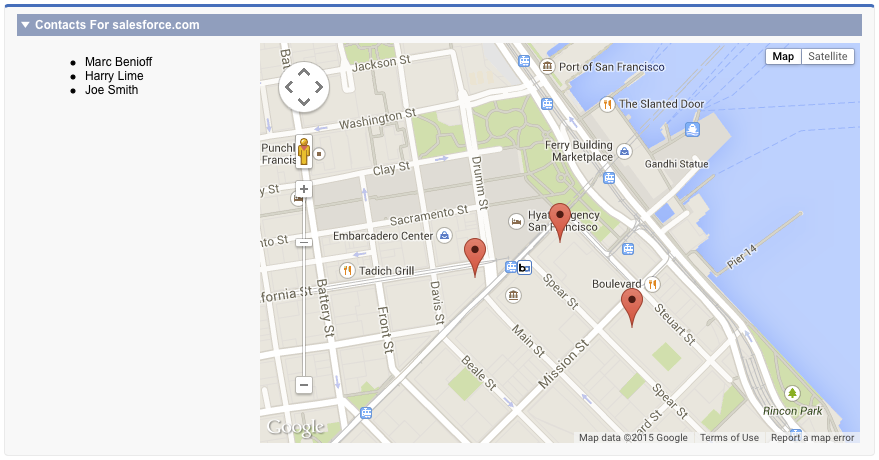
<apex:page controller="FindNearbyController" docType="html-5.0" >

    <!-- JavaScript to get the user's current location, and pre-fill
         the currentPosition form field. -->
    <script type="text/javascript">
        // Get location, fill in search field
    	function setUserLocation() {
            if (navigator.geolocation) {
                navigator.geolocation.getCurrentPosition(function(loc){
                    var latlon = loc.coords.latitude + "," + loc.coords.longitude;
                    var el = document.querySelector("input.currentPosition");
                    el.value = latlon;
                });
            }
        }
        // Only set the user location once the page is ready
    	var readyStateCheckInterval = setInterval(function() {
    		if (document.readyState === "interactive") {
        		clearInterval(readyStateCheckInterval);
        		setUserLocation();
    		}
		}, 10);
    </script>

    <apex:pageBlock >
        <!-- Form field to send currentPosition in request. You can make it
             an <apex:inputHidden> field to hide it. -->
        <apex:pageBlockSection >
            <apex:form >
                <apex:outputLabel for="currentPosition">Find Nearby</apex:outputLabel>
                <apex:input size="30"
                     html-placeholder="Attempting to obtain your position..."
                     id="currentPosition" styleClass="currentPosition"
                     value="{!currentPosition}" />
                <apex:commandButton action="{!findNearby}" value="Go!"/>
            </apex:form>
        </apex:pageBlockSection>

        <!-- Map of the results -->
        <apex:pageBlockSection rendered="{!resultsAvailable}" title="Locations">
            <apex:map width="600px" height="400px">
                <apex:repeat value="{!locations}" var="pos">
                    <apex:mapMarker position="{!pos}"/>
                </apex:repeat>
            </apex:map>
        </apex:pageBlockSection>

    </apex:pageBlock>

</apex:page>

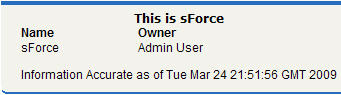
 这是 Visualforce 页面,其中包含 大胆。