使用Lightning Web组件构建Bear-tracking应用程序 – 与整个应用程序中的组件进行通信

更新Bear List组件

公园护林员对您有最后要求。他们希望在过滤熊名单时在地图上找到熊。您必须创建一个熊图组件并修改熊列表,以便将事件发送到地图。让我们从更新熊列表开始。

  1. 编辑bearList.js文件。
  2. 在下面添加以下代码import { NavigationMixin } from 'lightning/navigation';
    import { publish, MessageContext } from 'lightning/messageService';
    import BEAR_LIST_UPDATE_MESSAGE from '@salesforce/messageChannel/BearListUpdate__c';

    首次导入从Lightning Messaging Service(LMS)带来实用程序 。此服务使您可以通过Lightning消息通道跨Lightning页面中的兄弟组件发布消息。
    第二个导入是从GitHub检索的基础项目中包含的Lightning消息通道。

  3. 替换这两行…
    @wire(searchBears, {searchTerm: '$searchTerm'})
    bears;

    …具有以下代码:

    bears;
    @wire(MessageContext) messageContext;
    @wire(searchBears, {searchTerm: '$searchTerm'})
    loadBears(result) {
      this.bears = result;
      if (result.data) {
        const message = {
          bears: result.data
        };
        publish(this.messageContext, BEAR_LIST_UPDATE_MESSAGE, message);
      }
    }

    代码重点:

    • 我们检索闪电消息上下文并将其存储在messageContext属性中。
    • 我们使用有线功能捕获传入的熊名单数据,并BearListUpdate__c使用熊记录列表触发自定义Ligthning消息。
    • 我们将searchTerm动态参数传递给有线searchBears适配器,以便每次searchTerm更改时loadBears都会重新执行,并使用新的搜索结果触发一条新消息。
    • 我们使用publish从LMS导入的功能来触发BearListUpdate__c带有清单的Ligthning消息。

创建Bear Map组件

  1. 在VS Code中,右键单击lwc文件夹,然后单击SFDX:Create Lightning Web Component
  2. 命名组件bearMap
  3. 编辑bearMap.js-meta.xml文件,并替换<isExposed>false</isExposed>为这些行。
    <isExposed>true</isExposed>
    <targets>
    	<target>lightning__AppPage</target>
    	<target>lightning__RecordPage</target>
    	<target>lightning__HomePage</target>
    </targets>

    这使您的组件可以放置在任何类型的页面上。

  4. 将以下内容替换为bearMap.html
    <template>
    	<article class="slds-card">
    		<lightning-map
    			map-markers={mapMarkers}
    			zoom-level="11"
    			markers-title="Bears">
    		</lightning-map>
    	</article>
    </template>

    代码重点:

    • 我们显示一个包含地图的卡组件。
    • 该地图显示mapMarkers数组中的项目。
  5. 将以下内容替换为bearMap.js
    import { LightningElement, wire } from 'lwc';
    import { subscribe, unsubscribe, MessageContext } from 'lightning/messageService';
    import BEAR_LIST_UPDATE_MESSAGE from '@salesforce/messageChannel/BearListUpdate__c';
    export default class BearMap extends LightningElement {
      mapMarkers = [];
      subscription = null;
      @wire(MessageContext)
      messageContext;
      connectedCallback() {
        // Subscribe to BearListUpdate__c message
        this.subscription = subscribe(
            this.messageContext,
            BEAR_LIST_UPDATE_MESSAGE,
            (message) => {
                this.handleBearListUpdate(message);
            });
      }
      disconnectedCallback() {
        // Unsubscribe from BearListUpdate__c message
        unsubscribe(this.subscription);
        this.subscription = null;
      }
      handleBearListUpdate(message) {
        this.mapMarkers = message.bears.map(bear => {
          const Latitude = bear.Location__Latitude__s;
          const Longitude = bear.Location__Longitude__s;
          return {
            location: { Latitude, Longitude },
            title: bear.Name,
            description: `Coords: ${Latitude}, ${Longitude}`,
            icon: 'utility:animal_and_nature'
          };
        });
      }
    }

    代码重点:

    • 我们实现了两个组件生命周期挂钩函数:connectedCallbackdisconnectedCallback。组件加载和卸载时会自动调用它们。我们使用这两个功能来订阅和取消订阅我们的自定义BearListUpdate__c闪电消息。
    • 一旦收到BearListUpdate__c消息,该handleBearListUpdate函数就会被调用,并带有当前已过滤的熊记录列表。handleBearListUpdate构建一个地图标记列表,该列表将传递给该mapMarkers属性,然后显示在我们的地图组件上。
  6. 将更新的代码部署到组织。右键单击默认文件夹,然后单击SFDX:将源部署到组织

将Bear Map组件添加到App主页

让我们将新组件添加到应用程序主页。

  1. 在您的组织中,从App Launcher( 应用启动器)中找到并选择Ursus Park。
  2. 单击设置( 安装装置),然后选择编辑页面
  3. 在“自定义组件”下,找到您的bearMap组件并将其拖动到页面的右上角。
  4. 单击“保存返回”以返回主页,并在过滤熊名单时检查地图是否会自动更新。

熊图显示已过滤的熊记录

项目总结

这是一个包装。现在,由于您的努力,公园护林员可以轻松追踪熊。

在整个项目中,您已经使用了Lightning Web Components的所有核心概念:数据绑定,表达式,条件渲染,命令式和有线Apex,组件组成以及组件间事件。

通过Lightning Web Components构建自己的灵活应用程序,从而充分利用这些知识。祝您编码愉快!

使用Lightning Web组件构建Bear-tracking应用程序 – 创建一个子组件并与之交互

创建一个子组件并与之交互

在前面的步骤中,我们的代码库有所增加。现在,花一点时间将我们的清单列表组件重构为几个较小的组件。我们将把熊牌的代码移到一个新的组件中。

创建Bear Tile组件

  1. 在VS Code中,右键单击该lwc文件夹,然后单击SFDX:Create Lightning Web Component
  2. 命名组件bearTile
  3. 打开bearList.html并剪切<!-- Start bear tile -->和之间的所有代码<!-- End bear tile -->
  4. 将代码粘贴到的template标签中bearTile.html。完成后,bearTile.html应如下所示。
    <template>
    	<lightning-card title={bear.Name} class="bear-tile">
    		<div class="slds-var-p-horizontal_small bear-tile-body">
    			<div class="slds-media">
    				<div class="slds-media__figure">
    					<img src={appResources.bearSilhouette} alt="Bear profile" class="bear-silhouette"/>
    				</div>
    				<div class="slds-media__body">
    					<p class="slds-var-m-bottom_xx-small">{bear.Sex__c}</p>
    					<p class="slds-var-m-bottom_xx-small">{bear.Age__c} years old</p>
    					<p class="slds-var-m-bottom_xx-small">{bear.Height__c} cm</p>
    					<p class="slds-var-m-bottom_xx-small">{bear.Weight__c} Kg</p>
    				</div>
    			</div>
    		</div>
    	</lightning-card>
    </template>
  5. 将以下内容替换为bearTile.js
    import { LightningElement, api } from 'lwc';
    import ursusResources from '@salesforce/resourceUrl/ursus_park';
    export default class BearTile extends LightningElement {
    	@api bear;
    	appResources = {
    		bearSilhouette: `${ursusResources}/img/standing-bear-silhouette.png`,
    	};
    }

    我们添加了一个bear装饰有的属性@api。这会将bear属性公开给任何父组件。

  6. 删除bearList.css
  7. bearTile.cssbearTile目录中创建一个新文件,并将以下代码粘贴到该文件中。
    .bear-tile {
      border: 1px solid #d2955d;
      background-color: #fae8d2;
      border-radius: .25rem;
      display: block;
    }
    .bear-silhouette {
      height: 100px;
    }
    .bear-tile-body {
      background: linear-gradient(180deg, rgba(255,255,255,1) 80%, #fae8d2 100%);
    }
  8. 打开bearList.html并更换<!-- Start bear tile --><!-- End bear tile -->与评论<c-bear-tile bear={bear}></c-bear-tile>。一旦完成,bearList.html 应该看起来像这样。
    <template>
    	<lightning-card title="Bears" icon-name="utility:animal_and_nature">
    		<div class="slds-card__body_inner">
    			<!-- Start bear list -->
    			<template if:true={bears.data}>
    				<lightning-input type="search"
    					onchange={handleSearchTermChange}
    					variant="label-hidden"
    					class="slds-var-m-bottom_small"
    					label="Search"
    					placeholder="Search for bears"
    					value={searchTerm}>
    				</lightning-input>
    				<lightning-layout multiple-rows="true" pull-to-boundary="small">
    					<template for:each={bears.data} for:item="bear">
    						<lightning-layout-item key={bear.Id} size="3" class="slds-var-p-around_x-small">
    							<c-bear-tile bear={bear}></c-bear-tile>
    						</lightning-layout-item>
    					</template>
    				</lightning-layout>
    				<!-- No bears found -->
    				<template if:false={hasResults}>
    					<div class="slds-align_absolute-center slds-var-m-vertical_small">
    						This is beary disturbing, we did not find results...
    					</div>
    				</template>
    			</template>
    			<!-- End bear list -->
    			<!-- Data failed to load -->
    			<template if:true={bears.error}>
    				<div class="slds-text-color_error">
    					An error occurred while loading the bear list
    				</div>
    			</template>
    		</div>
    	</lightning-card>
    </template>

    bear将使用我们在前面的步骤中定义的属性引用我们的Bear Tile组件。请注意,我们的组件文件夹和文件已命名bearTile,但我们添加的标签是c-bear-tile。开头c代表默认名称空间,在名称空间后附加小写字母,并用破折号分隔以前的大写字母。

  9. 将更新的代码部署到组织中并测试您的新列表组件。细微的渐变看起来应该更好。

Ursus Park主页上具有自定义样式的熊列表

与Bear List组件进行交互

游骑兵要求能够快速查看熊记录并对其进行编辑,而不必离开主页。让我们单击熊形图块,然后打开一个可编辑的熊形记录表格。

  1. 编辑bearTile.html以下代码并将其添加到<lightning-card title={bear.Name} class="bear-tile">标签之后。
    <div slot="actions">
    	<lightning-button-icon
    		icon-name="utility:search"
    		icon-class="bear-tile-button"
    		variant="bare"
    		alternative-text="Open record"
    		onclick={handleOpenRecordClick}>
    	</lightning-button-icon>
    </div>

    我们添加了一个触发该handleOpenRecordClick功能的编辑按钮。使用actions插槽将按钮放置在闪电卡上。插槽是父组件传递到组件主体的标记的占位符。

  2. bearTile.js在最后一个括号之前编辑并添加以下功能。
    handleOpenRecordClick() {
    	const selectEvent = new CustomEvent('bearview', {
    		detail: this.bear.Id
    	});
    	this.dispatchEvent(selectEvent);
    }

    代码重点:

    • handleOpenRecordClick当用户单击熊图块的打开记录按钮时,将调用该函数。
    • 该函数创建并触发一个bearview包含熊记录ID的自定义事件。
  3. 编辑属性bearList.html并将其添加onbearview={handleBearView}c-bear-tile标签。这使我们能够捕获bearview由tile组件触发的事件。该事件在handleBearView函数中处理。
    <c-bear-tile bear={bear} onbearview={handleBearView}></c-bear-tile>
  4. 将以下内容替换为bearList.js
    import { NavigationMixin } from 'lightning/navigation';
    import { LightningElement, wire } from 'lwc';
    /** BearController.searchBears(searchTerm) Apex method */
    import searchBears from '@salesforce/apex/BearController.searchBears';
    export default class BearList extends NavigationMixin(LightningElement) {
    	searchTerm = '';
    	@wire(searchBears, {searchTerm: '$searchTerm'})
    	bears;
    	handleSearchTermChange(event) {
    		// Debouncing this method: do not update the reactive property as
    		// long as this function is being called within a delay of 300 ms.
    		// This is to avoid a very large number of Apex method calls.
    		window.clearTimeout(this.delayTimeout);
    		const searchTerm = event.target.value;
    		// eslint-disable-next-line @lwc/lwc/no-async-operation
    		this.delayTimeout = setTimeout(() => {
    			this.searchTerm = searchTerm;
    		}, 300);
    	}
    	get hasResults() {
    		return (this.bears.data.length > 0);
    	}
    	handleBearView(event) {
    		// Get bear record id from bearview event
    		const bearId = event.detail;
    		// Navigate to bear record page
    		this[NavigationMixin.Navigate]({
    			type: 'standard__recordPage',
    			attributes: {
    				recordId: bearId,
    				objectApiName: 'Bear__c',
    				actionName: 'view',
    			},
    		});
    	}
    }

    代码重点:

    • 我们导入一个导航mixin,它捆绑了处理导航的实用程序功能。使用mixin,我们可以在不扩展类的情况下向其添加功能。当一个类已经扩展了一个父类(一个类只能扩展一个父类)时,这很有用。
    • 我们的课程将导航混入扩展到了LightningElement基础类。
    • 我们bearviewhandleBearView函数中处理事件。我们从事件详细信息中提取熊记录ID,并使用导航mixin导航到熊记录页面。
  5. 将更新的代码部署到组织中,并测试您是否可以使用图块上的按钮图标导航到熊记录。

这就是步骤。我们已经将组件重构为两个较小的组件:Bear列表和Bear Tile。我们探索了如何使用@api装饰器从父列表组件与子磁贴组件进行通信。我们还看到了如何通过自定义事件从孩子与父母进行交流。

在下一步中,我们将在Lightning页面中了解如何与其他组件进行交互。

使用Lightning Web组件构建Bear-tracking应用程序 – 处理记录清单

创建熊列表组件

公园护林员希望直接从其主页上看到熊的目录。您的任务是实施该清单。

  1. 在VS Code中,右键单击该lwc文件夹,然后单击SFDX:Create Lightning Web Component
  2. 命名组件bearList
  3. 编辑bearList.js-meta.xml文件,并替换<isExposed>false</isExposed>为这些行。
    <isExposed>true</isExposed>
    <targets>
    	<target>lightning__AppPage</target>
    	<target>lightning__RecordPage</target>
    	<target>lightning__HomePage</target>
    </targets>

    这使您的组件可以放置在Lightning App Builder中的任何类型的页面上。

  4. 将以下内容替换为bearList.html
    <template>
    	<lightning-card title="Bears" icon-name="utility:animal_and_nature">
    		<div class="slds-card__body_inner">
    			<!-- Start bear list -->
    			<template if:true={bears}>
    				<lightning-layout multiple-rows="true" pull-to-boundary="small">
    					<template for:each={bears} for:item="bear">
    						<lightning-layout-item key={bear.Id} size="3" class="slds-var-p-around_x-small">
    							<!-- Start bear tile -->
    							<lightning-card title={bear.Name} class="bear-tile">
    								<div class="slds-var-p-horizontal_small bear-tile-body">
    									<div class="slds-media">
    										<div class="slds-media__figure">
    											<img src={appResources.bearSilhouette} alt="Bear profile" class="bear-silhouette"/>
    										</div>
    										<div class="slds-media__body">
    											<p class="slds-var-m-bottom_xx-small">{bear.Sex__c}</p>
    											<p class="slds-var-m-bottom_xx-small">{bear.Age__c} years old</p>
    											<p class="slds-var-m-bottom_xx-small">{bear.Height__c} cm</p>
    											<p class="slds-var-m-bottom_xx-small">{bear.Weight__c} Kg</p>
    										</div>
    									</div>
    								</div>
    							</lightning-card>
    							<!-- End bear tile -->
    						</lightning-layout-item>
    					</template>
    				</lightning-layout>
    			</template>
    			<!-- End bear list -->
    			<!-- Data failed to load -->
    			<template if:true={error}>
    				<div class="slds-text-color_error">
    					An error occurred while loading the bear list
    				</div>
    			</template>
    		</div>
    	</lightning-card>
    </template>

    代码重点:

    • template带有for:eachfor:item指令的标记用于遍历bears记录。每个迭代项都传递给bear属性。
    • 模板的每次迭代均标记有特殊key属性。key在迭代的上下文中必须具有唯一值。那就是我们组件中的熊id。
  5. 将以下内容替换为bearList.js
    import { LightningElement } from 'lwc';
    import ursusResources from '@salesforce/resourceUrl/ursus_park';
    /** BearController.getAllBears() Apex method */
    import getAllBears from '@salesforce/apex/BearController.getAllBears';
    export default class BearList extends LightningElement {
    	bears;
    	error;
    	appResources = {
    		bearSilhouette: `${ursusResources}/img/standing-bear-silhouette.png`,
    	};
    	connectedCallback() {
    		this.loadBears();
    	}
    	loadBears() {
    		getAllBears()
    			.then(result => {
    				this.bears = result;
    			})
    			.catch(error => {
    				this.error = error;
    			});
    	}
    }

    代码重点:

    • 我们导入ursusResources适配器,这使我们能够访问与我们的应用程序关联的静态资源。我们使用此适配器来构建一个appResources对象,该对象在模板中公开熊剪影图像URL。
    • 我们导入getAllBears适配器,这使我们可以与BearController.getAllBears()Apex方法进行交互。该BearController班是您在这个项目开始部署的代码捆绑在一起。该getAllBears方法返回获取所有熊记录的查询结果。
    • 我们实现了该connectedCallback功能,该功能允许我们在组件加载后执行代码。我们使用此函数来调用该loadBears函数。
    • loadBears函数调用getAllBears适配器。适配器调用我们的Apex代码并返回JS promise。我们使用promise将返回的数据保存在bears属性中或报告错误。使用这种方法检索数据称为命令式Apex。
  6. bearList.cssbearList目录中创建一个新文件,并将以下代码粘贴到该文件中。
    .bear-tile {
    		border: 1px solid #d2955d;
    		border-radius: .25rem;
    		display: block;
    }
    .bear-silhouette {
    		height: 100px;
    }

    这些CSS规则为熊卡添加边框,并设置熊剪影图像的高度。

  7. 将更新的代码部署到组织。右键单击默认文件夹,然后单击SFDX:将源部署到组织

将Bear List组件添加到App主页

让我们将新组件添加到应用程序主页。

  1. 在您的组织中,从App Launcher( 应用启动器)中找到并选择Ursus Park。
  2. 单击设置( 安装装置),然后选择编辑页面
  3. 在“自定义组件”下,找到您的bearList组件并将其拖动到页面的左上方。
  4. 单击保存,然后单击返回以返回主页并检查您的工作。

Ursus Park主页上的熊名单

使用有线Apex

现在,我们将探索一种检索熊市名单的新方法。我们将使用有线Apex代替命令式Apex。

  1. 编辑bearList.html并替换<template if:true={bears}><template if:true={bears.data}>
  2. 替换<template for:each={bears} for:item="bear"><template for:each={bears.data} for:item="bear">
  3. 替换<template if:true={error}><template if:true={bears.error}>。在这一点上,除了命令性Apex之外,模板几乎是相同的。现在,我们通过调用bears.data 而不是just来访问空头列表bears,并且现在使用bears.error而不是just来检索错误error
  4. 将以下内容替换为bearList.js
    import { LightningElement, wire } from 'lwc';
    import ursusResources from '@salesforce/resourceUrl/ursus_park';
    /** BearController.getAllBears() Apex method */
    import getAllBears from '@salesforce/apex/BearController.getAllBears';
    export default class BearList extends LightningElement {
    	@wire(getAllBears) bears;
    	appResources = {
    		bearSilhouette: `${ursusResources}/img/standing-bear-silhouette.png`,
    	};
    }

    通过bears使用有线Apex装饰属性,我们大大简化了JS代码。现在,我们需要的所有数据都通过以下一行:@wire(getAllBears) bears;

  5. 将更新的代码部署到组织中,并观察其行为与命令式Apex相同。

在您的Apex呼叫中传递参数

乌尔苏斯公园(Ursus Park)的居民人数正在上升。游骑兵希望能够过滤熊名单以快速找到它们。让我们在熊列表中添加一个搜索栏来帮助他们。

  1. 编辑bearList.html以下代码并将其添加到<template if:true={bears.data}>标签之后。
    <lightning-input type="search"
    	onchange={handleSearchTermChange}
    	variant="label-hidden"
    	class="slds-var-m-bottom_small"
    	label="Search"
    	placeholder="Search for bears"
    	value={searchTerm}>
    </lightning-input>

    这将添加一个搜索输入字段。当其值更改时,我们调用该handleSearchTermChange函数。

  2. </lightning-layout>结束标记后添加以下代码。
    <!-- No bears found -->
    <template if:false={hasResults}>
    	<div class="slds-align_absolute-center slds-var-m-vertical_small">
    		This is beary disturbing, we did not find results...
    	</div>
    </template>

    这会添加一条消息,指示未找到结果。仅当hasResults表达式为false时才会显示此消息。

  3. 将以下内容替换为bearList.js
    import { LightningElement, wire } from 'lwc';
    import ursusResources from '@salesforce/resourceUrl/ursus_park';
    /** BearController.searchBears(searchTerm) Apex method */
    import searchBears from '@salesforce/apex/BearController.searchBears';
    export default class BearList extends LightningElement {
    	searchTerm = '';
    	@wire(searchBears, {searchTerm: '$searchTerm'})
    	bears;
    	appResources = {
    		bearSilhouette: `${ursusResources}/img/standing-bear-silhouette.png`,
    	};
    	handleSearchTermChange(event) {
    		// Debouncing this method: do not update the reactive property as
    		// long as this function is being called within a delay of 300 ms.
    		// This is to avoid a very large number of Apex method calls.
    		window.clearTimeout(this.delayTimeout);
    		const searchTerm = event.target.value;
    		// eslint-disable-next-line @lwc/lwc/no-async-operation
    		this.delayTimeout = setTimeout(() => {
    			this.searchTerm = searchTerm;
    		}, 300);
    	}
    	get hasResults() {
    		return (this.bears.data.length > 0);
    	}
    }

    代码重点:

    • 我们添加了searchTerm反应性属性,并将其作为有线Apex调用的参数传递给searchBears
    • handleSearchTermChange功能用于对搜索输入字段的值的变化做出反应。更新searchTerm反应性时,我们有目的地引入了300毫秒的延迟。如果有更新待处理,我们将取消它,并在300毫秒内重新安排一个新的更新。当用户键入字母以形成单词时,此延迟会减少Apex呼叫的次数。每个新字母都会触发对的呼叫,handleSearchTermChange但理想情况下,searchBears 只有在用户完成输入后才被调用一次。这种技术称为反跳。
    • 我们公开该hasResults表达式以检查搜索是否返回了熊。
  4. 将更新后的代码部署到组织中,并检查搜索是否成功,无论结果如何。

Ursus Park主页上的已过滤熊列表

这就是步骤。我们已经了解了如何使用命令式Apex然后使用有线Apex处理记录列表,并且学习了如何在Apex调用中传递参数。在此过程中,我们组件的代码已显着增长,因此现在让我们将其分为子组件以使其易于维护。

使用Lightning Web组件构建Bear-tracking应用程序 – 处理单个记录

你会做什么

熊熊游乐园管理员需要您的帮助来追踪在公园里游荡的熊。他们已经在Salesforce中输入了一些信息,但是他们需要您为他们提供定制的应用程序体验。

创建Bear位置组件

  1. 在VS Code中,右键单击该lwc文件夹,然后单击SFDX:Create Lightning Web Component
  2. 命名组件bearLocation
  3. 编辑bearLocation.js-meta.xml文件,并替换<isExposed>false</isExposed>为这些行。
    <isExposed>true</isExposed>
    <targets>
    	<target>lightning__RecordPage</target>
    </targets>
    <targetConfigs>
    	<targetConfig targets="lightning__RecordPage">
    		<objects>
    			<object>Bear__c</object>
    		</objects>
    	</targetConfig>
    </targetConfigs>

    这样可以确保您的组件只能放置在Bear记录页面上。

  4. 将内容替换为bearLocation.html以下标记。
    <template>
    	<lightning-card title={cardTitle} icon-name="standard:address">
    		<lightning-map map-markers={mapMarkers} zoom-level="12"></lightning-map>
    	</lightning-card>
    </template>

    代码重点:

    • 我们根据cardTitle表达式显示带有动态标题的卡片组件。
    • 该卡包含一个地图组件,其标记由定义mapMarkers
  5. 用以下内容替换的内容bearLocation.js
    import { LightningElement, api, wire } from 'lwc';
    import { getRecord, getFieldValue } from 'lightning/uiRecordApi';
    // Set Bear object fields
    const NAME_FIELD = 'Bear__c.Name';
    const LOCATION_LATITUDE_FIELD = 'Bear__c.Location__Latitude__s';
    const LOCATION_LONGITUDE_FIELD = 'Bear__c.Location__Longitude__s';
    const bearFields = [
    	NAME_FIELD,
    	LOCATION_LATITUDE_FIELD,
    	LOCATION_LONGITUDE_FIELD
    ];
    export default class BearLocation extends LightningElement {
      @api recordId;
      name;
      mapMarkers = [];
      @wire(getRecord, { recordId: '$recordId', fields: bearFields })
      loadBear({ error, data }) {
        if (error) {
          // TODO: handle error
        } else if (data) {
          // Get Bear data
          this.name =  getFieldValue(data, NAME_FIELD);
          const Latitude = getFieldValue(data, LOCATION_LATITUDE_FIELD);
          const Longitude = getFieldValue(data, LOCATION_LONGITUDE_FIELD);
          // Transform bear data into map markers
          this.mapMarkers = [{
            location: { Latitude, Longitude },
            title: this.name,
            description: `Coords: ${Latitude}, ${Longitude}`
          }];
        }
      }
      get cardTitle() {
        return (this.name) ? `${this.name}'s location` : 'Bear location';
      }
    }

    代码重点:

    • 我们导入了一个getRecord适配器,该适配器使我们能够使用Lightning Data Service检索记录而无需编写Apex。
    • 我们导入一个getFieldValue辅助函数来检索字段值。
    • 我们Bear__cbearFields常量中汇编来自对象的硬编码字段名称的列表。请注意,这种方法不支持参照完整性。在编译时无法检查对象和字段的存在。这意味着Bear__c即使在您的代码中使用了它,也可以删除它的任何字段。我们在下一个组件中使用另一种支持引用完整性的方法。
    • recordId装饰为的属性会@api自动接收当前记录ID。
    • 我们@wireloadBear函数上使用装饰器来获取数据和错误,然后将它们传递给函数。@wire配置为getRecord使用某些参数调用适配器功能。这些参数是记录ID和我们希望检索的记录字段列表。感谢@wire装饰器,loadBear当组件加载或记录id更改时,它会自动调用。
    • 在此组件的第一个版本中,我们不处理错误。我们暂时跳过。
    • 如果没有错误,我们将保存熊的名称并使用熊的坐标构建地图标记。
  6. 将更新的代码部署到组织。右键单击默认文件夹,然后单击SFDX:将源部署到组织

将Bear位置组件添加到Bear Record页面

现在我们已经实现了组件,让我们将其添加到页面中以对其进行查看。

  1. 在您的组织中,导航至Bears标签并打开任何记录。
  2. 单击设置( 安装装置),然后选择编辑页面
  3. 在“定制组件”下,找到您的bearLocation组件并将其拖到右侧列的顶部。
  4. 点击保存
  5. 由于这是我们第一次修改标准Bear记录页面,因此我们需要激活更新的页面,以便我们的用户可以看到我们所做的事情。点击激活
  6. 单击应用程序默认选项卡。
  7. 点击分配为应用默认值
  8. 检查Ursus公园
  9. 单击下一步,下一步,然后单击保存
  10. 单击上一步返回到Bear记录页面并检查您的工作。

熊记录页面上的熊位置组件

做得好!现在,我们可以在地图上看到熊。让我们继续自定义熊记录页面。

创建Bear Supervisor组件

公园护林员被分配来监督特定的熊。如果发现熊做了鲁doing的事情,公园员工必须能够迅速联系到熊的主管。您将在熊记录页面上添加熊主管卡来提供帮助。

  1. 在VS Code中,右键单击该lwc文件夹,然后单击SFDX:Create Lightning Web Component
  2. 命名组件bearSupervisor
  3. 编辑bearSupervisor.js-meta.xml文件,并替换<isExposed>false</isExposed>为这些行。
    <isExposed>true</isExposed>
    <targets>
    	<target>lightning__RecordPage</target>
    </targets>
    <targetConfigs>
    	<targetConfig targets="lightning__RecordPage">
    		<objects>
    			<object>Bear__c</object>
    		</objects>
    	</targetConfig>
    </targetConfigs>

    这使您的组件可以放置在Bear记录页面上。

  4. 将以下内容替换为bearSupervisor.html
    <template>
    	<lightning-card title="Supervisor" icon-name="standard:people">
    		<div class="slds-var-m-around_medium">
    			<!-- Show supervisor when bear is loaded -->
    			<template if:true={bear.data}>
    				<lightning-record-form
    					object-api-name="Contact"
    					record-id={supervisorId}
    					layout-type="Compact">
    				</lightning-record-form>
    			</template>
    			<!-- Data failed to load -->
    			<template if:true={bear.error}>
    				<div class="slds-text-color_error">
    					An error occurred while loading the bear record
    				</div>
    			</template>
    		</div>
    	</lightning-card>
    </template>

    代码重点:

    • if:true加载熊数据后,我们使用指令有条件地呈现主管。
    • 我们使用来显示主管(联系人)记录的紧凑视图lightning-record-form
    • 如果无法加载Bear记录if:true,则使用指令和error属性有条件地呈现错误消息。
  5. 将以下内容替换为bearSupervisor.js
    import { LightningElement, api, wire } from 'lwc';
    import { getRecord, getFieldValue } from 'lightning/uiRecordApi';
    // Import Bear object fields
    import SUPERVISOR_FIELD from '@salesforce/schema/Bear__c.Supervisor__c';
    const bearFields = [SUPERVISOR_FIELD];
    export default class BearSupervisor extends LightningElement {
    	@api recordId; // Bear Id
    	@wire(getRecord, { recordId: '$recordId', fields: bearFields })
      bear;
    	get supervisorId() {
    		return getFieldValue(this.bear.data, SUPERVISOR_FIELD);
    	}
    }

    代码重点:

    • 我们Bear__c.Supervisor__c通过模式导入来导入字段,而不是像以前在熊位置组件中那样使用硬编码字符串。这种方法的主要好处是可以确保引用完整性。
    • 我们使用@wire装饰器和getRecord适配器检索熊记录。
    • 我们公开一个supervisorId表达式。该表达式使用该getFieldValue函数来检索主管字段的值。
  6. 将更新的代码部署到组织。右键单击默认文件夹,然后单击SFDX:将源部署到组织

将Bear Supervisor组件添加到Bear Record页面

让我们将新组件添加到熊记录页面。

  1. 在您的组织中,通过单击“熊”选项卡并单击任何熊来导航到熊记录页面。在熊记录页面中,单击设置( 安装装置),然后选择编辑页面
  2. 在“定制组件”下,找到您的bearSupervisor组件并将其拖动到bearLocation组件下。
  3. 单击保存返回以返回到记录页面并检查您的工作。

熊记录页面上的熊主管组件

这就是步骤。我们已经看到了Lightning Web组件如何使用@wire适配器处理单个记录。现在让我们进入记录列表。

使用Lightning Web组件构建Bear-tracking应用程序 – 创建一个Hello World Lightning Web组件

学习目标

在此项目中,您将:

  • 构建一组简单的Lightning Web组件。
  • 从单个记录,然后从记录列表中检索并显示数据。
  • 将功能封装到子组件中。
  • 使用事件进行跨组件通信。

介绍

在这个项目中,您将通过创建一个让公园管理员跟踪熊的应用程序来尝试Lightning Web Components的基本概念。

Lightning Web Components是用于构建Lightning组件的新编程模型。它使用最新的Web标准,并且可以与原始的Aura编程模型互操作。

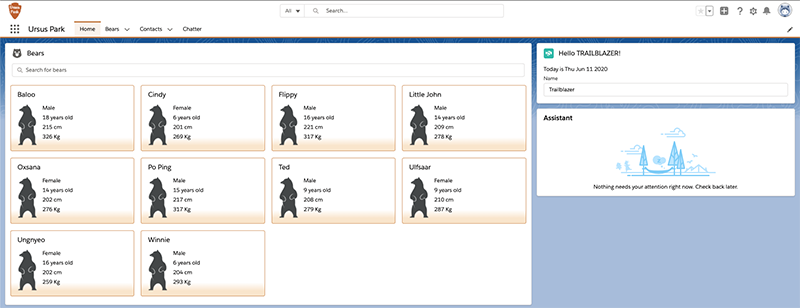
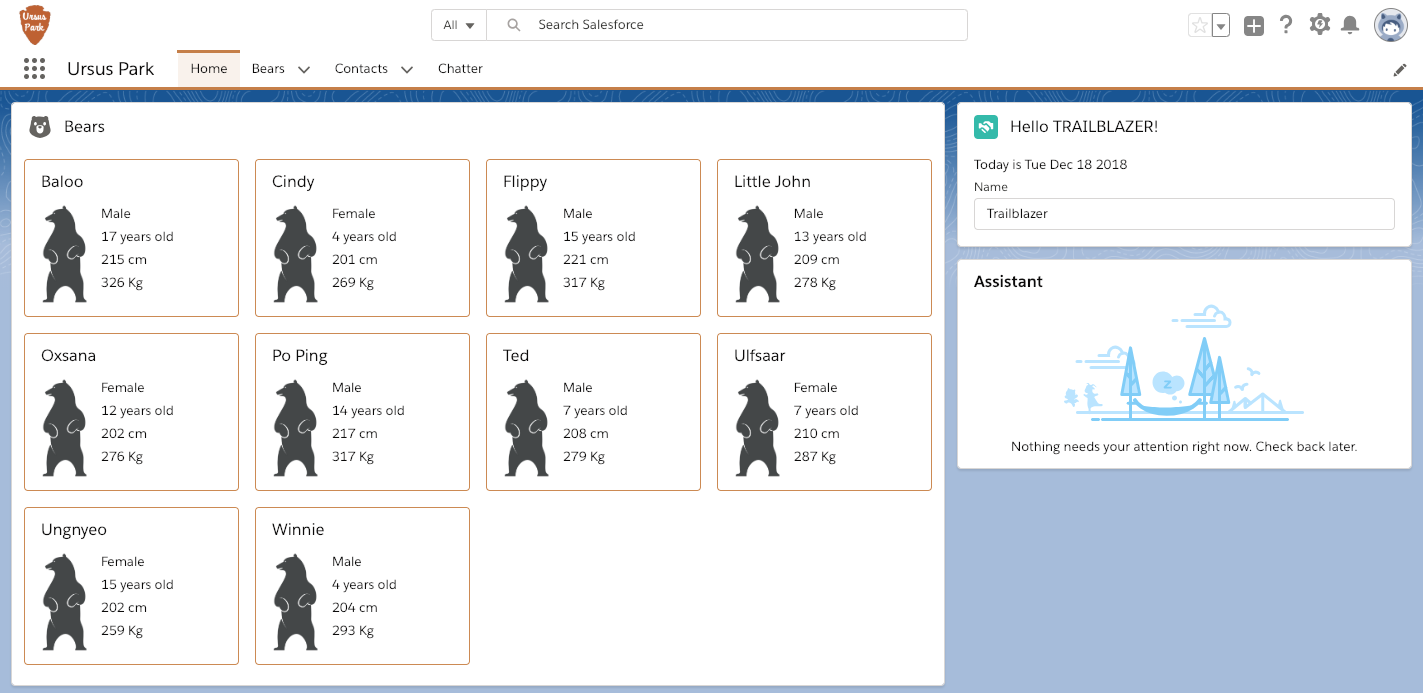
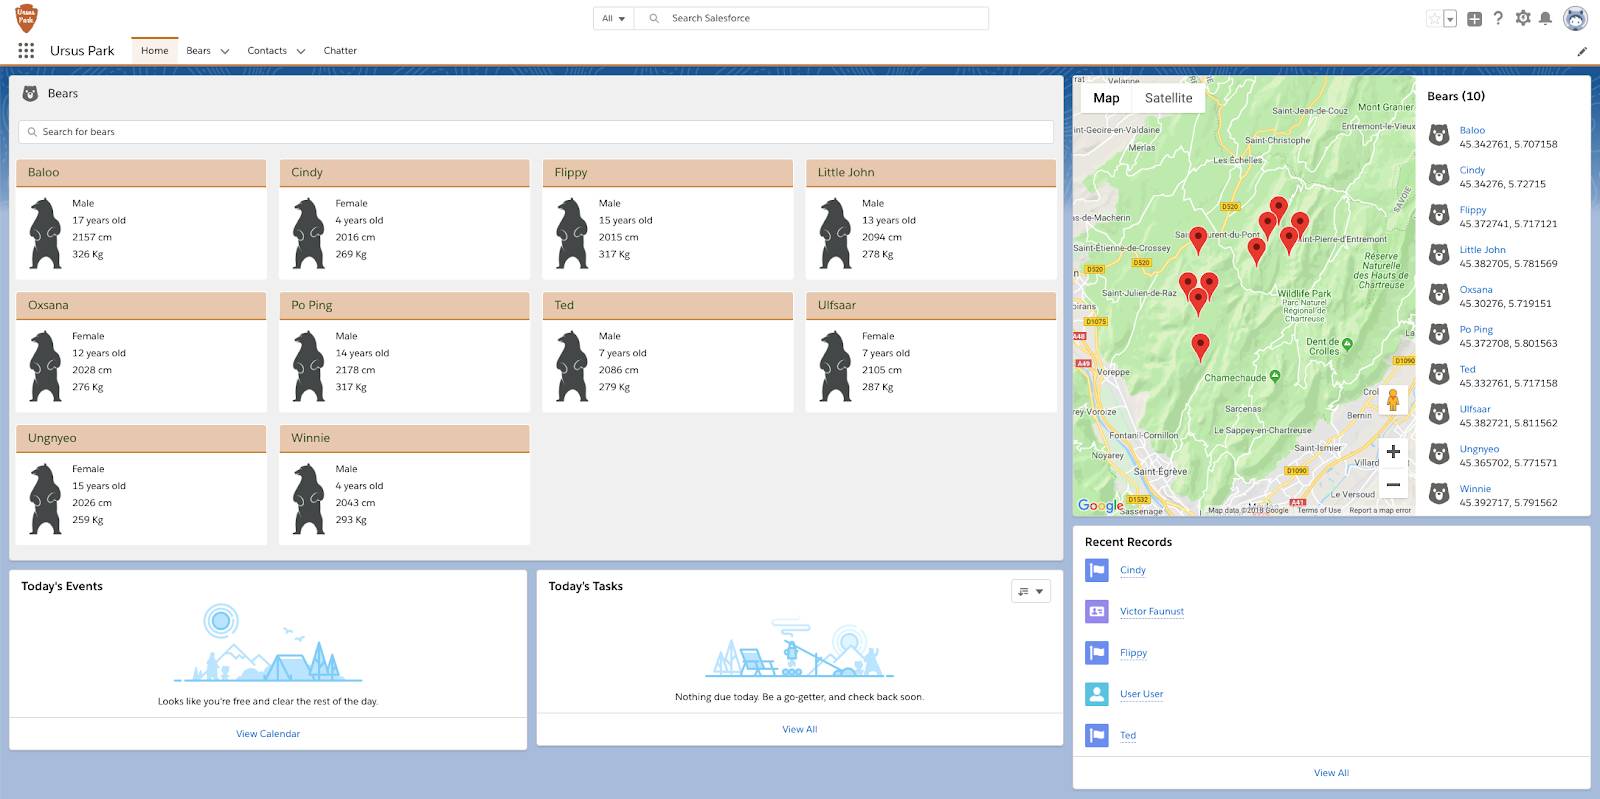
在此项目中,您为虚拟国家公园Ursus Park工作。您创建的应用程序允许护林员跟踪在公园中游荡的熊。

已完成的Ursus Park应用程序概述

注意

注意

在此项目中,我们针对Trailhead Playground组织进行开发。您还可以使用以下force:source:push命令针对临时组织开发Lightning Web组件。通过“使用Salesforce DX进行应用开发”模块了解有关源驱动开发的更多信息 。

在你开始之前

在进行此项目之前,请确保完成“快速入门:闪电Web组件”中的这些步骤 。如果您尚未完成快速入门中的步骤,则将无法完成该项目。

确保已安装VS Code和Salesforce CLI。

设置您的Trailhead游乐场

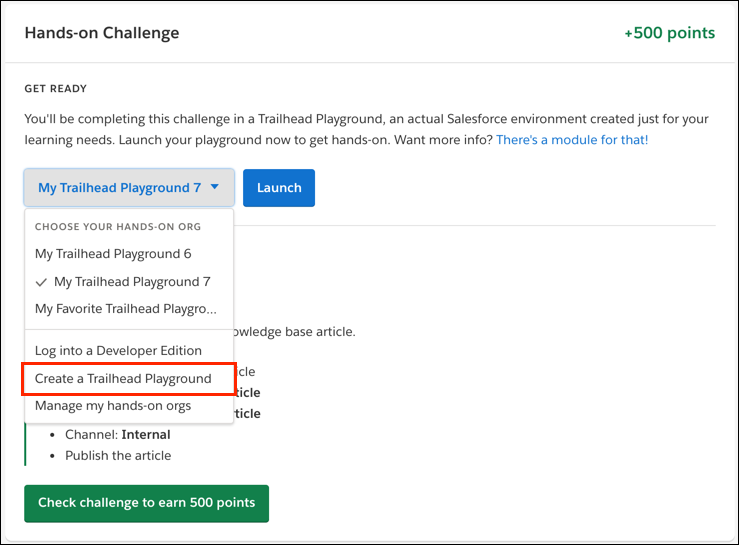
  1. 要创建新的Trailhead Playground,请点击此步骤末尾的下拉菜单,然后选择Create a Trailhead Playground在模块的动手练习中创建一个Trailrail游乐场下拉菜单。
  2. 拥有Trailhead游乐场后,单击“启动”。

如果您在组织中看到一个标签为“获取登录凭据”的标签,那就太好了!请按照以下步骤操作。 

如果不是,请打开App Launcher( 应用启动器),找到并选择Playground Starter,然后按照以下步骤操作。如果您没有看到Playground Starter应用程序,请在Trailhead帮助中签出 查找Trailhead Playground的用户名和密码

  1. 单击获取您的登录凭据选项卡,并记下您的用户名。
  2. 单击重置我的密码。这会将电子邮件发送到与您的用户名关联的地址。
  3. 单击电子邮件中的链接。
  4. 输入新密码,确认,然后单击更改密码

设置Ursus Park应用

  1. 打开命令提示符,例如Windows上的cmd或MacOS上的Terminal。
  2. 克隆Ursus Park应用程序git存储库。
    git clone https://github.com/trailheadapps/build-apps-with-lwc.git

    该存储库包含Ursus Park应用程序,具有一组字段,记录和页面布局的Bear对象以及用于检索熊记录和样本熊记录的Apex代码。该项目基础帮助我们专注于Lightning Web Component开发。请注意,VS Code集成了Git支持,您也可以直接从开放源代码站点(https://git-scm.com/)安装它。

  3. 导航到新的build-apps-with-lwc目录。
    cd build-apps-with-lwc
  4. 使用Salesforce CLI授权Trailhead Playground,使用bear-tracking别名保存它,并将当前用户设置为默认用户:
    sfdx auth:web:login -s -a bear-tracking
  5. 当带有Salesforce登录页面的浏览器窗口打开时,输入您的Trailhead Playground凭据。
  6. 将应用程序代码部署到组织中。
    sfdx force:source:deploy -p force-app/main/default
  7. 将Ursus Park用户权限集分配给当前用户。
    sfdx force:user:permset:assign -n Ursus_Park_User
  8. 导入样本数据。
    sfdx force:data:tree:import -p data/plan.json
  9. 在浏览器中打开组织。
    sfdx force:org:open
  10. 在应用启动器( 应用启动器)中,找到并选择Ursus Park。这将打开闪电应用程序。
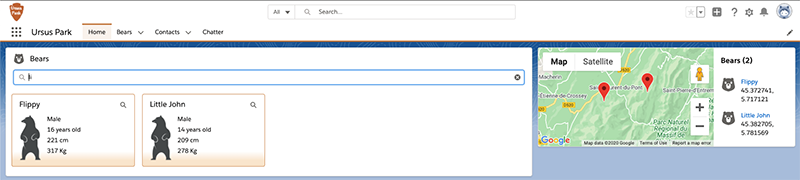
  11. 单击Bears选项卡,并确保已填充一些示例数据。

使用静态HTML创建Hello World Lightning Web组件

让我们创建第一个Lightning Web组件:一个简单的hello world组件。

  1. 打开VS Code。
  2. 通过单击文件>打开 文件夹并导航到该build-apps-with-lwc文件夹 ,添加刚从GitHub克隆的项目文件夹。
  3. 在边栏中,展开force-app/main/default文件夹。
  4. 在以下位置创建一个lwc文件夹force-app/main/default
  5. 右键单击该lwc文件夹,然后单击SFDX:创建Lightning Web组件并命名该组件helloWebComponent
    或者,您可以通过sfdx force:lightning:component:create --type lwc -n helloWebComponent -d force-app/main/default/lwc在命令提示符下运行来获得相同的结果。
  6. 将内容替换为helloWebComponent.html以下标记。
    <template>
    	<lightning-card title="Lightning Web Component" icon-name="custom:custom14">
    		<div class="slds-var-m-around_medium">
    			<h2>Hello World!</h2>
    		</div>
    	</lightning-card>
    </template>

    该标记使用静态文本定义了 卡片基础组件

  7. 编辑helloWebComponent.js-meta.xml文件,并替换<isExposed>false</isExposed>为这些行。
    <isExposed>true</isExposed>
    <targets>
    	<target>lightning__AppPage</target>
    	<target>lightning__RecordPage</target>
    	<target>lightning__HomePage</target>
    </targets>

    这些额外的行允许您将组件添加到Lightning App Builder中的任何类型的Lightning页面。

  8. 将更新的代码部署到组织。在VS Code中,右键单击默认文件夹,然后单击SFDX:将源部署到组织

将Hello World组件添加到页面

现在我们已经实现了组件,让我们将其添加到页面中以对其进行查看。

  1. 在浏览器中打开组织:
    sfdx force:org:open
  2. 在应用启动器( 应用启动器)中,找到并选择Ursus Park。这将打开应用程序主页。
  3. 单击齿轮图标( 安装装置 ),然后选择“编辑页面”
  4. 在“自定义组件”下,找到您的helloWebComponent组件并将其拖动到右侧列的顶部。
  5. 点击保存
  6. 由于这是我们第一次修改标准主页,因此我们需要激活更新的页面,以便我们的用户可以看到我们所做的事情。点击激活
  7. 单击应用程序默认选项卡。
  8. 单击分配给应用程序
  9. 检查Ursus公园
  10. 单击下一步,然后单击保存
  11. 单击上一步返回键返回到主页。

Ursus Park主页上的静态Lightning Web组件

恭喜你!您刚刚创建了第一个Lightning Web组件并将其添加到Lightning Experience中的页面。这个第一个版本并没有太大的作用,所以让我们将其转变为更具动态性的东西。

使用数据绑定

让我们向组件中添加一些数据。我们将使用单向数据绑定。我们首先显示只读数据,然后使其可编辑。

  1. 在“ VS代码”中,单击helloWebComponent.html以对其进行编辑。替换<h2>Hello World!</h2><h2>Hello {greeting}!</h2>。这将为greeting我们在下一步中定义的属性添加绑定。
  2. 编辑helloWebComponent.js其内容并替换为以下内容。
    import { LightningElement } from 'lwc';
    export default class HelloWebComponent extends LightningElement {
    	greeting = 'Trailblazer';
    }

    这将声明并初始化一个greeting属性。此属性是反应性的。换句话说,只要greeting更改值,组件的HTML模板就会自动刷新。

  3. 将更新的代码部署到组织。右键单击默认文件夹,然后单击SFDX:将源部署到组织
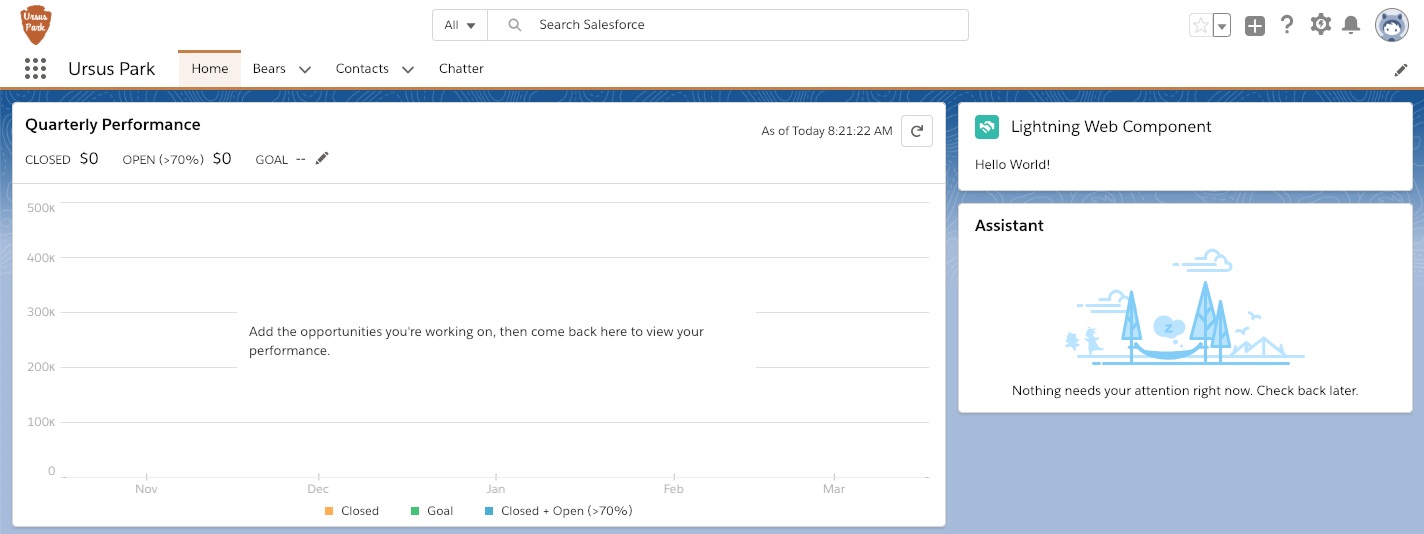
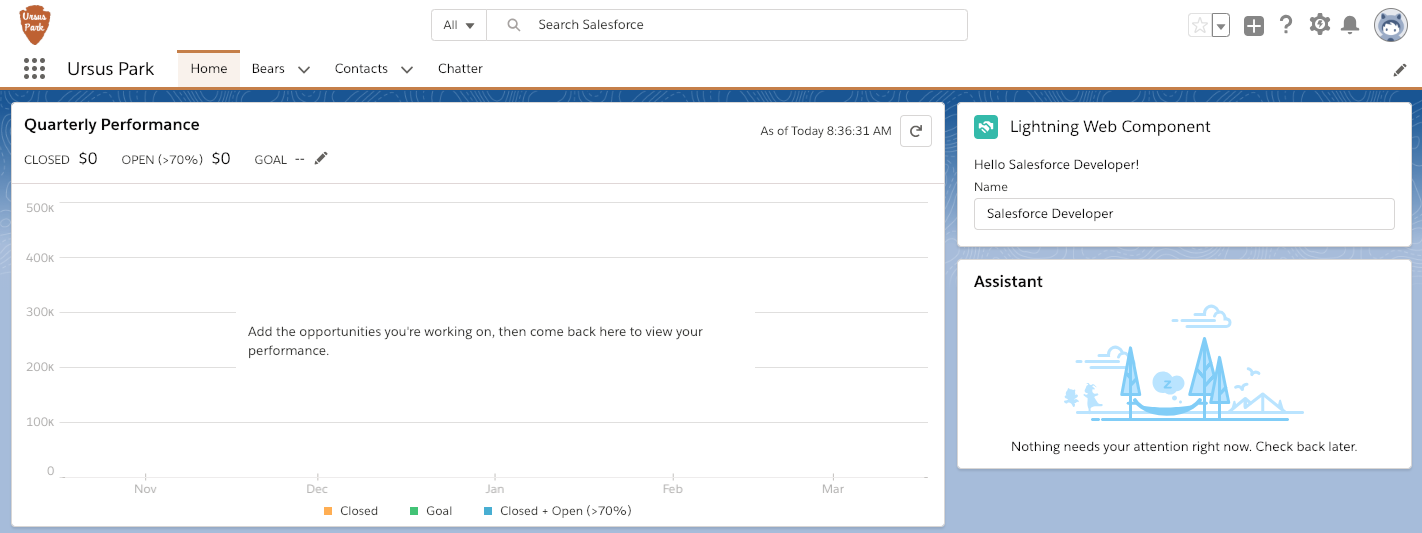
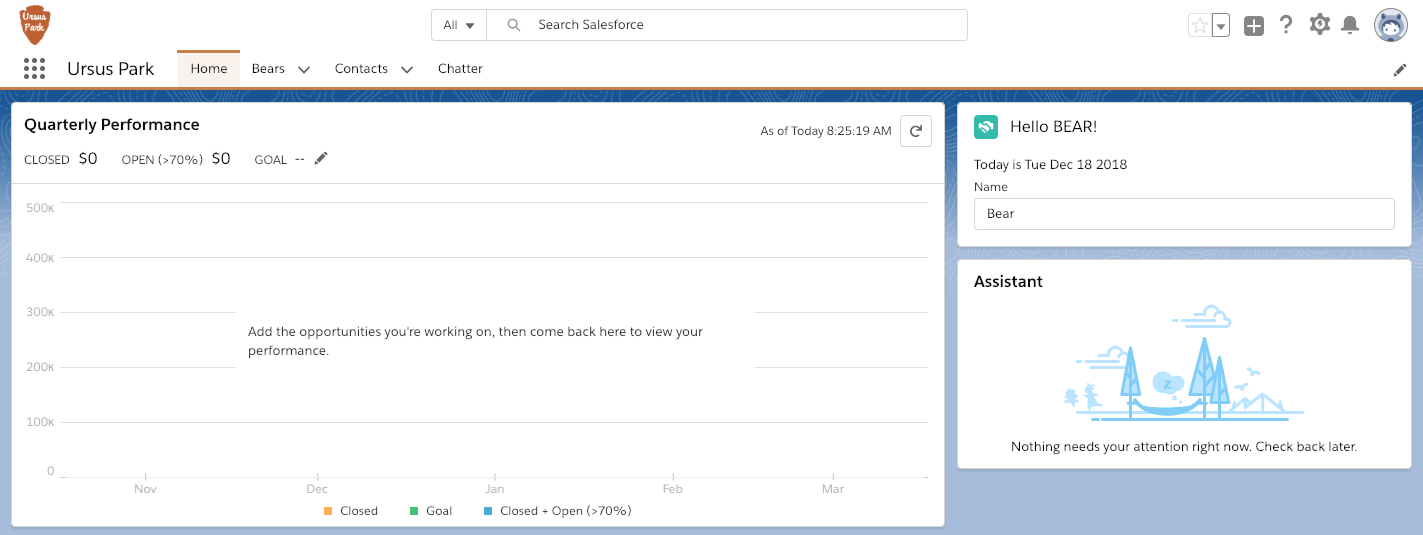
  4. 在组织中,刷新Ursus Park主页,并注意您的组件已更改(它现在显示“ Hello Trailblazer!”而不是“ Hello World!”)。

做得好!您已经实现了数据绑定:greeting读取并显示了该属性,但是用户暂时无法修改该属性。

让我们更进一步,并通过添加输入字段使数据可编辑。

  1. 在VS Code中,编辑helloWebComponent.html并在下面添加以下行<h2>Hello {greeting}!</h2>
    <lightning-input
    label="Name"
    value={greeting}
    onchange={handleGreetingChange}
    ></lightning-input>

    这段代码添加了一个用SLDS样式化的文本输入字段。输入使用greeting属性初始化。每当输入更改时,它将调用handleGreetingChange我们在下一步中定义的JavaScript函数。

  2. 编辑helloWebComponent.js并在下方添加以下行greeting = 'Trailblazer';
    handleGreetingChange(event) {
    	this.greeting = event.target.value;
    }

    这定义了一个函数,该函数从事件(来自输入字段的输入更改事件)中捕获值并将其分配给greeting属性。

  3. 将更新的代码部署到组织。右键单击默认文件夹,然后单击SFDX:将源部署到组织
  4. 在组织中,刷新主页,并注意在编辑文本字段时如何立即更新组件。

Ursus Park主页上具有数据绑定的Lightning Web组件

您已建立数据绑定,并使数据可编辑。greeting每当您在输入字段中更改其值时,该属性就会显示并自动刷新。

显示属性只是一个开始,但是如果需要在呈现之前转换其值怎么办?Lightning Web Components使您可以使用表达式。

使用表达式

让我们进入一些更高级的主题,并使用表达式来显示动态值。我们将添加一个表达式,该表达式以大写字母返回您的名字的问候消息。

  1. 在VS Code中,编辑helloWebComponent.html并替换title="Lightning Web Component"title={capitalizedGreeting}
  2. 替换<h2>Hello {greeting}!</h2><p>Today is {currentDate}</p>
  3. 编辑helloWebComponent.js并在handleGreetingChange功能块上方添加以下几行。
    currentDate = new Date().toDateString();
    get capitalizedGreeting() {
    	return `Hello ${this.greeting.toUpperCase()}!`;
    }

    这定义了一个currentDate类属性和一个capitalizedGreetinggetter函数。这些getter函数称为表达式。它们用于显示值,就像属性一样,但是表达式值可以基于函数中编写的某些逻辑来计算。与属性不同,表达式不是被动的:每次重新渲染组件时,表达式都会自动重新评估。无论其值是否更改,这都是正确的。当用户在组件的输入中键入内容时,handleGreetingChange事件处理程序函数将更新greeting属性的值。由于greeting是反应性的,因此会触发重新渲染,从而迫使表达式重新评估。请注意,我们声明了currentDateclass属性,用于保存和显示当前日期,而不使用表达式。我们也可以使用just编写表达式,return new Date().toDateString();但是使用属性的好处是不必Date为每个重新渲染创建新对象。

  4. 将更新的代码部署到组织。右键单击默认文件夹,然后单击SFDX:将源部署到组织
  5. 在组织中,刷新“主页”并注意表达式的显示方式。

在Ursus Park主页上带有表达式的Lightning Web组件

如您所见,表达式使我们能够使组件模板保持逻辑清晰。实际上,使用表达式是在显示属性值之前对其进行转换的唯一方法。

这就是步骤。您已经建立了带有基本组件,数据绑定和表达式的基本hello world组件。

现在我们已经涵盖了基础知识,让我们继续进行一些更令人兴奋的事情。