
电子邮件内容生成器中的自定义组件允许营销人员和经理为其客户创建更具吸引力的电子邮件内容。
为电子邮件生成器配置组件
在 Pardot 电子邮件内容生成器中提供自定义 Lightning Web 组件,用户可以将其添加到他们的电子邮件内容中。
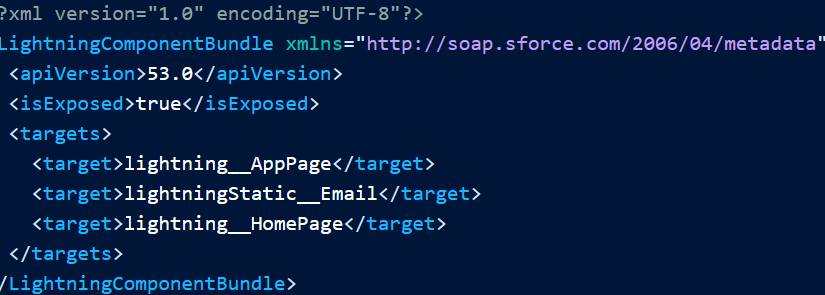
在组件的配置文件中,添加电子邮件内容生成器的目标。设置为 。lightningStatic__Email<isExposed>true
<?xml version="1.0" encoding="UTF-8"?>
<LightningComponentBundle xmlns="http://soap.sforce.com/2006/04/metadata">
  <apiVersion>53.0</apiVersion>
  <isExposed>true</isExposed>
  <targets>
    <target>lightning__AppPage</target>
    <target>lightningStatic__Email</target>
    <target>lightning__HomePage</target>
  </targets>
</LightningComponentBundle>
目标将属性添加到组件中。添加到组件的属性包括 、 、 、 和 。访问组件模板中的属性。lightningStatic__EmailBooleanColorIntegerStringHorizontalAlignmentVerticalAlignment
<template>
  <table …>
    <tr valign={valign}>
      <td>{content}</td>
    </tr>
  </table>
</template>在组件文件中声明属性,如垂直对齐示例。js-meta.xml
// sampleCustomComponent.js-meta.xml
<targetConfigs>
  <targetConfig targets="lightningStatic__Email">
    <property name="buttonAlignment" type="VerticalAlignment" default="middle" />
    <designLayout>
      <designSection name="...">
        <designLayoutItems>
          <designLayoutProperty name="buttonAlignment" />
        </designLayoutItems>
      </designSection>
    </designLayout>
  </targetConfig>
</targetConfigs>
在项目目录中使用以下命令为自定义组件准备元数据包。创建的文件夹名称为 。custompackage
sf project convert source -d custompackage将包部署到测试组织。首先,通过登录到要部署包的任意组织来创建别名。使用以下命令登录并命名别名。
sf org login web -r http://login.salesforce.com -a isvorg使用以下命令将包部署到您授权的别名。
sf project deploy --metadata-dir -d custompackage -u isvorg您可以通过登录到部署的目标组织来验证部署是否已完成。在“设置”的“快速查找”框中,输入 ,然后选择“部署状态”。Deployment Status
自定义组件已部署。在“设置”的“快速查找”框中,输入 ,然后选择 Lightning 组件。Lightning Components
测试目标组织中的组件,以验证自定义组件是否可以在电子邮件内容生成器中使用。
自定义组件的注意事项
在 Lightning 应用程序生成器中工作的某些自定义组件与电子邮件内容生成器不兼容。在启用现有自定义组件以在电子邮件构建器中使用它们之前,请查看这些组件的要求。
不支持的项目
为我们的内容构建器提供支持的渲染引擎在安全的环境中运行。但是,在自定义组件文件中可以添加的代码存在限制。
- 任何类型的 DOM API
- 文件中的生命周期挂钩
renderedCallback().js - 文件中的 Web API 方法
fetch().js <script>标记.html- 对文件中对象的引用
window.js - 命名空间中的基本组件
lightning - 使用语法的线路服务
@wire - Apex 方法,但
PicklistEntry
CSS 文件
- 不支持 SLDS 令牌和选择器。
:host - 我们建议您使用唯一的类名或在 CSS 类名前面加上命名空间,以区别于其他组件。
选择列表
- 通过使用 Apex 创建 HTML 标记来填充选择列表。请参阅 Apex 参考指南 PicklistEntry 类。
- 仅当覆盖以下方法时,用作选择列表数据源的 Apex 外部标注才有效:
global override Boolean isValid(Object attributeValue){return true;}
向组件添加自定义 HTML
您可以将自定义 HTML 添加到组件中,以便在电子邮件内容构建器中使用。
在模板标记中指定要位于 innerHTML 容器中的元素的特殊属性和值:.ishtmlcontainer="true"
不要在其他地方使用,因为它不会处理生成 HTML 的时间。renderedCallback()
在模板中,将属性和值附加到要指定 innerHTML 容器的位置。ishtmlcontainer="true"
<template>
  <div ishtmlcontainer="true" lwc:dom="manual"></div>
</template>
在 JavaScript 文件中,为属性创建 setter 和 getter。暂时将它们留空。htmlValue
@api
set htmlValue(value) {

}

get htmlValue() {

}
添加一个方法,在该方法中创建一个实例变量,以保存对保存 innerHTML 属性的元素的引用(称为 )。在该元素的 innerHTML 属性上,为其分配刚创建的属性的值。renderedCallback()attachmentPoint
renderedCallback() {
    this.attachmentPoint = this.template.querySelector('div[ishtmlcontainer=true]');
    this.attachmentPoint.innerHTML = this.htmlValue;
}
在 setter 中,添加对所创建的实例变量的赋值的检查。将新值分配给实例变量的 innerHTML 属性,并将该值分配给非公共属性。在 getter 中,返回非公共属性的值。
import { LightningElement, api } from "lwc";

export default class CustomInner extends LightningElement {
  @api
  set htmlValue(value) {
    if (this.attachmentPoint) {
      this.attachmentPoint.innerHTML = value;
    }
    this._htmlValue = value;
  }

  get htmlValue() {
    return this._htmlValue;
  }

  renderedCallback() {
    this.attachmentPoint = this.template.querySelector("div[ishtmlcontainer=true]");
    this.attachmentPoint.innerHTML = this.htmlValue;
  }
}在文件中定义属性的默认值和其他属性。.js-meta.xml
<?xml version="1.0" encoding="UTF-8"?>
<LightningComponentBundle xmlns="http://soap.sforce.com/2006/04/metadata" fqn="CustomInner">
    <apiVersion>53.0</apiVersion>
    <isExposed>true</isExposed>
    <masterLabel>Custom Inner HTML</masterLabel>
    <description>Display HTML-enhanced text</description>
    <targets>
        <target>lightningStatic__Email</target>
    </targets>
    <targetConfigs>
        <targetConfig targets="lightningStatic__Email">
            <property name="htmlValue" type="String" required="true" default="YOUR CUSTOM INNER HTML HERE"/>
            ...
        </targetConfig>
    </targetConfigs>
</LightningComponentBundle>
为 CRM Analytics 仪表板配置组件
使用 Lightning Web 组件实现自定义功能,然后将它们与 CRM Analytics 仪表板小组件和步骤交互使用。
1. 在配置文件中添加 CRM Analytics 目标
componentName.js-meta.xml 文件定义组件的元数据值,包括允许在 CRM Analytics 仪表板中使用的设置。将目标添加到组件的配置文件中。确保将属性设置为 ,以便组件对 CRM Analytics 设计器 UI 可见。analytics__DashboardisExposedtrue
<?xml version="1.0" encoding="UTF-8"?>
<LightningComponentBundle xmlns="http://soap.sforce.com/2006/04/metadata">
    <isExposed>true</isExposed>
    <targets>
        <target>analytics__Dashboard</target>
    </targets>
</LightningComponentBundle>
2. 设置组件配置选项
在 componentName.js-meta.xml 文件中,为目标添加 a。如果组件设计为使用仪表板步骤中的 CRM Analytics 查询数据,则将标记设置为。对于设计用于 CRM Analytics 仪表板的每个组件属性,添加标记。targetConfiganalytics__DashboardhasSteptrueproperty
<?xml version="1.0" encoding="UTF-8"?>
<LightningComponentBundle xmlns="http://soap.sforce.com/2006/04/metadata">
    <targetConfig targets="analytics__Dashboard">
        <hasStep>true</hasStep>
        <property name="title" type="String" label="Title" description="Component Title" required="true" />
    </targetConfig>
</LightningComponentBundle>
除了常见的数据类型外,目标还支持具有 的组件的数据类型。仪表板编辑器能够从附加步骤的结果中选择给定数据类型的列。analytics__DashboardMeasureDimension<hasStep>true</hasStep>
<?xml version="1.0" encoding="UTF-8"?>
<LightningComponentBundle xmlns="http://soap.sforce.com/2006/04/metadata">
    <targetConfig targets="analytics__Dashboard">
        <hasStep>true</hasStep>
        <property name="labelColumn" type="Dimension" label="Label Column" description="Segment Label" required="true" />
    </targetConfig>
</LightningComponentBundle>
完成这些步骤后,在 CRM Analytics Studio 仪表板编辑器中将 Lightning Web 组件添加为组件小部件。有关详细信息,请参阅《CRM Analytics 仪表板中的 Lightning Web 组件开发人员指南》。