
文档对象模型 (DOM) 表示 HTML 页面,以便您可以使用 JavaScript 或标准 DOM API 处理其内容、结构和样式。例如,您可以使用标准 DOM API 访问组件中的元素,无论是否使用模板引用选择器。虽然我们不建议操作 DOM,但某些第三方 JavaScript 库需要接管 DOM。querySelector()
有关 DOM 的更多信息,请参阅 MDN Web 文档:文档对象模型 (DOM)。
访问组件拥有的元素
要访问使用标准 DOM API 的组件呈现的元素,请使用 或 。要在没有选择器的情况下查找 DOM 中的元素,请使用 refs。querySelector()this.templatethis
querySelector()
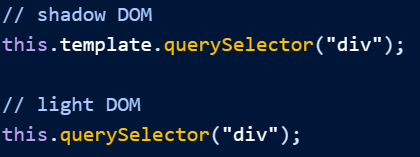
访问 DOM 中元素的标准方法是使用 .要查找影子 DOM 节点,请使用 或 on 。对于轻量级 DOM 节点,请在 上使用以下方法之一。querySelector()querySelector()querySelectorAll()this.templatethis
// shadow DOM
this.template.querySelector("div");

// light DOM
this.querySelector("div");
注意
您也可以使用 .{element}.template.querySelector
使用这些方法查找组件呈现的元素。
- 元素的顺序不保证。
- 未呈现到 DOM 的元素不会在结果中返回。
querySelector - 不要将 ID 选择器与 一起使用。呈现模板时,在 HTML 模板中定义的 ID 可能会转换为全局唯一值。如果在 JavaScript 中使用 ID 选择器,它将与转换后的 ID 不匹配。
querySelector - 对于轻量级 DOM 组件,搜索直接模板之外的元素,例如轻量级 DOM 子级。使用更具体的选择器来缩小方法的范围。
this.querySelector() - 如果组件在启用了 Lightning Locker 的组织中运行,请注意潜在的内存泄漏。如果可能,组织应启用 Lightning Web Security。或者,考虑使用 refs 而不是 .
querySelector
<!-- example.html -->
<template>
  <div>First <slot name="task1">Task 1</slot></div>
  <div>Second <slot name="task2">Task 2</slot></div>
</template>
// example.js
import { LightningElement } from "lwc";
export default class Example extends LightningElement {
renderedCallback() {
this.template.querySelector("div"); // <div>First</div>
this.template.querySelector("span"); // null
this.template.querySelectorAll("div"); // [<div>First</div>, <div>Second</div>]
}
}重要
不要使用 或 全局属性来查询 DOM 元素。请参阅 DOM 访问遏制。此外,我们不建议使用 JavaScript 来操作 DOM,除非您通过 lightning/platformResourceLoader 使用第三方库。最好使用 Lightning Web 组件 HTML 指令来编写声明性代码。windowdocument
裁判
Refs 查找没有选择器的 DOM 元素,并且只查询包含在指定模板中的元素。首先,将指令添加到元素中并为其赋值。要调用该引用,请使用 .在此示例中,该元素具有指令 ,该指令引用以访问 at 运行时。lwc:refthis.refs<div>lwc:ref="myDiv"this.refs<div>
<template>
  <div lwc:ref="myDiv"></div>
</template>
export default class extends LightningElement {
renderedCallback() {
console.log(this.refs.myDiv);
}
}考虑
在调用 之前,必须定义该指令。如果调用不存在的 ref,则返回 .如果模板包含重复的指令,则引用最后一个 .lwc:refthis.refsthis.refsundefinedlwc:refthis.refs<div>
<template>
  <div lwc:ref="myDiv"></div>
  <div lwc:ref="myDiv"></div>
</template>this.refs是一个普通的只读对象。尝试在其组件中添加、修改或删除属性会导致运行时错误。它的键是一个字符串,它的值是一个 DOM 元素。在 light DOM 和 shadow DOM 中引用元素的语法是相同的。this.refs
Ref 是可配置和可写的,因此在组件中定义的 ref 会覆盖 中的 ref。LightningElement.prototype
您不能应用于元素,也不能应用于轻量级 DOM 中的元素。lwc:ref<template><slot>
<template lwc:render-mode="light">
  <template lwc:if={myTemplate} lwc:ref="myTemplate"></template>
  <!-- Not allowed -->
</template>
<template lwc:render-mode="light">
<slot lwc:ref="mySlot"></slot>
<!-- Not allowed -->
</template>如果将 or 循环置于 or 循环中,模板编译器将引发错误。lwc:reffor:eachiterator:*
<template for:each={items} for:item="item">
  <div key={item} lwc:ref="foo"></div>
  <!-- Not allowed -->
</template>
多个模板
this.refs指多模板组件中最近呈现的模板。当模板更改时,对象也会更改。this.refs
import a from "./a.html";
import b from "./b.html";

export default class extends LightningElement {
  count = 0;

  render() {
    return this.count % 2 === 0 ? a : b;
  }

  renderedCallback() {
    console.log(this.refs);
  }

  increment() {
    this.count++;
  }
}

const cmp = createElement("c-component", { is: Component });
// Logs `this.refs` for a.html

cmp.increment();
// Logs `this.refs` for b.html

cmp.increment();
// Logs `this.refs` for a.html
要有条件地定义基于 的元素,请在一个父模板下创建多个子模板。在此示例中,指呈现的任何子模板中的元素。<template lwc:if={boolean}>this.refs.toggleDarkMode
<template>
  <template lwc:if={darkMode}>
    <button lwc:ref="toggleDarkMode">Enable Light Mode</button>
  </template>
  <template lwc:else>
    <button lwc:ref="toggleDarkMode">Enable Dark Mode</button>
  </template>
</template>
影子 DOM
Shadow DOM 是一种封装 Web 组件的内部文档对象模型 (DOM) 结构的标准。封装 DOM 使开发人员能够共享组件并保护组件不被任意 HTML、CSS 和 JavaScript 操纵。内部 DOM 结构称为影子树。影子树会影响您使用 CSS、事件和 DOM 的方式。
由于并非所有浏览器都实现了影子 DOM,因此 LWC 对 Lightning Experience 和 Experience Cloud 使用合成影子 polyfill。polyfill 是允许功能在 Web 浏览器中工作的代码。
解释影子 DOM
注意
如果您在 Lightning Experience 或 Experience Cloud 之外使用 LWC,例如在 Lightning Out 中,LWC 将在原生阴影中渲染。请参阅 Salesforce Platform 上的编译时差异。
影子树
为了理解影子树,让我们看一些标记。此标记包含两个 Lightning Web 组件:和 .文档片段定义了 DOM 和影子树之间的边界。阴影根下方的元素位于阴影树中。c-todo-appc-todo-item#shadow-root
<c-todo-app>
  #shadow-root
  <div>
    <p>Your To Do List</p>
  </div>
  <c-todo-item>
    #shadow-root
    <div>
      <p>Go to the store</p>
    </div>
  </c-todo-item>
</c-todo-app>
让我们看看如何在这些区域中使用阴影树。CSS的
在父组件中定义的 CSS 样式不会泄漏到子组件中。在我们的示例中,样式表中定义的样式不会设置组件中元素的样式,因为样式不会进入阴影树。请参阅 CSS。ptodoApp.csspc-todo-item事件
为了防止暴露组件的内部详细信息,如果事件冒泡并越过阴影边界,则某些属性值会更改以匹配侦听器的范围。请参阅事件重定向。访问元素
影子树中的元素无法通过传统的 DOM 查询方法访问。代码无法使用或访问 Lightning Web 组件的影子树。例如,代码无法调用以选择 Lightning Web 组件的影子树中的节点。要访问自己的影子树,Lightning Web 组件会调用 .请参阅组件拥有的 Access 元素。documentdocument.bodydocument.querySelector()this.template.querySelector()访问插槽
插槽是父组件传递到组件主体中的标记的占位符。通过插槽传递给组件的 DOM 元素不归该组件所有,也不在组件的影子树中。要访问通过插槽传递的 DOM 元素,请调用 。该组件不拥有这些元素,因此您不使用 .请参阅将标记传递到槽中。this.querySelector()template测试组件
请参阅 DOM 检查测试可能会发生变化。
提示
观看 Salesforce 开发人员布道师 Alba Rivas 对 Shadow DOM 的解释。
DOM API 接口
不要使用这些 DOM API 访问使用 Lightning Locker 的组织中的组件影子树。如果您使用的第三方 JavaScript 库使用这些 DOM API 访问组件的影子树,请与库作者合作提交并修复问题。
Document.prototype.getElementByIdDocument.prototype.querySelectorDocument.prototype.querySelectorAllDocument.prototype.getElementsByClassNameDocument.prototype.getElementsByTagNameDocument.prototype.getElementsByTagNameNSDocument.prototype.getElementsByNamedocument.body.querySelectordocument.body.querySelectorAlldocument.body.getElementsByClassNamedocument.body.getElementsByTagNamedocument.body.getElementsByTagNameNS
Lightning Locker 通过阻止这些 API 来防止您破坏 Lightning Web 组件之间的影子 DOM 封装。但是,在 Aura 组件版本 39.0 及更早版本中,Lightning Locker 在组件级别被禁用,因此 Aura 组件的代码可能会失败。
这些 API 不受 Lightning Web Security (LWS) 的限制。LWS 通过对所有组件的 ShadowRoot 属性强制执行值来防止破坏影子 DOM 封装。closedmode
重要
Shadow DOM polyfill 包含接口的补丁。如果您习惯于监视 DOM 树中的更改,请断开它,否则将造成内存泄漏。请注意,组件只能在其自己的模板中观察到突变。它无法观察到其他自定义元素的影子树中的突变。MutationObserverMutationObserver
轻量级 DOM
Lightning Web 组件目前在每个组件上强制执行影子 DOM,封装组件的内部标记,并使编程代码无法访问它。当您使用轻量级 DOM 时,您的组件位于影子 DOM 之外,并避免了影子 DOM 限制。这种方法简化了第三方集成和全局样式设置。
在深入探讨轻量级 DOM 的细节之前,让我们先看看不同的 DOM 结构是如何在 DOM 中呈现的。首先,考虑影子树的一些标记。原生影子 DOM 在标签中呈现组件。但是,Lightning Experience 和 Experience Cloud 改用合成阴影,这模仿了本机阴影行为。#shadow-root
使用轻量级 DOM 时,组件内容将附加到主机元素,而不是其影子树。然后,可以像文档宿主中的任何其他内容一样访问它,从而提供与不受影子 DOM 约束的内容类似的行为。
<my-app>
  <my-header>
    <p>Hello World</p>
  </my-header>
</my-app>
如需全面概述,请参阅 Google Web Fundamentals: Shadow DOM v1。
与影子 DOM 相比,Light DOM 具有几个优点。
- CSS 主题和品牌:Light DOM 支持全局样式,可以轻松地将自定义品牌应用于组件和子组件。
- 第三方工具和测试:使用轻量级 DOM,第三方工具可以遍历 DOM,从而启用标准的浏览器查询 API(如 和),而无需遍历影子根。例如,轻量级 DOM 使 LWR 站点中的标准组件能够跟踪事件。
querySelectorquerySelectorAll - 可访问性:Light DOM 不限定 ID 的范围,并允许两个单独的组件引用另一个 ID。例如,即使元素位于单独的组件中,也可以引用。
<label for="my-input"><input type="text" id="my-input">
使用 Light DOM 的准则
使用轻量级 DOM 会使您的组件暴露给 DOM 抓取,因此,如果您正在处理敏感数据,我们建议改用影子 DOM。换言之,轻量级 DOM 不提供影子 DOM 封装带来的好处,后者可以防止未经授权访问影子树。由于 DOM 对其他组件和第三方工具的遍历是开放的,因此您有责任保护您的轻量级 DOM 组件。
在应用中同时使用轻量级 DOM 和影子 DOM 时,请考虑以下最佳做法。
- 您可以将轻量级 DOM 子组件嵌套在父阴影 DOM 组件中,反之亦然。
- 我们建议将深度嵌套的轻量级 DOM 组件封装在顶层的单个阴影 DOM 组件中。然后,您可以在影子根下的所有组件之间共享样式。
- 在文档级别查询元素或注入样式时要小心。影子树可以位于文档和组件之间。
- 您可以通过 CSS 自定义属性和 ::p art 覆盖阴影 DOM 样式。但是,组件所有者负责公开扩展点,这可以防止下游使用者设置任意元素的样式。
哪些内容不适用于 Light DOM
- 不支持将轻量级 DOM 限制为特定命名空间。
- 不支持分发以轻量级 DOM 渲染的组件。托管包中的组件引用使用命名空间,并会导致命名空间冲突。
c - 基本组件始终在影子 DOM 中呈现。
- Aura 组件不能使用轻量级 DOM。但是,Aura 组件可以包含使用轻量级 DOM 的 LWC 组件。
- 插槽上的生命周期挂钩永远不会被调用,因为该元素不会在 DOM 中呈现。
slot - 不支持在迭代器中使用插槽。例如:
for:each
<!-- This results in a runtime error -->
<template for:each={items} for:item="item">
  <div key={item.id}>
    <my-repeateditem item={item}>
      <slot></slot>
    </my-repeateditem>
  </div>
</template>
Lightning Locker 注意事项
Lightning Locker 和 Lightning Web Security 不支持顶级 light DOM 组件。Light DOM 组件应始终嵌套在阴影 DOM 组件中的某个位置。
禁用 Locker(例如在 Experience Builder 站点中)意味着您将无法从 Locker 获得安全优势。确保您了解 Experience Builder 站点上更宽松的 CSP 环境的后果。请参阅 CSP 和 Lightning Locker 设计注意事项。
在基于 Aura 的 Experience Builder 站点中,Lightning Locker 会阻止 DOM 访问和其他 Web API。如果您在基于 Aura 的 Experience Cloud 站点中使用轻量级 DOM,请确保至少有一个 LWC 阴影 DOM 组件作为轻量级 DOM 组件的祖先。使用影子 DOM 组件意味着封装组件的内部标记,并受到影子 DOM 限制的约束。this.querySelector()
注意
从 23 年冬季开始,如果在组织中启用了 Lightning Web Security (LWS),则 Aura 站点中包含的任何 Lightning Web 组件都将受到 LWS 而不是 Lightning Locker 的保护。如果为站点禁用 Lightning Locker,则也会禁用 Lightning Web Security。
比较 Light DOM 和 Shadow DOM
由于其强大的封装性,shadow DOM 是创作组件的推荐方法。它隐藏了组件的内部结构,因此使用者只能使用其公共 API。
Shadow DOM 不适用于以下情况。
- 构建高度可自定义的 UI,在其中完全控制 Web 应用的外观。
- 使用第三方库。许多流行的库与影子 DOM 不兼容。
在这些情况下,Light DOM 更适合,但请注意,消费者可以像使用公共 API 一样访问组件的内部。允许此类访问使得在不影响使用者代码的情况下实现更改变得具有挑战性。
以下是使用一个而不是另一个的利弊。
| 影子 DOM | 轻量级 DOM | |
|---|---|---|
| 安全 | 强大的组件封装可保护组件免受未经授权的访问 | 弱封装使组件容易受到未经授权的访问 |
| 可移植性 | 高度可移植,通过公共 API 进行访问控制 | 容易受到组件作者或使用者导致的重大更改的影响 |
| 造型 | 需要 CSS 自定义属性来覆盖样式 | 易于覆盖样式 |
| 第三方库和工具集成 | 与需要 DOM 遍历或事件重定向的第三方库或工具的兼容性有限 | 与第三方库和工具的简单集成 |
使用第三方库(例如 Google Analytics 或其他检测库)时,如果您的影子 DOM 组件公开了正确的 API,则不必使用轻量级 DOM。假设您要检测按钮上的点击交互:
<!-- myButton.html example -->
<template>
  <button>{label}</button>
</template>
使用 light DOM,您可以在元素上附加单击事件侦听器。如果在阴影 DOM 中渲染组件,则无法从组件外部访问该元素。使用影子 DOM,成为组件的内部实现细节。在这种情况下,检测此组件的正确方法是在其自身上添加一个单击处理程序来检测它。buttonbutton<button>my-buttonmy-button
<!-- myComponent.html example -->
<template>
  <my-button label="click me" onclick={handleClick}></my-button>
</template>
仅公开要检测的最低限度,因为公开内部事件会削弱组件的封装。虽然上述示例并非始终可行,但我们建议您在选择最适合您的用例的选项之前探索您的选项。
在组件中启用轻量级 DOM
要启用轻量级 DOM,首先在组件类中设置 static 属性:renderMode
import { LightningElement } from "lwc";

export default class LightDomApp extends LightningElement {
  static renderMode = "light"; // the default is 'shadow'
}
然后使用根模板指令,这是使用轻量级 DOM 的组件所必需的。lwc:render-mode
<template lwc:render-mode="light">
  <my-header>
    <p>Hello World</p>
  </my-header>
</template>
注意
实例化后更改静态属性的值不会影响组件是在轻量级 DOM 还是阴影 DOM 中呈现。renderMode
使用 Light DOM
将组件从影子 DOM 迁移到轻量级 DOM 需要一些代码更改。影子树会影响您使用 CSS、事件和 DOM 的方式。在使用轻量级 DOM 时,请考虑以下各节中描述的差异。
组成
您的应用可以包含使用阴影或浅色 DOM 的组件。在此示例模板中,使用影子 DOM 并包含多个组件:使用轻量级 DOM 和使用影子 DOM。my-appmy-headermy-footer
<my-app>
  #shadow-root
  | <my-header>
  |   <p>Hello World</p>
  | </my-header>
  | <my-footer>
  |   #shadow-root
  |   |  <p>Footer</p>
  | </my-footer>
</my-app>
轻量级 DOM 组件可以包含阴影 DOM 组件。类似地,影子 DOM 组件可以包含轻量级 DOM 组件。
提示
如果您有深度嵌套的组件,请考虑在顶层使用嵌套的轻量级 DOM 组件的单个阴影 DOM 组件。此结构允许您在一个影子根中的所有子组件之间自由共享样式。
可及性
与合成阴影或原生阴影不同,light DOM 不会将 ID 范围限定为单个组件。相反,它使组件能够引用单独组件上的 ID。这一优点使您能够使用 ID 和 ARIA 属性将两个元素放在同一个影子根中来链接它们。
请考虑此示例,其中包含两个同级组件。
<!-- container.html -->
<template>
  <c-label></c-label>
  <c-input></c-input>
</template>该组件包含一个具有属性的元素。c-label<label>id
<!-- label.html -->
<template lwc:render-mode="light">
  <label id="my-label">My label</label>
</template>该组件包含一个元素,该元素引用组件中的元素。c-input<input><label>c-label
<!-- input.html -->
<template lwc:render-mode="light">
  <input type="text" aria-labelledby="my-label" />
</template>
CSS的
使用影子 DOM 时,在父组件中定义的 CSS 样式不适用于子组件。相比之下,轻量级 DOM 允许从根文档设置样式以针对 DOM 节点并设置其样式。
以下本机阴影组件上的样式级联到子组件的浅色 DOM 中。在这种情况下,light DOM 组件位于原生阴影组件中,并挂载在最近的原生阴影根级别,该根级别在本地作用域为整个阴影根,并影响该根内的任何轻量级 DOM 组件。
<template>
  <my-app>
    #shadow-root
    |  <style> p { color: green; }</style>
    |  <p>This is a paragraph in shadow DOM</p>
    |    <my-container>
    |      <p>This is a paragraph in light DOM</p>
    |    </my-container>
  </my-app>
</template>
同样,在轻量级 DOM 中呈现的子组件上的样式将应用于其父组件,直到在使用本机阴影 DOM 时遇到阴影边界。
对于合成阴影 DOM,阴影 DOM 样式不会级联到轻量级 DOM 子组件中。
注意
在合成影子 DOM 中,样式是在全局文档级别实现的,但使用属性来限定样式的范围。这是合成影子 DOM 的当前限制。
LWC 不会自动为您确定样式范围。为了防止样式从组件中级联出来,我们建议对文件使用作用域样式。请参阅在 Light DOM 中使用作用域样式部分。*.scoped.css
要覆盖 Lightning Web 组件中继承的样式,请在组件样式表中创建 SLDS 样式挂钩。样式挂钩充当自定义样式的占位符。有关支持样式挂钩的组件蓝图列表,请参阅蓝图概述。
提示
轻量级 DOM 组件的渲染顺序会影响样式表注入根节点的顺序,并直接影响 CSS 规则的特异性。
访问元素
在影子 DOM 中,您只能访问组件拥有的元素。
相比之下,您可以从轻量级 DOM 组件中检索节点,这对第三方集成和测试很有帮助。例如,您可以使用 查询应用中的段落。document.querySelector('p')
<!-- JS code returns "Your Content Here" -->
<template>
  <script>
    console.log(document.querySelector("my-custom-class").textContent);
  </script>
  <my-component>
    <div class="my-custom-class">Your Content Here</div>
  </my-component>
</template>
使用 shadow DOM 时,返回与组件关联的影子根。该元素不适用于使用轻量级 DOM 的组件,因此使用轻量级 DOM 时,返回 .LightningElement.prototype.templatetemplateLightningElement.prototype.templatenull
将影子 DOM 组件迁移到轻型 DOM 时,请替换为 .以下示例使用常见 DOM API 列表来处理轻量级 DOM 组件。this.template.querySelectorthis.querySelector
import { LightningElement } from "lwc";

export default class LightDomApp extends LightningElement {
  static renderMode = "light";
  query(event) {
    const el = this.querySelector("p");
    const all = this.querySelectorAll("p");
    const elById = this.getElementById("#myId");
    const elements = this.getElementsByClassName("my-class");
    const tag = this.getElementsByTagName("button");
  }
}
使用轻量级 DOM 组件,可以返回其他轻量级 DOM 组件渲染的元素。this.querySelectorAll()
元素的 id 属性在运行时保留,不会像在合成影子 DOM 中那样作。因此,您可以在 CSS 或 JavaScript 中使用选择器,因为它与运行时的元素匹配。idid
注意
或者,在处理轻量级 DOM 和阴影 DOM 中的组件时,请使用 this.refs。 访问组件中定义的元素,并且在 light DOM 和 shadow DOM 中的行为类似,这与 or 不同。this.refsthis.querySelectorthis.querySelectorAll
事件
使用 shadow DOM 时,如果事件冒泡并越过影子边界,则某些属性值会更改以匹配侦听器的作用域。使用轻量级 DOM 时,事件不会被重定向。如果单击嵌套在多个轻量级 DOM 组件层中的按钮,则可以在文档级别访问该事件。此外,返回触发事件的按钮,而不是包含的组件。clickevent.target
例如,你有一个使用轻量级 DOM 的组件,该组件嵌套在一个同样使用轻量级 DOM 的容器组件中。顶级组件使用影子 DOM。c-light-childc-light-containerc-app
<!-- app.html (shadow DOM) -->
<template>
  <c-light-container onbuttonclick={handleButtonClick}> </c-light-container>
</template>
<!-- lightContainer.html -->
<template lwc:render-mode="light">
<p>Hello, Light DOM Container</p>
<!-- c-light-child host -->
<c-light-child onbuttonclick={handleButtonClick}> </c-light-child>
</template>// lightContainer.js
import { LightningElement } from "lwc";
export default class LightContainer extends LightningElement {
static renderMode = "light";
handleButtonClick(event) {
// do something
}
}<!-- lightChild.html -->
<template lwc:render-mode="light">
<button onclick={handleClick}></button>
</template>// lightChild.js
import { LightningElement } from "lwc";
export default class LightChild extends LightningElement {
static renderMode = "light";
handleClick(event) {
this.dispatchEvent(new CustomEvent("buttonclick", { bubbles: true, composed: false }));
}
}当您调度 中的自定义事件时,处理程序将返回以下元素。buttonclickc-light-child
c-light-child主机处理程序
event.currentTarget:c-light-childevent.target:c-light-child
c-light-container主机处理程序
event.currentTarget:c-light-containerevent.target:c-light-child
相反,如果使用影子 DOM,则事件不会转义影子根。c-light-container
注意
即使在轻量级 DOM 中,事件也会通过组件冒泡,因为没有影子根。composedfalse
插槽
插槽是在轻量级 DOM 中模拟的,因为浏览器不支持 shadow DOM 之外的插槽。LWC 在运行时确定插槽是否在轻量级 DOM 上运行。
假设您有一个具有命名和未命名插槽的组件。my-component
<!-- myComponent.html -->
<template>
  <slot name="title"></slot>
  <h3>Subtitle</h3>
  <slot></slot>
</template>
像这样使用组件。
<my-component>
  <p>Default slotted content</p>
  <h1 slot="title">Component Title</h1>
</my-component>
这些元素不会呈现到 DOM。内容直接附加到 DOM 中的 host 元素。<slot>
<my-component>
  <h1>Component Title</h1>
  <h3>Subtitle</h3>
  <p>Default slotted content</p>
</my-component>在运行时,插槽内容或回退内容将平展到父元素。元素本身不会呈现,因此向元素添加属性或事件侦听器会引发编译器错误。<slot><slot>
此外,请考虑这个包含阴影 DOM 组件和轻量级 DOM 组件的轻量级 DOM 组件。c-light-slot-consumerc-shadow-slot-containerc-light-slot-container
<!-- app.html -->
<template>
  <c-shadow-component></c-shadow-component>
  <c-light-slot-consumer></c-light-slot-consumer>
</template>
<!-- lightSlotConsumer.html -->
<template lwc:render-mode="light">
<c-shadow-slot-container>
<p>Hello from shadow slot</p>
</c-shadow-slot-container>
<c-light-slot-container>
<p>Hello from light slot</p>
</c-light-slot-container>
</template><!-- shadowSlotContainer.html -->
<template>
<slot></slot>
</template><!-- lightSlotContainer.html -->
<template lwc:render-mode="light">
<slot name="other">
<p>Hello from other slot</p>
</slot>
<slot>This is the default slot</slot>
</template>如果在 中包含样式,则插槽中的所有元素(在阴影 DOM 和浅色 DOM 组件中)都会获得样式。但是,没有插槽的影子 DOM 组件不会接收样式。c-app
<c-app>
  <style type="text/css">
    p {
      background: green;
      color: white;
    }
  </style>
  <h2>Hello Light DOM</h2>
    <p>This is a paragraph in app.html</p>
    <h3>Shadow DOM</h3>
    <c-shadow-component>
        #shadow-root (open)
        | <p>Hello, Shadow DOM container</p>
    </c-shadow-component>
    <h3>Slots</h3>
    <c-light-slot-consumer>
        <c-shadow-slot-container>
            #shadow-root (open)
            | <p>Hello from shadow-slot-container</p>
        </c-shadow-slot-container>
        <c-light-slot-container>
            <p>Hello from other slot</p>
            <p>Hello from light-slot-container</p>
        </c-light-slot-container>
    </c-light-slot-consumer>
</c-app>
考虑使用插槽的这些组合模型。轻量级 DOM 中的组件可以插入内容和其他组件。插槽支持轻量级 DOM 和阴影 DOM 组件。
<template>
  <slot name="content">Default content in the named slot</slot>
  <p>This makes the component a bit more complex</p>
  <slot>This is a default slot to test if content bypasses the named slot and goes here</slot>
</template>
以下是您的内容在插槽中的呈现方式。
<my-component>
  <!-- Inserted into the content slot -->
  <div slot="content">Some text here</div>
</my-component>

<my-component>
  <!-- Inserted into the content slot -->
  <my-shadow-lwc slot="content">Some text here</my-shadow-lwc>
</my-component>

<my-component>
  <!-- Inserted into the content slot -->
  <my-light-lwc slot="content">Some text here</my-light-lwc>
</my-component>

<my-component>
  <!-- Inserted into the default slot -->
  <my-shadow-lwc>Some text here</my-shadow-lwc>
</my-component>

<my-component>
  <!-- Inserted into the default slot -->
  <my-light-lwc>Some text here</my-light-lwc>
</my-component>
注意
不支持事件和 CSS 伪选择器,因为 slot 元素不会在 DOM 中呈现。slotchange::slotted
Light DOM 不会渲染未分配给插槽的插槽元素,因此永远不会调用它们的生命周期钩子。
<!-- c-parent -->
<template>
  <c-child>
    <span>This element is not rendered in light DOM</span>
  </c-child>
</template>

<!-- c-child -->
<template>
  <p>This component does not include a slot</p>
</template>
作用域插槽
使用作用域槽,您可以访问子组件中的数据,并在父组件内的槽内容中呈现数据。通过将数据从子组件绑定到作用域内插槽,父组件可以在插槽内容中引用子组件的数据。此数据入子组件的轻量级 DOM 中。
在此示例中,子组件将其数据绑定到作用域槽。在父组件中,作用域内的槽片段引用以及将槽入的标记。<c-child>item<slot><c-parent>{item.id}{item.name}<c-child>
<!-- c/parent.html -->
<template> <!-- Parent component doesn’t need to be light DOM -->
    <c-child>
        <template lwc:slot-data="item">
            <span>{item.id} - {item.name}</span>
        </template>
    </c-child>
</template>


<!-- c/child.html -->
<template lwc:render-mode="light"> <!-- Child must be light DOM -->
    <ul>
        <template for:each={item} for:item="item">
            <li key={item.id}>
                <slot lwc:slot-bind={item}</slot>
            </li>
        </template>
    </ul>
</template>
由于作用域内的槽片段位于父组件的模板中,因此父组件拥有槽位内容。因此,如果父组件引用作用域样式表,则这些样式也适用于作用域内插槽的内容。
父组件部分呈现作用域槽的内容,因此必须将其包含在标记中。在此示例中,作用域内的槽内容为 。父组件创建此部分片段。<template></template><span>{item.id} - {item.name}</span>
父组件也渲染每个 ,子组件控制循环逻辑。 使用从 传递的相同模板片段创建任意数量的插槽。item<c-child><c-parent>
注意
若要使用作用域插槽,子组件必须使用轻量级 DOM。 不支持影子 DOM 中的作用域插槽。父级可以是轻量级 DOM 或影子 DOM 组件。
最终的 HTML 如下所示。
<c-parent>
  #shadow-root
  | <c-child>
  |  <ul>
  |    <li>
  |      <span>1 - One</span>
  |    </li>
  |    <li>
  |      <span>2 - Two</span>
  |    </li>
  |  </ul>
  | </c-child>
</c-parent>
要在组件中引入作用域槽,请添加指令和 .有关详细信息,请参阅槽的指令和嵌套模板的指令。lwc:slot-bindlwc:slot-data
多个作用域插槽和绑定
子组件可以有多个命名的作用域插槽,但它只能有一个默认的作用域插槽。
<template>
    <c-child>
        <template lwc:slot-data="defaultdata"> <!-- This is a default slot -->
            <p>{defaultdata.title}</p>
        </template>
        <template slot="slotname1" lwc:slot-data="slot1data"> <!-- This is a named slot -->
            <p>{slot1data.title}</p>
        </template>
        <template slot="slotname2" lwc:slot-data="slot2data"> <!-- This is a named slot -->
            <p>{slot2data.title}</p>
        </template>
    </c-child>
</template
您可以将不同的作用域槽绑定到同一数据源。在下面的示例中,默认的作用域内插槽和两个命名的作用域内插槽呈现来自 的内容。slotdata
<template lwc:render-mode="light">
  <!-- This is a default slot -->
  <slot lwc:slot-bind={slotdata}></slot>
  <!-- This is a named slot -->
  <slot name="slotname1" lwc:slot-bind={slotdata}></slot>
  <!-- This is a named slot -->
  <slot name="slotname2" lwc:slot-bind={slotdata}></slot>
</template>
只能将作用域槽绑定到一个数据源。例如,将命名的作用域槽绑定到两组不同的数据,并且 会导致编译器错误。namedslotAslot1dataslot2data
<!-- Invalid usage of named scoped slot -->
<template lwc:render-mode="light">
  <slot name="namedslotA" lwc:slot-bind={slot1data}></slot>
  <slot name="namedslotA" lwc:slot-bind={slot2data}></slot>
</template>
如果尝试将默认作用域槽绑定到多个不同的数据集,编译器会引发相同的错误。
<!-- Invalid usage of default scoped slot -->
<template lwc:render-mode="light">
  <slot lwc:slot-bind={slot1data}></slot>
  <slot lwc:slot-bind={slot2data}></slot>
</template>
混合标准插槽和分区插槽
由于组件中只能有一个默认插槽,因此不能在同一组件中放置标准默认插槽和默认作用域插槽。以下代码将导致错误。
<!-- c/child.html -->
<!-- Invalid usage of default slots -->
<template lwc:render-mode="light">
  <slot lwc:slot-bind={slotdata}>Default scoped slot</slot>
  <slot>Standard default slot</slot>
</template>
在子组件中,命名范围的插槽和标准命名插槽不能共享相同的名称。以下代码将导致错误。
<!-- c/child.html -->
<!-- Invalid usage of named slots -->
<template lwc:render-mode="light">
  <slot name="slotname1" lwc:slot-bind={slotdata}>Named scoped slot</slot>
  <slot name="slotname1">Standard named slot</slot>
</template>
将父组件中的作用域槽绑定到子组件中的数据时,组件必须包含相同类型的槽。例如,如果父组件包含绑定到子组件的作用域槽,则该子组件也必须具有作用域槽。否则,不会呈现槽内容。如果启用调试模式,则还会在开发控制台中记录错误。
作用域插槽的灵活性
您可以将一个作用域插槽嵌套在另一个作用域插槽中。
<template>
  <c-table data={data}>
    <template lwc:slot-data="row">
      <c-row row={row}> <!-- This is rendered for every row in the table -->
        <template lwc:slot-data="column">
          <span> <!-- This is rendered for every column in the row -->
            Coordinates: {row.number} - {column.number} <!-- This can refer to both `row` and `column` -->
          </span>
        </template>
      </c-row>
    <template>
  </c-table>
</template>
Scoped slots can reference component bindings and scope bindings.
<template>
  {title}
  <c-list>
    <template lwc:slot-data="item">
      <div>{label}</div>
      <!-- label is a component binding that’s repeated in every row of the list -->
      <span>{item.id} - {item.name}</span>
    </template>
  </c-list>
</template>
在 Light DOM 中使用作用域样式
在轻量级 DOM 中,您可以使用作用域样式仅将 CSS 应用于组件上的元素。此行为类似于使用影子 DOM 进行样式封装。
若要向组件添加作用域样式,请在组件文件夹中创建一个文件。*.scoped.css
myCmp
    ├──myCmp.html
    ├──myCmp.css
    └──myCmp.scoped.css
在上面的示例中,对于阴影 DOM 组件和轻量级 DOM 组件,您可以包含一个、两个或两个 CSS 文件。
注意
在基于 Aura 的容器中,轻量级 DOM 组件只能加载作用域样式。例如,在基于 Aura 的 Experience Builder 站点中,您必须包含自定义组件的文件,而不是文件。*.scoped.css*.css
让我们检查一个具有作用域样式的轻量级 DOM 组件。
<!-- lightCmp.html -->
<template lwc:render-mode="light">
  <p>This is a paragraph in c-light-cmp</p>
</template>
// lightCmp.js
import { LightningElement } from "lwc";
export default class LightCmp extends LightningElement {
static renderMode = "light";
}/* lightCmp.scoped.css */
p {
background: silver;
color: black;
}作用域样式的结果为:
<c-light-cmp class="c-lightCmp_lightCmp-host">
  <style class="c-lightCmp_lightCmp" type="text/css">
    p.c-lightCmp_lightCmp {
      background-color: silver;
      color: black;
    }
  </style>
  <p class="c-lightCmp_lightCmp">This is a paragraph in c-light-cmp</p>
</c-light-cmp>
如果文件与文件一起使用,则样式表将在样式表之前注入。作用域样式 CSS 选择器优先于无作用域选择器,因为它们是最后声明的。*.css*.scoped.css*.css*.scoped.css
注意
如果在模板上使用作用域样式表和无作用域样式表,则同时应用这两种样式表。注入顺序会影响浏览器在重复选择器时应用哪些样式。见树接近无知。
/* lightCmp.css */
p {
  background: yellow;
  color: #777;
}在这种情况下,使用作用域样式,但无作用域样式表中的样式可能会从组件中渗出。c-light-cmp
<!-- c-app -->
<template>
  <!-- This paragraph is styled yellow from lightCmp.css -->
  <p>This is a paragraph in c-app shadow DOM</p>
  <c-light-cmp></c-light-cmp>
</template>
在前面的示例中,段落继承自 的样式。要覆盖 中的样式,请包含作用域样式表。c-applightCmp.csslightCmp.cssapp.scoped.css
注意
我们不建议使用该规则,因为它会使调试更加困难。当您在作用域内样式表和无作用域样式表中使用样式声明时,作用域样式具有更大的特异性,并且其样式将应用于组件。!important!important
作用域区域
使用 时,CSS 选择器的范围限定为组件 HTML 文件中的所有元素。*.scoped.css
<!-- c-my-cmp -->
<template>
  <div>
    <span></span>
    <button class="my-button"></button>
  </div>
</template>
在下面的 CSS 中,所有选择器都与模板中的元素匹配,并且只匹配这些元素。
/* myCmp.css */
div {
}
span {
}
button {
}
div > span {
}
div button {
}
.my-button {
}
根元素可以使用 作为目标,即使在轻量级 DOM 组件中也是如此。c-light-cmp:host
CSS 范围使用自定义 CSS 类来防止样式从组件中泄漏出来。
以根元素为目标
由于默认情况下不限定轻量级 DOM 样式的范围,因此伪选择器引用最接近的影子根宿主元素(如果有)。对于轻量级 DOM 范围样式,选择器引用轻量级 DOM 组件的根元素,即作用域 DOM 区域的根。:host:host
假设您在一个轻量级 DOM 组件上有一个无作用域和作用域的样式表。
/* light.css */
:host {
  background: red;
}
/* light.scoped.css */
:host {
background: blue;
}该组件呈现:
<c-shadow>
  <!-- red background -->
  #shadow-root
  <c-light class="c-light_light-host">
    <!-- blue background -->
    <style>
      :host {
        background: red;
      }
      :c-light_light-host {
        background: blue;
      }
    </style>
  </c-light>
</c-shadow>在前面的示例中,为作用域样式进行转换。:host
注意
不支持选择器。:host-context()
将作用域样式与合成影子 DOM 进行比较
Light DOM 范围样式与 LWC 的合成阴影范围样式有一些不同。
- 轻量级 DOM 范围样式使用类来确定范围,但合成阴影 DOM 使用 HTML 属性。
- 轻量级 DOM 作用域样式在作用域样式表中不受支持。
@import - 轻量级 DOM 范围样式不适用于在
lwc:dom=“manual”中手动注入模板的内容,例如,使用 或 注入的内容。Element.appendChildElement.innerHTML
在混合阴影模式下构建组件(开发人员预览版)
混合阴影模式使组件能够使用本机阴影 DOM,即使应用了合成阴影 polyfill。
注意
混合阴影模式作为开发人员预览版提供。除非 Salesforce 在文档、新闻稿或公开声明中宣布其正式发布,否则此功能不会正式发布。所有命令、参数和其他功能都可能随时更改或弃用,恕不另行通知。不要实现使用这些命令或工具开发的功能。
现在所有主流浏览器都支持影子 DOM。Salesforce 维护旧版浏览器(如旧版本的 Microsoft Edge)的合成影子 polyfill。
为了简化开发和测试,目前甚至在支持影子 DOM 的浏览器上使用 polyfill。使用混合阴影模式,您可以获得在应用中尽可能多地使用原生阴影的速度和效率。而且,将来可以更轻松地迁移以完全使用本机影子。
原生阴影和合成阴影有几个区别,例如它们如何通过插槽与样式实现封装。虽然应用依赖于全局样式表来应用合成影子 DOM 中的样式,但组件的样式会添加到原生影子中的组件包中。此外,合成阴影不支持某些影子 DOM 功能,例如 。最重要的是,原生阴影组件比合成阴影组件更快、性能更高。::part
下面是具有混合模式组件的应用示例。它有一个父组件和子组件。当您在 Web 控制台中检查本机影子组件时,它们会显示在标签中。合成阴影根在开发人员工具中不可见,但以下示例中显示了它们,以便进行说明。c-appc-nativec-synthetic#shadow-root
<!-- c-app -->
<c-app>
    <c-native>
     #shadow-root
     |  <div>Your content for the native component</div>
    </c-native>
    <c-synthetic>
        <div>Your content for the synthetic component</div>
    </c-synthetic>
</template>
在本文中,父组件和子组件也称为祖先组件和后代组件。相反,扩展另一个组件的组件称为子类及其超类。
注意
LWC 允许遗传,但不建议这样做,因为组合通常更有效。继承不能跨命名空间工作,并且无法扩展命名空间。lightning
合成组件可以包含本机组件,但不支持反之组件。
<!-- c-app -->
<c-app>
  #shadow-root (synthetic)
  <c-synthetic>
    #shadow-root (synthetic)
    <c-native>
      #shadow-root (native)
      <p>Content inside a native shadow root</p>
    </c-native>
  </c-synthetic>
</c-app>
启用混合阴影模式
注意
默认情况下,混合影子模式在您的组织中不可用。联系 Salesforce 以参与开发人员预览版。
要在组件上启用混合阴影模式,请将 static 属性设置为 。shadowSupportModeany
// native.js
import { LightningElement } from "lwc";
export default class MixedModeApp extends LightningElement {
  static shadowSupportMode = "any";
}的有效值包括:shadowSupportMode
any– 尽可能在本机阴影 DOM 中渲染整个组件子树。如果浏览器不支持影子 DOM,则子树将以合成影子形式呈现。reset– 使子类能够选择不接收来自其超类的值。 仅当组件的超类正在使用且没有父组件正在使用 时才适用。shadowSupportModeresetanyany
在设置为启用混合影子模式之前,我们建议检查子树中的所有组件是否都与本机影子 DOM 兼容。例如,不能在本机影子 DOM 子树中使用属性选择器,因为该选择器仅在合成影子 DOM 中起作用。相反,请查看您的浏览器是否支持本机影子 DOM 中的伪类。 或者,您可以从叶组件开始,然后沿着组件树向上移动,以确保混合阴影模式按预期工作。shadowSupportModeany[dir=""]:dir()
使用混合阴影模式
如果父组件使用 ,则子树中的所有组件都在本机阴影中运行,而不管其值如何。本机影子模式组件只能包含本机影子模式子组件。此限制是将属性应用于整个子树的副作用。anyshadowSupportModeshadowSupportMode
默认情况下,插槽内容以本机阴影呈现。开槽内容不是从其嵌套的组件派生的,因此您可以将合成阴影内容插入到本机阴影组件中。这也意味着,插槽内容不受浏览器呈现包含插槽的组件的方式的影响。例如,如果您的浏览器在合成阴影中渲染本机组件,则插入该组件的本机内容仍会在本机阴影中渲染。#shadow-root
下面,有一个带有子组件的原生影子子树,以及开槽的内容。 在原生影子中运行,因为它是 的后代,但可以在合成影子中,因为它不是 的后代。<c-parent><c-child><c-slotted><c-child><c-parent><c-slotted><c-parent>
<!-- c-app -->
<c-app>
  #shadow-root (synthetic)
  <c-parent>
    #shadow-root (native)
    <p>Parent component</p>
    <slot>
      <c-slotted>
        #shadow-root (synthetic)
        <p>Slotted content</p>
    </slot>
    <c-child>
      #shadow-root (native)
      <p>Child component</p>
    </c-child>
  </c-parent>
</c-app>
在支持影子 DOM 的浏览器上,以下是当您包含 polyfill 并设置为 or 时父组件和子组件的呈现方式。@lwc/synthetic-shadowshadowSupportModeanyreset
<!-- c-parent -->
<template>
  <c-child></c-child>
</template>| 父母 | 孩子 | 阴影模式 |
|---|---|---|
| – | – | 合成 |
| 重置 | 重置 | 合成 |
| 任何 | 任何 | 本地 |
| 任何 | 重置 | 本地 |
| 重置 | 任何 | 父级:合成,子级:原生 |
| – | 任何 | 父级:合成,子级:原生 |
| – | 重置 | 合成 |
包含 polyfill 时,通过将 设置为 将阴影模式重置为默认行为。@lwc/synthetic-shadowshadowSupportModereset
- 如果存在 polyfill,则将阴影模式设置为合成阴影。
reset - 如果 polyfill 不存在,则不会产生任何影响,并且组件会在本机阴影中呈现。
shadowSupportMode
要确定元素是否具有合成影子根,请使用 .this.template.synthetic
export default class extends LightningElement {
  renderedCallback() {
    console.log("Synthetic?", !!this.template.synthetic);
  }
}
示例:使用原生和合成阴影组件
应用可以包含本机和合成阴影组件。此示例假定应用正在使用 polyfill。@lwc/synthetic-shadow
<!-- c-app -->
<c-app>
  <c-native>
    #shadow-root
    |  <div>Your content for the native component</div>
  </c-native>
  <c-synthetic>
    <div>Your content for the synthetic component</div>
  </c-synthetic>
</c-app>
该应用程序包括两个以不同模式运行的组件。
<!-- c-app -->
<template>
  <c-native></c-native>
  <c-synthetic></c-synthetic>
</template>
这是本机组件。
<!-- c-native -->
<template>
  <div>Your content for the native component</div>
</template>
// native.js
import { LightningElement } from "lwc";
export default class Native extends LightningElement {
static shadowSupportMode = "any";
}这是合成组件。
<!-- c-synthetic -->
<template>
  <div>Your content for the synthetic component</div>
</template>
// synthetic.js
import { LightningElement } from "lwc";
export default class Synthetic extends LightningElement {}原生阴影与合成阴影的比较
在这里,我们讨论原生阴影和合成阴影之间的一些区别。
元素和插槽
在原生阴影 DOM 中,元素在组件的轻量级 DOM 中呈现,并分配给子组件的阴影 DOM 中的插槽。但在合成阴影 DOM 中,LWC 不会渲染传递给子组件的元素,除非它们被分配给插槽。
对于包含 的组件,其跨度未分配给槽。在原生阴影中,此跨度在 DOM 中呈现。但是,在合成阴影中,DOM 中不存在跨度。c-parentc-childc-child
<!-- c-parent -->
<template>
  <c-child>
    <span>This is some text in a span tag</span>
  </c-child>
</template>
<!-- c-child -->
<template>
<p>child</p>
</template>若要确定元素分配到哪个槽,请调用 API。以前,当加载合成阴影 polyfill 时,分配给本机阴影组件中插槽的元素会返回 assignedSlot。现在,API 返回本机阴影组件中开槽元素的元素。assignedSlotnull<slot>
若要返回指定坐标处所有元素的数组,请使用 elementsFromPoint API,包括用于 DOM 中不可见的合成阴影 DOM 元素。在以下示例中,是不可见的(宽度和高度为零),但它包含的 是可见的。<c-inner><div>
<c-outer>
  #shadow-root
  <c-inner>
    #shadow-root
    <div></div>
  </c-inner>
</c-outer>
在合成影子中,调用返回 。在原生阴影中,它返回outer.shadowRoot.elementsFromPoint()[<div>, <c-outer>, <html>][<c-inner>, <c-outer>, <html>]
造型
使用合成阴影,应用程序依靠全局样式表在整个 DOM 中应用样式。在原生阴影中,这是不可能的,因为在原生阴影中,组件的样式必须添加到组件包中。
但是,使用合成阴影时,文档顶层的共享样式表可以设置页面上所有组件的样式。若要防止将顶层样式应用于子组件,请使用 @import 将共享样式表包含在需要共享样式表的组件中。
注意
在多个组件中导入相同的样式表不会影响性能,因为 LWC 会为您处理 CSS 的重复数据删除。
虽然 CSS 模块导入适用于大多数共享的 CSS 库,但如果 CSS 包含遍历阴影边界的选择器,则它不起作用。假设你有一个带有这个 CSS 的父组件和子组件。
.parent .child {
  color: red;
}
如果 和 选择器位于单独的组件中,则此 CSS 不起作用。在这种情况下,请使用 CSS 自定义属性或其他技术根据子项的父级有条件地呈现子项。.parent.child
例如。您可以将该属性传递给子组件。color
class Parent extends LightningElement {
  myColor = "red";
}

class Child extends LightningElement {
  @api color;
  get myStyle() {
    return `color: ${this.color}`;
  }
}
子组件中显示的颜色由父组件确定。
<!-- c-parent -->
<template>
  <c-child color={myColor}></c-child>
</template>

<!-- c-child -->
<template>
  <h1 style={myStyle}>My color is determined by my parent</h1>
</template>
或者,如果不需要对组件进行封装,请考虑迁移组件以改用轻量级 DOM。
可及性
使用合成阴影,您可以通过在父组件和子组件中动态设置属性来创建跨阴影边界的引用。使用原生阴影时,您不能执行相同的操作,因为元素 ID 的范围限定为特定组件。
我们推荐以下选项。
- 如果一个元素引用了另一个元素的 ID,请将两者放在同一个组件中。
- 如果使用 ,则使用 在元素之间复制字符串。
aria-labelledbyaria-label
或者,如果您使用的是不需要封装的组件,请考虑使用轻量级 DOM。例如,在同一个影子 DOM 父组件中,有两个轻量级 DOM 组件作为同级组件,并且 ID 在同级组件之间共享。
生命周期钩子
使用合成阴影时,如果仅将槽元素分配给槽,则会渲染这些元素。对于从未分配给槽的槽元素,从不调用其生命周期挂钩。
此外,合成阴影中的生命周期钩子在分配后按出现顺序调用。相比之下,在原生阴影中,它们按模板中的出现顺序调用。
非组合事件
使用合成影子,如果事件源自子树中的非 LWC 组件,侦听器可以处理根 LWC 节点之外的非组合事件。但是,影子 DOM 不支持此行为。
基本 Lightning 组件
混合阴影模式目前不支持基本组件。Salesforce 正在按照 Web 组件标准为本机影子 DOM 准备基本组件。随着我们努力实现未来对混合影子模式和原生影子 DOM 的支持,基本组件的内部结构会不断变化。 目前,当基本组件放置在本机阴影组件中时,可能无法显示正确的样式;原生阴影渲染所有子组件,而不渲染合成阴影。
其他注意事项
我们的基准测试表明,在某些情况下,原生阴影组件比合成组件快 50%。删除合成阴影 polyfill 也会将 LWC 的整体 JavaScript 大小减少一半。混合阴影模式使我们更接近于能够完全迁移到原生阴影,然后使我们能够从 LWC 中完全删除 polyfill。
合成阴影不支持某些影子 DOM 功能,例如 .::part
请考虑原生阴影和合成阴影之间的这些额外差异。
| 合成阴影 | 原生阴影 |
|---|---|
| 插槽是按照目标可插槽组件中定义的顺序创建的。 | 插槽是按照调用插槽的组件中定义的顺序创建的。 |
该属性不会隐藏阴影内容。innerText | 该属性隐藏阴影内容。innerText |
this.template.firstChild返回模板中的第一个元素。 | this.template.firstChild在某些浏览器中返回本机阴影中的元素。<style> |